
Table of Contents
- Choosing the Right Ceramic Plates for Wall Décor
- How to Source Decorative Ceramic Plates for Wall Décor
- Planning Your Arrangement: From Grid to Freeform
- Installation Techniques for a Secure Finish
- Integrating Ceramic Plate Walls into Different Rooms
- Living Room
- Bedroom
- Kitchen
- Bathroom
- Styling Tips to Elevate Your Ceramic Plate Wall
- Quick Tips for Instant Impact
- Common Mistakes to Avoid When Using Decorative Ceramic Plates
- Frequently Asked Questions
- Conclusion
Transform Your Space with Wall Décor Using Decorative Ceramic Plates
Decorating a wall can feel like a daunting task, especially when the space lacks a clear focal point. One surprisingly versatile solution is wall décor with decorative ceramic plates. These plates, originally intended for dining, have evolved into artistic canvases that bring texture, color, and cultural flair to any room. Whether you live in a compact apartment or a sprawling house, ceramic plates can be arranged in patterns that reflect your personality while maintaining a cohesive look.
What makes this approach so appealing is its accessibility. Ceramic plates are widely available, come in countless designs—from rustic terra cotta to sleek contemporary glazes—and are relatively inexpensive compared to custom artwork. Moreover, they are easy to install, reposition, and even swap out as your style evolves. In this guide, you’ll learn how to choose the right plates, plan arrangements, and integrate them into various rooms without compromising functionality.
By the end of the article, you’ll have a toolbox of practical tips, common pitfalls to avoid, and answers to frequently asked questions—all aimed at helping you master wall décor with decorative ceramic plates and elevate your home’s aesthetic.
Choosing the Right Ceramic Plates for Wall Décor
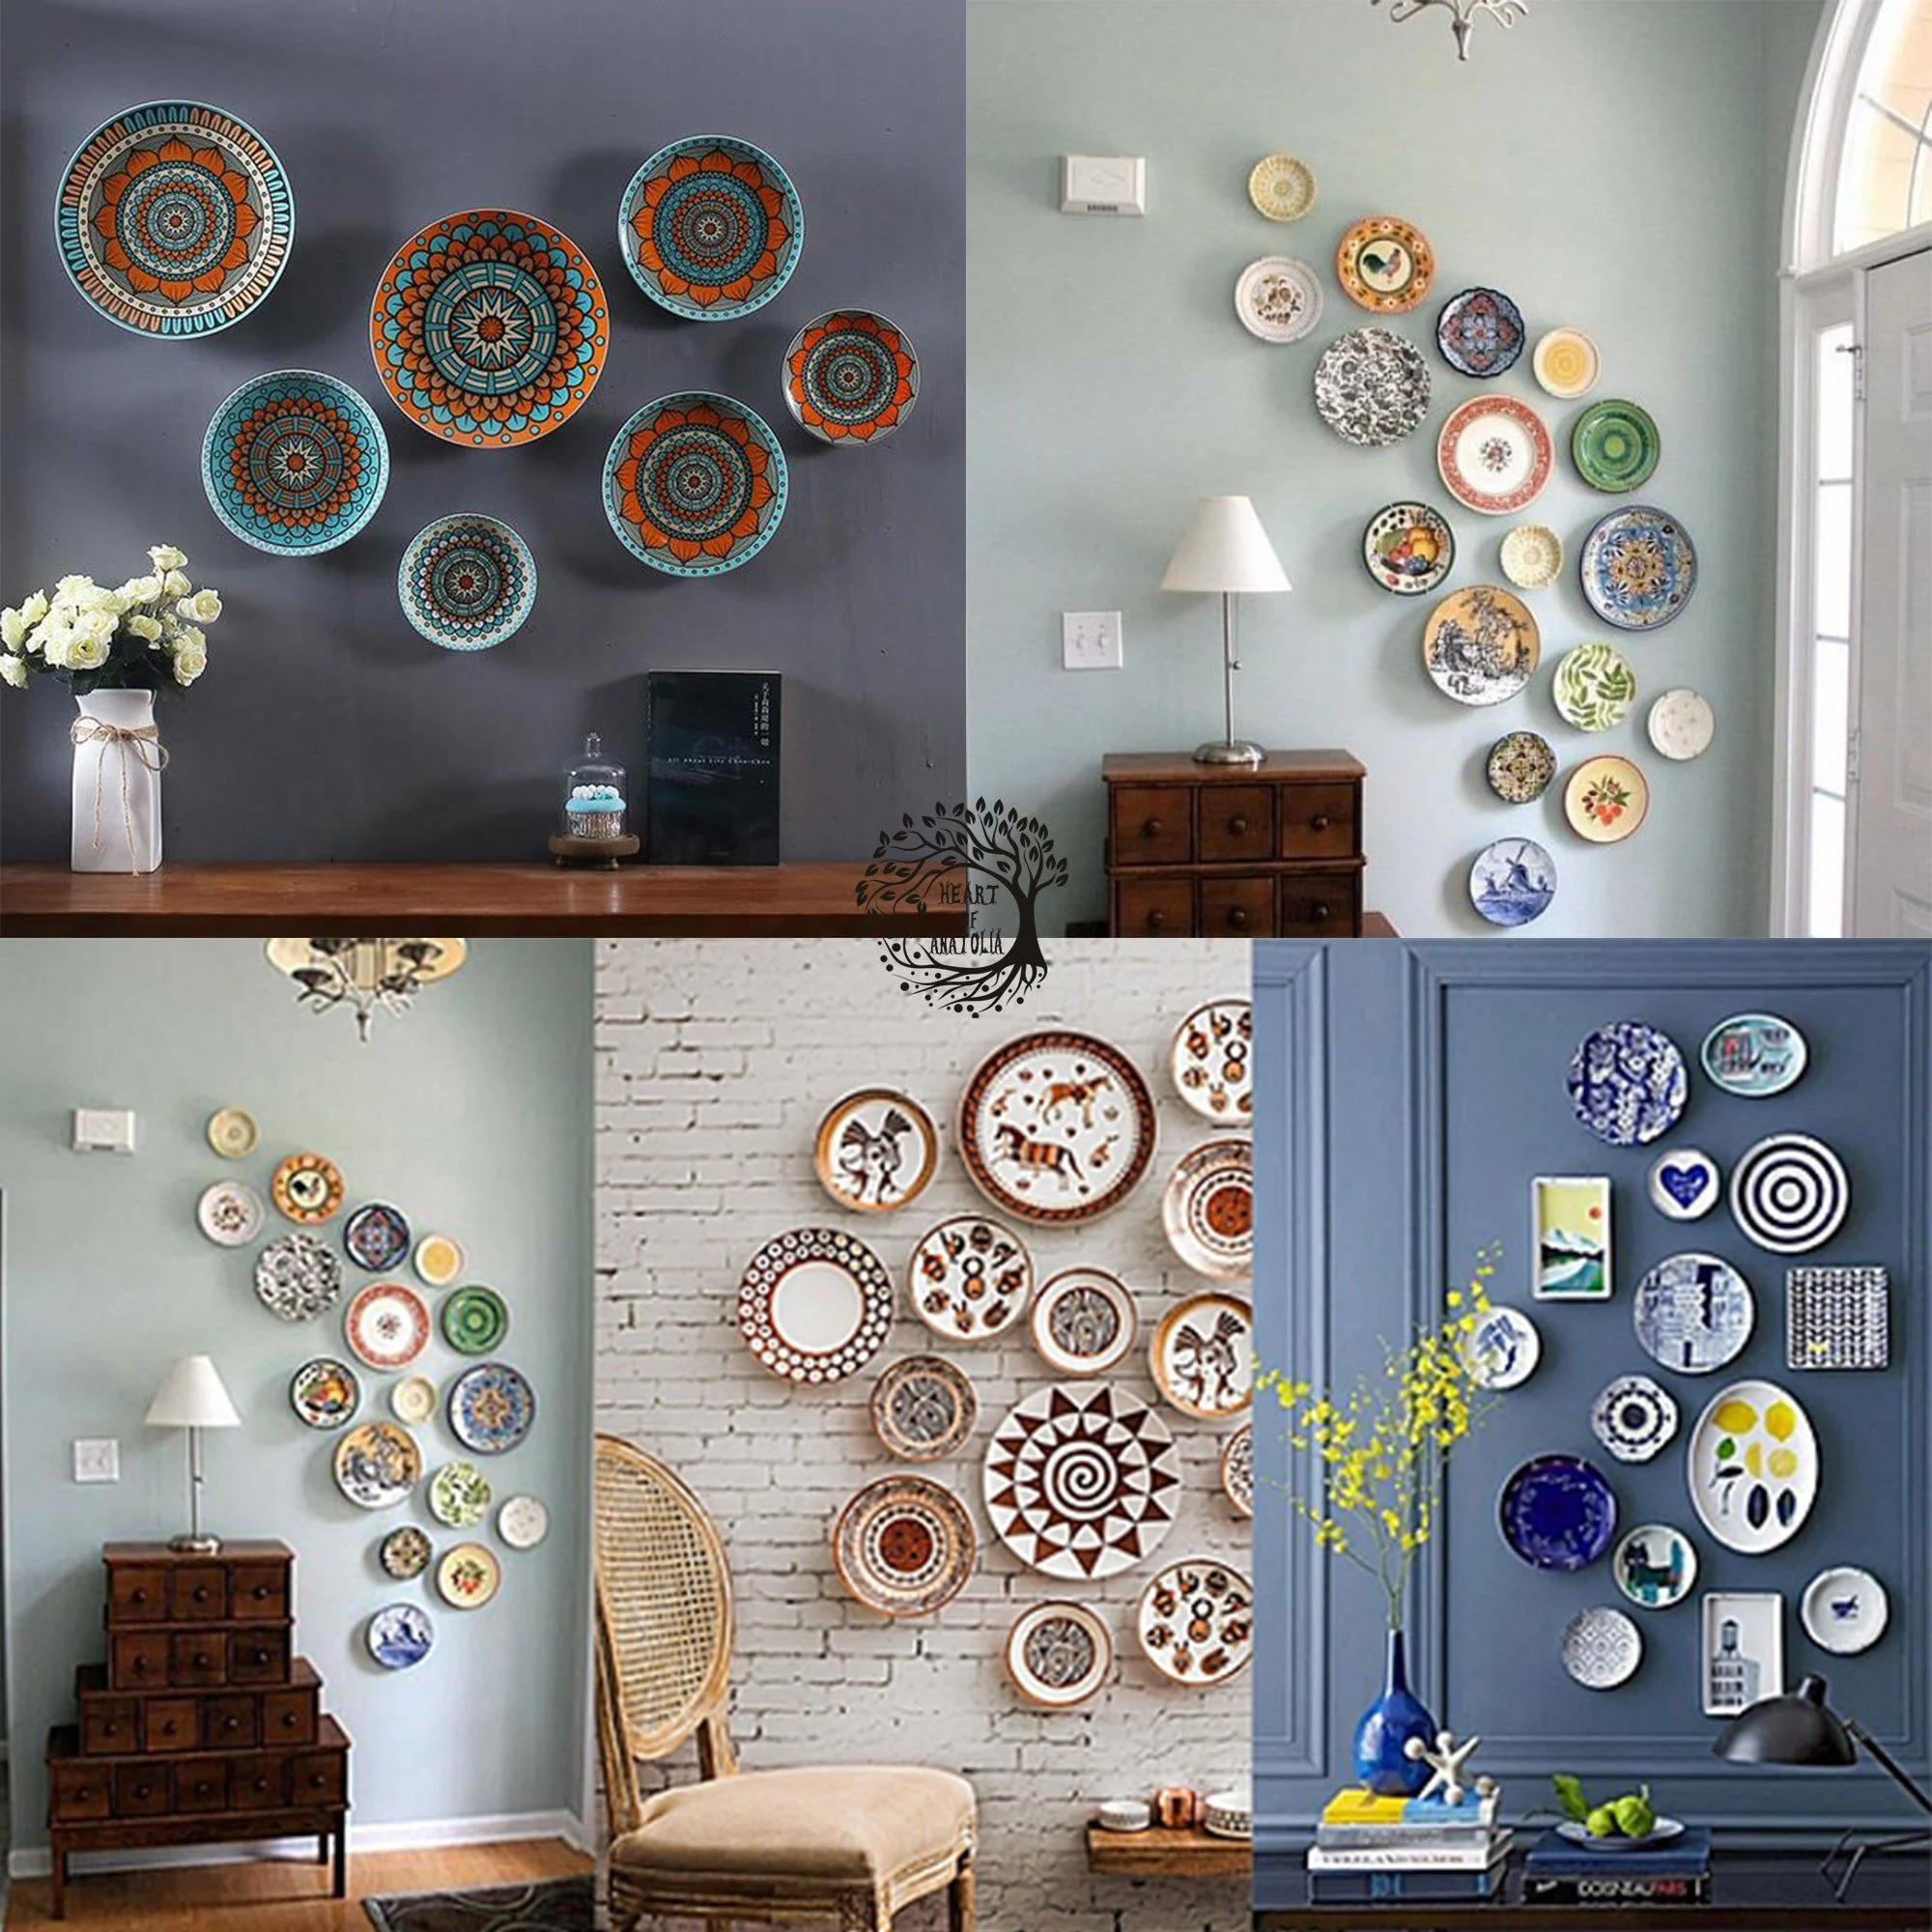
The first step toward successful wall décor with decorative ceramic plates is selecting plates that complement your existing palette and the room’s purpose. Consider the following factors:
- Style and Era: Traditional hand‑painted patterns add a vintage charm, while minimalistic matte finishes suit modern interiors.
- Color Scheme: Use plates that echo the room’s dominant hues or introduce an accent color for a pop.
- Size Variety: Mixing small and large plates creates visual interest; however, keep a balance to avoid a cluttered look.
- Material Quality: Opt for high‑fire ceramics that are less prone to chipping, especially if you have children or pets.
For example, a living room with navy walls can be enlivened by a collection of white and gold‑rimmed plates, while a bathroom benefits from sea‑green glazes that echo the watery theme.
How to Source Decorative Ceramic Plates for Wall Décor
Finding plates that fit your design vision is easier than you think. Local antique shops often carry one‑of‑a‑kind pieces, while online marketplaces such as Etsy provide curated sets at various price points. Don’t overlook thrift stores—sometimes a hidden gem can become the centerpiece of an entire wall. If you’re on a tight budget, consider repurposing plates from a family heirloom collection, giving them a fresh purpose without sacrificing sentiment.
Planning Your Arrangement: From Grid to Freeform

Once you have your plates, the next decision is how to arrange them. Two popular strategies are the classic grid and the organic freeform layout. The grid approach offers a clean, symmetrical look that works well in formal spaces like a dining room or office. Measure the wall, mark equal spacing with a pencil, and use a level to keep each plate aligned.
Freeform arrangements, on the other hand, bring a more relaxed, artistic vibe. Start by laying the plates on the floor to experiment with patterns before committing to the wall. Overlap edges slightly, vary the orientation, and incorporate decorative elements such as small mirrors or metal brackets for added depth.
Remember, the goal is to create a composition that feels intentional rather than random. A well‑planned layout enhances the visual weight of wall décor with decorative ceramic plates and makes the display feel curated.
Installation Techniques for a Secure Finish

Proper installation ensures your ceramic plates stay in place for years to come. Here’s a step‑by‑step method that works for most wall types:
- Gather materials: adhesive hooks or picture‑hanging strips, a level, a pencil, and a measuring tape.
- Mark the desired height—eye level (around 57‑60 inches) is a safe bet for most viewers.
- Apply adhesive to the back of each plate, following the manufacturer’s instructions.
- Press the plate firmly onto the wall, hold for 30 seconds, then step back and check alignment with a level.
- For heavier plates, consider using small wall anchors or a French cleat system for added support.
If you rent, removable picture‑hanging strips are an excellent option because they won’t damage the paint or drywall. For permanent installations, a professional can help you locate studs and secure the plates with screws.
Integrating Ceramic Plate Walls into Different Rooms
Each room in a home offers unique opportunities for wall décor with decorative ceramic plates. Below are tailored suggestions for popular spaces:
Living Room
A large feature wall behind a sofa is ideal for a statement arrangement. Pair earthy plates with a woven rug and a few indoor plants to create a cozy, layered look. For a modern twist, choose monochrome plates with glossy finishes and frame the composition with sleek black trim.
Bedroom
In the bedroom, plates can serve as a subtle accent behind the headboard. Choose soft pastel tones that promote relaxation, and balance the display with bedside lamps that highlight the plate textures at night. For inspiration on budget-friendly bedroom upgrades, read our budget bedroom makeover ideas guide.
Kitchen
The kitchen naturally lends itself to ceramic décor. Install a horizontal row of plates above the countertop, similar to a backsplash, to protect the wall while adding visual interest. Pair this with open shelving for spices and a woven basket display to keep the look cohesive.
Bathroom
Moisture‑resistant glazed plates work beautifully as a splash‑proof art piece near the vanity. Choose cool blues or sea‑green shades to evoke a spa‑like atmosphere. Ensure the adhesive is rated for high‑humidity areas to prevent peeling.
Styling Tips to Elevate Your Ceramic Plate Wall
Beyond placement, small styling details can transform a simple plate arrangement into a masterpiece. Consider these ideas:
- Layer with Textiles: Hang a lightweight fabric or tapestry behind the plates for added depth.
- Mix Materials: Incorporate metal wall hooks, reclaimed wood frames, or glass mirrors to break monotony.
- Lighting: Install directional spotlights or LED strips to highlight the glaze’s sheen.
- Thematic Grouping: Group plates by motif—floral, geometric, or abstract—to tell a visual story.
For a broader perspective on modern trends, explore our article on modern interior design trends shaping today’s homes.
Quick Tips for Instant Impact
- Start with a focal point: choose one plate as the centerpiece and build outward.
- Use painter’s tape to outline your design before committing to adhesive.
- Balance colors: if you have bold plates, keep surrounding décor neutral.
- Rotate plates seasonally for a fresh look without purchasing new pieces.
Common Mistakes to Avoid When Using Decorative Ceramic Plates
Even seasoned decorators can slip up. Here are pitfalls to watch for:
- Overcrowding: Packing too many plates can overwhelm the eye. Aim for a harmonious ratio of negative space to decor.
- Inconsistent Themes: Mixing wildly different styles (e.g., rustic and ultra‑modern) can create visual chaos. Choose a unifying element such as color or shape.
- Poor Adhesion: Skipping the step of testing adhesive on a small area may lead to plates falling. Always follow product guidelines.
- Ignoring Lighting: A wall with glossy plates looks dull under harsh fluorescent lights. Soft, warm lighting enhances glaze depth.
Frequently Asked Questions
Can I use regular dinner plates for wall décor?
Yes, but choose plates made of sturdy ceramic that can support their own weight when mounted. Avoid delicate porcelain that may chip easily.
How do I prevent the plates from cracking over time?
Mount plates on a solid surface using appropriate hardware. Avoid direct exposure to extreme temperature changes, and consider sealing the backs with clear varnish for added protection.
Is it safe to install plates in a high‑humidity bathroom?
Select glazed, moisture‑resistant plates and use adhesives rated for bathrooms. Proper ventilation will also extend the lifespan of both the plates and the wall.
What if I rent and can’t make permanent holes?
Removable picture‑hanging strips or adhesive hooks are renter‑friendly solutions. They hold most lightweight plates securely and leave no residue when removed.
How can I make a small wall feel larger using ceramic plates?
Opt for a linear arrangement with uniform spacing, and choose plates in light, reflective colors. A horizontal layout visually widens the space, especially when paired with strategic lighting.
Conclusion
Incorporating wall décor with decorative ceramic plates offers a flexible, affordable way to personalize any room. By selecting plates that resonate with your style, planning a thoughtful layout, and installing them securely, you can create a striking focal point that reflects both heritage and modern flair. Remember to balance colors, use appropriate lighting, and avoid common mistakes for a polished finish. As you experiment with patterns and textures, you’ll discover how these humble plates can become the cornerstone of a room’s visual narrative. For more inspiration, dive into our extensive library of design ideas and keep your home’s story evolving.