
Table of Contents
- beadboard vs tongue and groove: Core Differences Explained
- Profile and Visual Rhythm
- Installation Mechanics
- beadboard vs tongue and groove: Aesthetic Impact on Different Rooms
- Living Room Applications
- Bedroom Serenity
- Kitchen and Bathroom Durability
- beadboard vs tongue and groove: Cost and Material Considerations
- Material Pricing
- Long‑Term Value
- beadboard vs tongue and groove: Installation Tips for a Flawless Finish
- Preparation Steps
- Beadboard Installation
- Tongue and Groove Installation
- beadboard vs tongue and groove: Choosing the Right Finish
- Paint vs Stain
- Specialty Coatings
- Quick Home Décor Tips for Paneling Projects
- Common Mistakes to Avoid When Comparing beadboard vs tongue and groove
- Frequently Asked Questions
- Is beadboard better for small spaces?
- Can I install tongue and groove on a ceiling without professional help?
- How does moisture affect beadboard compared to tongue and groove?
- Which option is more eco‑friendly?
- Do I need to prime both beadboard and tongue and groove?
- Can I mix beadboard and tongue and groove in the same room?
beadboard vs tongue and groove – Which Paneling Wins for Your Home?
When you start planning a room makeover, the choice of wall or ceiling paneling can feel surprisingly pivotal. Two classic options—beadboard and tongue and groove—have been used for generations, yet each brings a distinct visual language, installation method, and budget impact. Understanding beadboard vs tongue and groove isn’t just about aesthetics; it’s about matching the material to your lifestyle, the room’s function, and the overall design narrative you want to create.
In this article we’ll walk through the anatomy of both systems, compare their strengths and drawbacks, and give you practical guidance on where each shines. By the end, you’ll be equipped to decide which paneling style best supports your interior design goals, whether you’re refreshing a small bathroom, adding texture to a living room, or creating a cozy bedroom backdrop.
beadboard vs tongue and groove: Core Differences Explained
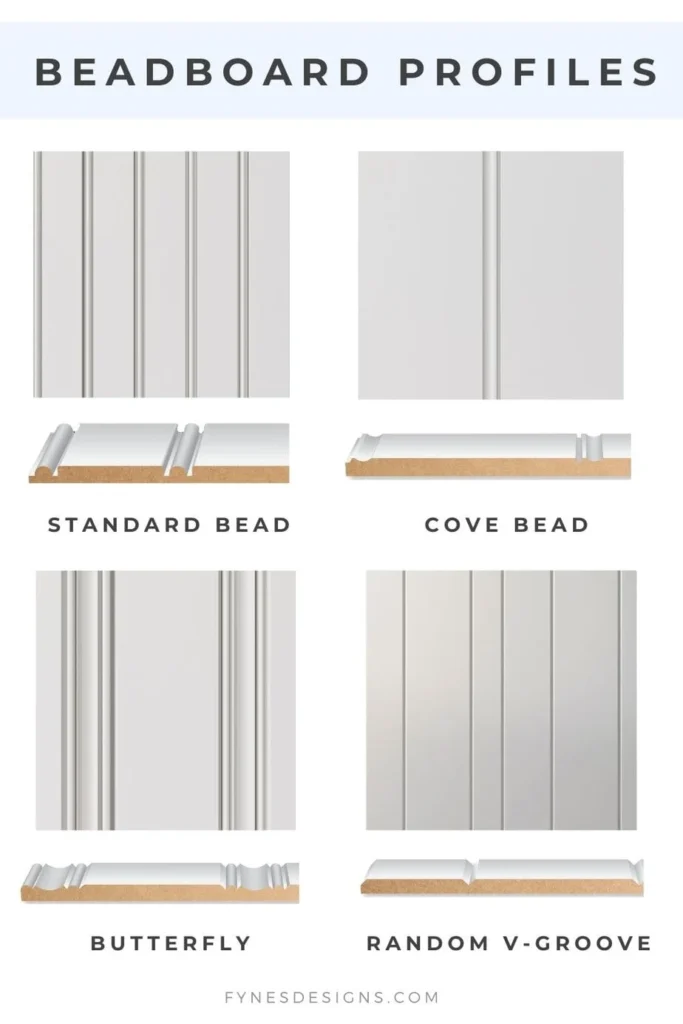
At first glance, beadboard and tongue and groove may look similar—both consist of narrow boards that interlock. The key differences lie in the profile, installation technique, and typical applications.
Profile and Visual Rhythm
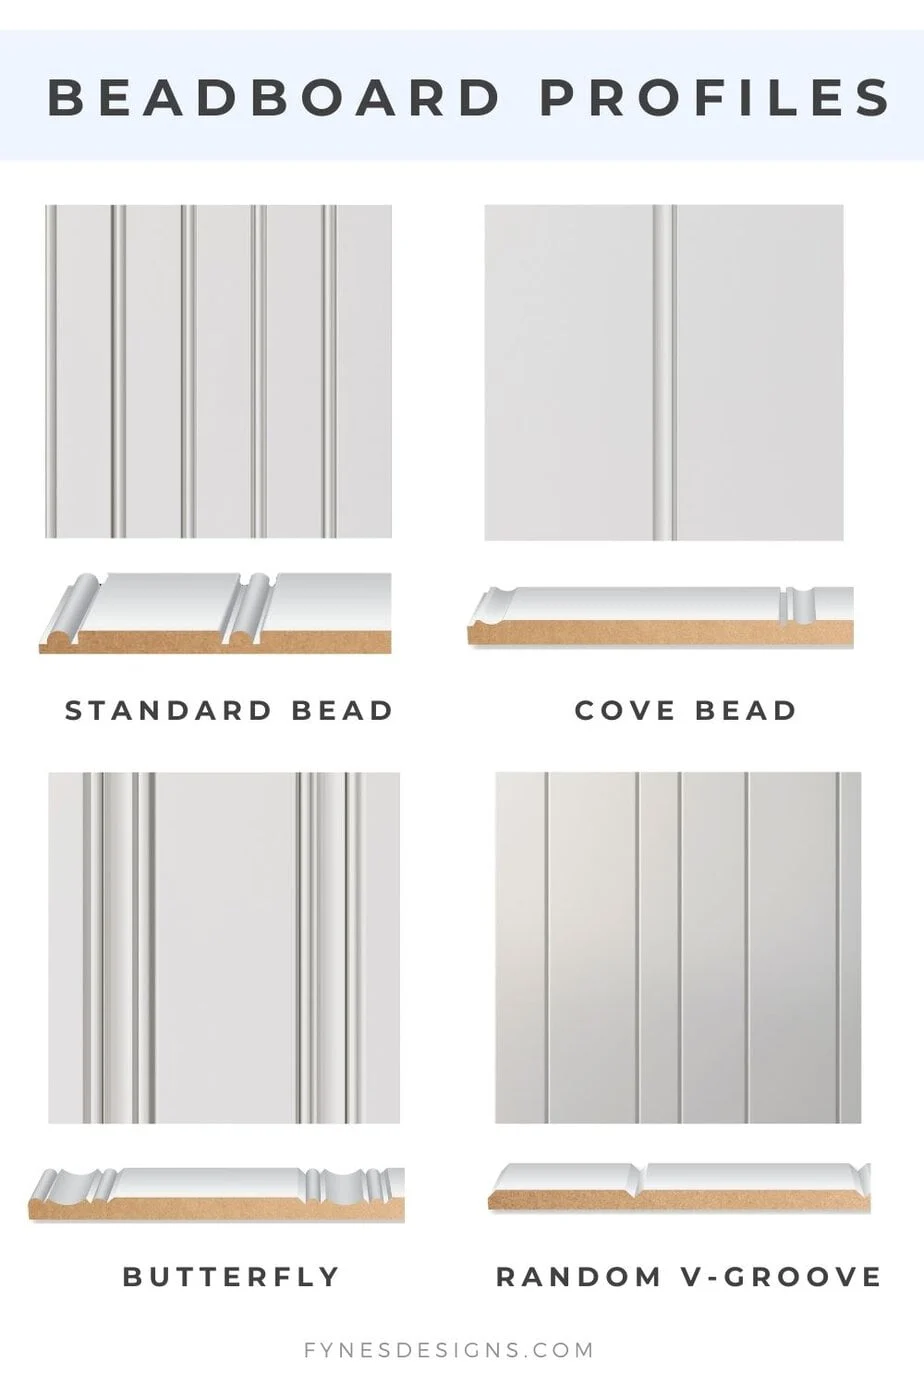
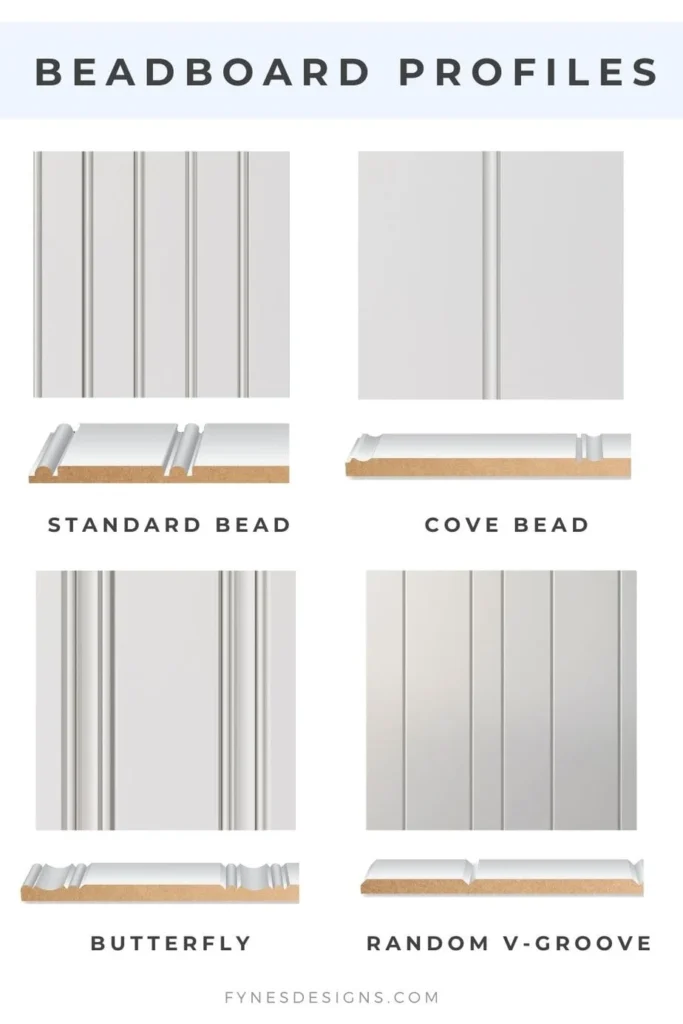
- Beadboard features a series of vertical “beads” (narrow ridges) that create a linear, paneled look. The classic look includes a flat center panel flanked by the raised beads, offering a subtle, almost nautical vibe.
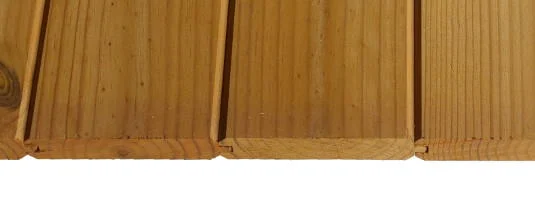
- Tongue and groove boards have a tongue on one edge and a groove on the opposite side, allowing them to fit tightly together. The surface can be flat, beveled, or even reclaimed, giving a seamless, continuous grain that emphasizes wood texture.
The visual rhythm of beadboard is more decorative, while tongue and groove leans toward a clean, natural wood presentation. This distinction often guides designers toward specific rooms: beadboard for traditional or cottage‑style spaces, tongue and groove for modern, minimalist interiors.
Installation Mechanics
Both systems require careful alignment, but they differ in the way the boards connect. With beadboard, each board is typically nailed directly to studs, and the beads are part of the board itself—no extra interlocking step is needed. Tongue and groove boards, however, slide together; the tongue of one board fits into the groove of the next, creating a tighter joint that can better handle movement and humidity changes.
Because of this, tongue and groove is often favored for ceilings and high‑traffic walls where a smooth, uninterrupted surface is essential, while beadboard’s simpler method makes it a go‑to for DIY beginners looking to add character without extensive carpentry.
beadboard vs tongue and groove: Aesthetic Impact on Different Rooms
Choosing between these two paneling styles isn’t just a technical decision; it profoundly influences the mood of a space. Let’s explore how each performs in key rooms.
Living Room Applications
In a living room, ceiling height and natural light dictate whether you want to add height or intimacy. Beadboard installed on walls can make a room feel cozier, especially when painted a light hue that reflects daylight. Pairing it with a warm table lamp—like those highlighted in our Living Room Décor with Warm Table Lamps – A Complete Guide—creates a layered, inviting atmosphere.
Conversely, tongue and groove on the ceiling or an accent wall can accentuate the architectural lines of a modern living room. The seamless grain draws the eye upward, emphasizing vertical space and providing a subtle backdrop for art or bold furniture pieces.
Bedroom Serenity
Bedrooms benefit from the soft, textured backdrop that beadboard offers. The vertical beads add a gentle pattern that works well behind a headboard or as a wainscoting element. When painted in muted pastel tones, beadboard can make a master suite feel like a private retreat.
For a contemporary bedroom, tongue and groove on the ceiling or a feature wall adds an understated elegance. The natural wood grain can be left untreated for a rustic feel or stained to match a sleek, dark furniture palette, reinforcing a modern aesthetic.
Kitchen and Bathroom Durability
Both environments demand moisture‑resistant materials. Tongue and groove, especially when using marine‑grade plywood or reclaimed hardwood, offers superior water resistance because the tight joints limit infiltration. It’s ideal for kitchen backsplashes or bathroom ceilings where steam is common.
Beadboard can also thrive in these spaces if properly sealed with a water‑proof paint or a clear polyurethane finish. Its vertical orientation helps channel moisture away from seams, but it generally requires more diligent maintenance to prevent swelling.
beadboard vs tongue and groove: Cost and Material Considerations
Budget is a practical factor that often decides the outcome of a renovation. While both paneling types are available in a range of price points, there are notable cost differences.
Material Pricing
- Beadboard: Typically manufactured from MDF, pine, or PVC. MDF beadboard is the most affordable, ranging from $1 to $2 per linear foot. Pine and PVC options sit between $2 and $4 per linear foot, offering a higher-end look and better moisture resistance.
- Tongue and groove: Available in softwoods (like pine or fir), hardwoods (oak, maple), and engineered wood. Softwood options start around $2 per linear foot, while hardwoods can climb to $6‑$10 per linear foot, especially for reclaimed or specialty species.
Installation labor also varies. Beadboard’s straightforward nail‑and‑paint approach can save on labor costs, whereas tongue and groove may require more precise fitting and possibly a professional carpenter, adding $2‑$4 per square foot in labor.
Long‑Term Value
When evaluating beadboard vs tongue and groove for long‑term value, consider durability and resale appeal. Tongue and groove’s tight joints often hold up better over decades, especially in high‑traffic areas, which can enhance a home’s marketability. Beadboard, while charming, may need repainting or refinishing sooner, which could be a hidden expense.
beadboard vs tongue and groove: Installation Tips for a Flawless Finish
Even the most beautiful paneling can look lackluster if installed incorrectly. Below are proven strategies that help you master the installation of both systems.
Preparation Steps
- Inspect and level the wall or ceiling studs. Use shims where necessary to create a flat surface.
- Acclimate the boards in the room for at least 48 hours to adjust to temperature and humidity.
- Lay out a dry run of the boards to visualize the pattern and minimize waste.
Beadboard Installation
- Start at the bottom corner, ensuring the first board is perfectly plumb.
- Secure each board with 1‑inch finish nails, driving them into the center of the studs.
- Maintain a consistent gap (about 1/8″) between boards for expansion, then fill with paint‑able caulk.
- After nailing, sand any nail heads and apply a high‑quality primer before painting.
Tongue and Groove Installation
- Apply a thin bead of construction adhesive to the studs before placing each board; this adds stability.
- Fit the tongue into the groove at a slight angle, then gently tap the board into place using a rubber mallet.
- Use a nail gun with a 1‑1/4″ finish nail, driving nails at an angle (toenailing) into the stud behind the tongue.
- Check for level after every few boards; a slight misalignment can become noticeable over a large surface.
For more detailed visual guides, check out our article on DIY photo display wall ideas – Transform Your Space, which shares step‑by‑step photo tutorials that are also useful for paneling projects.
beadboard vs tongue and groove: Choosing the Right Finish
The finish you apply can dramatically affect durability, color depth, and the overall vibe of the room.
Paint vs Stain
- Beadboard is traditionally painted. A matte or satin paint highlights the beads while providing a smooth, washable surface—ideal for children’s rooms or high‑traffic hallways.
- Tongue and groove often looks striking when stained. The wood grain becomes a focal point, especially when using a dark walnut or light natural finish. Clear polyurethane on top adds moisture resistance.
Specialty Coatings
For bathrooms and kitchens, consider a moisture‑blocking primer followed by a semi‑gloss paint on beadboard, or a marine‑grade varnish on tongue and groove. These coatings extend the life of the panels and keep them looking fresh longer.
Quick Home Décor Tips for Paneling Projects
- Mix and match: Use beadboard on lower walls and tongue and groove on the ceiling for a dynamic contrast.
- Play with color: A soft pastel on beadboard can make a narrow hallway feel wider, while a deep charcoal stain on tongue and groove adds drama to a loft.
- Incorporate lighting: Install recessed lighting above tongue‑and‑groove ceilings to enhance the natural wood shine.
- Combine with trim: Crown molding over beadboard or a simple shoe‑molding on tongue and groove adds a polished finish.
Common Mistakes to Avoid When Comparing beadboard vs tongue and groove
Even experienced DIYers can fall into pitfalls that compromise the final look.
- Ignoring expansion gaps: Both panel types expand with humidity. Failing to leave a small gap can cause buckling.
- Skipping surface preparation: Unleveled studs create uneven panels; always shim and level first.
- Choosing the wrong wood grade: Low‑quality MDF beadboard may warp in humid climates; opt for moisture‑rated options for bathrooms.
- Over‑nailing: Too many nails can split the wood, especially in tongue and groove. Use the recommended nail length and spacing.
Frequently Asked Questions
Is beadboard better for small spaces?
Yes, beadboard’s vertical lines can create an illusion of height, making compact rooms feel more spacious. Light paint colors amplify this effect, especially in narrow hallways or petite bedrooms.
Can I install tongue and groove on a ceiling without professional help?
While it’s possible for confident DIYers, tongue and groove ceilings require precise alignment and secure fastening to prevent sagging. Using a laser level and a nail gun can make the process smoother, but many homeowners still prefer a professional for larger areas.
How does moisture affect beadboard compared to tongue and groove?
Both materials can handle moisture when properly sealed, but tongue and groove’s interlocking joints provide a tighter barrier against water penetration. In high‑humidity bathrooms, choose marine‑grade tongue and groove or a sealed beadboard with a water‑resistant paint.
Which option is more eco‑friendly?
Reclaimed hardwood tongue and groove panels score high on sustainability because they reuse existing wood. MDF beadboard can be eco‑friendly if sourced from low‑VOC, recycled fibers, but it generally has a higher embodied energy than solid wood.
Do I need to prime both beadboard and tongue and groove?
Priming is recommended for both, especially if you plan to paint. For tongue and groove, a stain may not require primer, but a clear coat or sealant is essential to protect the wood.
Can I mix beadboard and tongue and groove in the same room?
Absolutely. Many designers pair beadboard wainscoting with a tongue‑and‑groove ceiling to add texture and visual interest without competing patterns.
Choosing between beadboard and tongue and groove ultimately rests on the style you crave, the room’s functional demands, and your budget. By weighing the visual rhythm, installation complexity, cost, and durability, you’ll arrive at a solution that feels both timeless and perfectly tailored to your home.
Ready to start your paneling project? Gather your tools, select the finish that speaks to your design vision, and enjoy the transformation. For more inspiration, explore our Small Living Room Color Ideas guide, where we show how subtle paneling choices can enhance a room’s palette.