
Table of Contents
- Understanding the Anatomy of a Hansgrohe Faucet
- Preparing Your Tools and Workspace
- Essential Tools
- Workspace Preparation
- Step‑by‑Step Process to Remove Hansgrohe Bathroom Faucet Handles
- How to Remove Hansgrohe Bathroom Faucet Handles – Locate the Set‑Screw
- How to Remove Hansgrohe Bathroom Faucet Handles – Unscrew the Handle
- How to Remove Hansgrohe Bathroom Faucet Handles – Dealing with a Retaining Clip
- How to Remove Hansgrohe Bathroom Faucet Handles – Inspect the Stem
- Reinstalling or Replacing the Faucet After Handle Removal
- Finishing Touches: Cleaning and Polishing
- Quick Tips for a Smooth DIY Experience
- Common Mistakes and How to Avoid Them
- Frequently Asked Questions
When a faucet starts to leak, feels loose, or simply looks out of style, the first instinct for many homeowners is to call a plumber. While professional help is always an option, removing the faucet handles yourself can be a rewarding DIY project that saves both time and money. Hansgrohe, a leading brand known for sleek design and high‑quality engineering, uses a few specific fasteners that, once understood, make the removal process straightforward.
In this guide we’ll walk you through everything you need to know about how to remove Hansgrohe bathroom faucet handles, from gathering the right tools to finishing the job with a polished look. Whether you’re planning a full faucet replacement, a simple handle swap, or just routine maintenance, the steps outlined here will give you confidence and clear direction.
Before we dive in, remember that a careful approach protects the underlying cartridge and prevents costly damage. With a little patience and the right technique, you’ll be able to tackle this task just like a seasoned tradesperson.
Understanding the Anatomy of a Hansgrohe Faucet
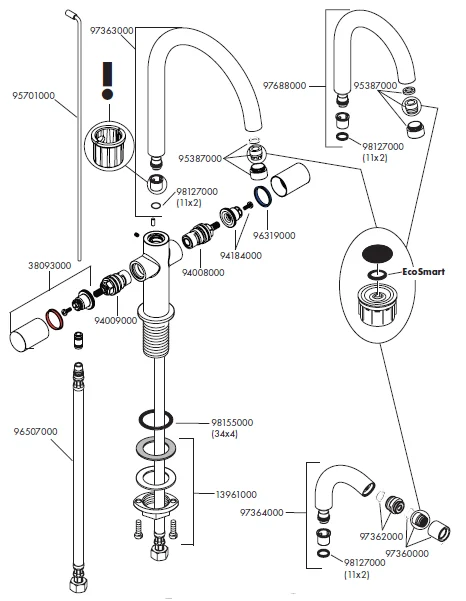
Hansgrohe faucets are built around a cartridge that controls water flow and temperature. The visible components—spout, aerator, and handles—are attached to this core system using screws, retaining clips, or a combination of both. Knowing where each part sits helps you avoid accidental disassembly of the cartridge when you’re figuring out how to remove Hansgrohe bathroom faucet handles.
The handles themselves are typically secured by one of two methods:
- Screw‑type fasteners: A small set‑screw located on the underside of the handle, often hidden beneath a decorative cap.
- Retaining clip: A metal or plastic clip that slides into a groove on the handle stem.
Identifying which method your specific model uses will determine the exact tools you’ll need and the sequence of steps you’ll follow.
Preparing Your Tools and Workspace

Having the right tools on hand is half the battle won. Below is a concise checklist that ensures you’re ready for any variation of Hansgrohe hardware while you learn how to remove Hansgrohe bathroom faucet handles.
Essential Tools
- Flat‑head and Phillips screwdrivers (size #2 works for most set‑screws).
- Allen wrench set (4 mm and 5 mm are common for interior screws).
- Adjustable wrench or pliers for retaining clips.
- Soft cloth or rag to protect the faucet finish.
- Silicone lubricant (optional, for stubborn clips).
Workspace Preparation
Turn off the water supply at the shut‑off valves beneath the sink. Open the faucet to relieve any residual pressure and to ensure the water is completely drained. Lay a towel over the sink basin to catch any drips and protect the porcelain from scratches.
Step‑by‑Step Process to Remove Hansgrohe Bathroom Faucet Handles
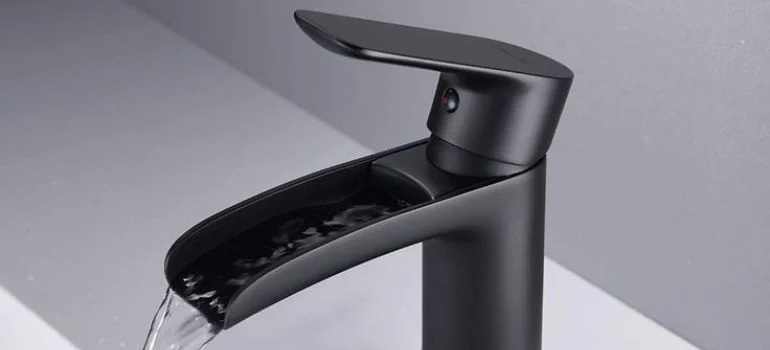
This section delivers the core answer to the question “how to remove Hansgrohe bathroom faucet handles” in a clear, logical order.
How to Remove Hansgrohe Bathroom Faucet Handles – Locate the Set‑Screw
Most modern Hansgrohe models hide the set‑screw beneath a decorative cap on the back of the handle. Use a flat‑head screwdriver to gently pry the cap off. Once removed, you’ll see a small screw that holds the handle to the stem.
How to Remove Hansgrohe Bathroom Faucet Handles – Unscrew the Handle
Insert the appropriate screwdriver or Allen key into the set‑screw and turn counter‑clockwise. Apply steady pressure; if the screw feels stuck, a few drops of silicone lubricant can help. When the screw is fully removed, the handle should lift away easily. Keep the screw in a safe place for reassembly.
How to Remove Hansgrohe Bathroom Faucet Handles – Dealing with a Retaining Clip
If your model uses a retaining clip instead of a screw, you’ll notice a small metal tab on the side of the handle stem. Use a pair of needle‑nose pliers to compress the clip inward, then slide the handle off the stem. Some clips are spring‑loaded; a gentle push on the clip with a flat‑head screwdriver will release the tension.
How to Remove Hansgrohe Bathroom Faucet Handles – Inspect the Stem
After the handle is off, take a moment to inspect the stem for mineral buildup or corrosion. A clean stem ensures smoother reassembly and reduces the risk of leaks. If you notice any debris, wipe it away with a damp cloth and a mild cleaner.
Reinstalling or Replacing the Faucet After Handle Removal
Whether you’re installing brand‑new handles or simply putting the original ones back, the reassembly mirrors the removal steps in reverse. Align the stem with the handle, re‑engage the retaining clip or re‑insert the set‑screw, and tighten securely but without over‑torquing.
After the handles are back in place, turn the water supply on and test for leaks. Run both hot and cold water, checking around the base of the handles and the spout. If you spot any drips, tighten the screw a notch more or ensure the clip is fully seated.
Finishing Touches: Cleaning and Polishing
A freshly serviced faucet deserves a polished finish. Use a non‑abrasive cleaner and a microfiber cloth to wipe down the handles, spout, and surrounding countertop. For a streak‑free shine, consider a light application of a bathroom‑safe polish.
If you’re planning a larger bathroom remodel, you might also explore new finish options. For instance, reading our guide on gel stain vs. poly stain can inspire complementary wood accents that elevate the overall aesthetic.
Quick Tips for a Smooth DIY Experience
- Label each screw and clip before removal to avoid confusion during reassembly.
- Work in a well‑lit area; a flashlight can make spotting tiny set‑screws much easier.
- Keep a small container nearby for fasteners; a magnetic tray works well.
- If the faucet feels stiff after reassembly, apply a tiny dab of silicone grease to the stem.
- Document the process with photos; they’re invaluable if you need to troubleshoot later.
Common Mistakes and How to Avoid Them
Even experienced DIYers can slip up when learning how to remove Hansgrohe bathroom faucet handles. Below are the most frequent errors and practical ways to prevent them:
- Using the wrong screwdriver size: A mismatched driver can strip the set‑screw head. Always match the tip to the screw slot.
- Applying excessive force: Over‑tightening the screw or clip can damage the handle or the underlying cartridge. Turn gently and stop at resistance.
- Neglecting to shut off water: Forgetting this step can lead to unwanted flooding. Double‑check valve positions before you start.
- Skipping the cleaning step: Residual mineral deposits can cause future leaks. A quick wipe‑down after removal ensures a clean re‑installation.
Frequently Asked Questions
Can I replace only the handles without changing the cartridge?
Yes. Hansgrohe designs its cartridges to be independent of the handles, so you can swap out worn or outdated handles without disturbing the internal valve system.
What if the set‑screw is missing?
If the screw is lost, contact a Hansgrohe dealer for a replacement part. Using a mismatched screw can compromise the handle’s stability.
Do I need a plumber’s wrench for the retaining clip?
Usually a pair of needle‑nose pliers or a small adjustable wrench is sufficient. The clip is designed for hand tools, not heavy‑duty wrenches.
How often should I service my Hansgrohe faucet?
A light cleaning every 3–4 months and a more thorough inspection (including handle removal) once a year helps maintain optimal performance and extends the faucet’s lifespan.
Is it safe to use chemical cleaners on the faucet?
Avoid abrasive or acidic cleaners. Stick to mild bathroom cleaners and a soft cloth to preserve the finish. For tougher stains, a diluted vinegar solution works well.
When you’ve completed the steps above, you’ll have mastered how to remove Hansgrohe bathroom faucet handles with confidence. This knowledge not only empowers you to address leaks or aesthetic upgrades but also deepens your understanding of bathroom hardware, a valuable skill for any home décor enthusiast.
Feel free to explore more design ideas on The Homara, such as our Kelly Moore vs. Sherwin‑Williams paint showdown for fresh color inspiration, or discover space‑saving solutions in our small kitchen interior inspiration guide. Happy renovating!