Table of Contents
- how to install home decorators collection flooring: Preparing the Space
- Assessing Subfloor Condition
- Gathering Essential Tools and Materials
- Step‑by‑Step Process for Installing Home Decorators Collection Flooring
- Step 1 – Layout Planning and Dry Fit
- Step 2 – Installing the Underlayment
- Step 3 – Laying the First Row
- Step 4 – Continuing the Installation
- Step 5 – Finishing Touches
- Quick Home Décor Tips for Enhancing Your New Floor
- Common Mistakes When Installing Home Decorators Collection Flooring and How to Avoid Them
- Skipping Moisture Testing
- Inconsistent Expansion Gaps
- Improper Joint Staggering
- Rushing the Acclimation Period
- Using the Wrong Tools for Cuts
- Frequently Asked Questions
- Can I install Home Decorators Collection flooring over existing hardwood?
- Do I need a professional for large‑area installations?
- How long does the flooring take to settle after installation?
- Is it safe to install laminate flooring in a bathroom?
- What maintenance routine will keep my floor looking new?
- Can I replace a single damaged plank without removing the entire floor?
How to Install Home Decorators Collection Flooring – A Complete Guide
Choosing the right flooring can transform a room, adding warmth, texture, and a sense of cohesion to your overall design. The Home Decorators Collection offers a wide range of engineered wood, laminate, and vinyl options that blend durability with style, making them a popular choice for modern homes. Yet, many homeowners hesitate because they assume professional installation is the only route. In reality, with the right tools, preparation, and a clear plan, you can install Home Decorators Collection flooring yourself and achieve a showroom‑quality finish.
In this article we’ll walk you through every stage of the process, from assessing the space and gathering materials to laying the planks and handling tricky edges. Whether you’re refreshing a living room, updating a bedroom, or tackling a high‑traffic hallway, you’ll find practical tips, common mistakes to avoid, and answers to the most frequently asked questions. By the end, you’ll feel confident enough to roll up your sleeves and give your floors a brand‑new look.
how to install home decorators collection flooring: Preparing the Space

The foundation of a successful flooring project begins long before you open the box of planks. Proper preparation ensures a flat, clean surface and reduces the risk of post‑installation issues such as squeaking or gaps.
Assessing Subfloor Condition
- Concrete slabs: Check for moisture using a calcium chloride test. If moisture levels exceed 3 lb/1000 ft² in 24 hours, install a moisture barrier.
- Wood subfloors: Ensure joists are level within 3 mm over a 2‑meter span. Reinforce any loose boards with screws rather than nails.
- Existing flooring: Remove carpet, padding, or old laminate, but keep a clean, level surface. A thin underlayment can smooth minor imperfections.
When the subfloor passes these checks, you’re ready to move on to the next stage. If you’re unsure about moisture or levelness, a quick consultation with a local flooring specialist can save you time and money later.
Gathering Essential Tools and Materials
Having the right tools on hand streamlines the process and prevents unnecessary trips to the hardware store. Below is a checklist tailored for Home Decorators Collection products:
- Measuring tape and straight edge
- Level and laser line (for larger rooms)
- Utility knife with extra blades
- Pull‑bar and tapping block
- Rubber mallet
- Spacers (¼‑inch for expansion gaps)
- Flooring underlayment (if not pre‑attached)
- Moisture barrier (polyethylene sheeting)
- Safety glasses and hearing protection
- Optional: Knee pads for comfort
Most Home Decorators Collection flooring comes with a click‑lock system, but the same principles apply whether you’re using glue‑down vinyl or a floating laminate floor.
Step‑by‑Step Process for Installing Home Decorators Collection Flooring

With the space prepped and tools ready, you can begin the installation. Follow these steps in order to achieve a seamless, professional finish.
Step 1 – Layout Planning and Dry Fit
Measure the room’s length and width, then calculate the total square footage. Purchase an additional 5‑10 % to account for waste and future repairs. Before laying any planks, lay out a dry run: place the first row of boards along the longest wall, leaving a ¼‑inch expansion gap between the wall and the plank. Use spacers to maintain this gap throughout the installation.
Pay special attention to the direction of the grain. For a more spacious feel, install planks parallel to the longest wall or the main source of natural light. If you have a rectangular room, consider a diagonal layout for added visual interest, but be aware that diagonal installations require more cuts and waste.
Step 2 – Installing the Underlayment
If your chosen Home Decorators Collection product does not include an attached underlayment, roll out a thin foam or cork underlayment. Overlap the seams by 6 inches and seal with underlayment tape. This layer provides sound insulation, added comfort underfoot, and a moisture barrier for wood subfloors.
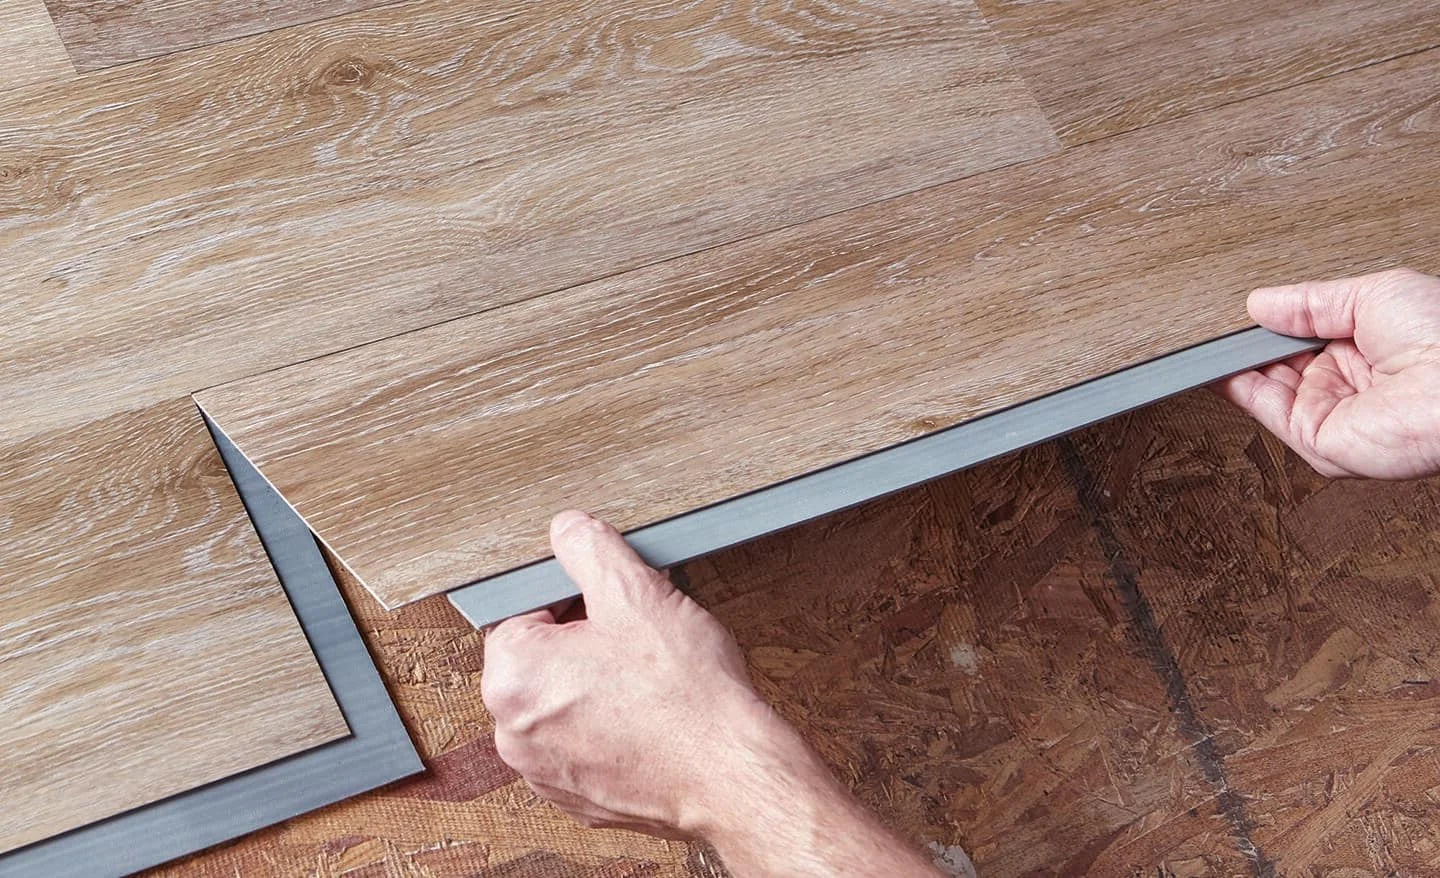
Step 3 – Laying the First Row
Begin in a corner opposite the main entrance, so you won’t have to step on the newly installed floor. Insert spacers between the wall and the first plank, then click the second plank into place using the tongue‑and‑groove system. Use a tapping block and rubber mallet to ensure a tight fit without damaging the edges.
Continue the first row, checking frequently that the expansion gap remains consistent. If the room’s dimensions cause the last plank of the row to be too narrow (less than 6 inches), cut the first plank instead and start with a narrower piece. This technique keeps the final cut at the opposite wall, providing a cleaner finish.
Step 4 – Continuing the Installation
Stagger the joints by at least 12 inches from row to row. This not only looks more natural but also adds structural stability. Use a pull‑bar to engage the tongue of each new plank when you reach the far edge of the room. If you encounter obstacles such as door thresholds, cut the planks with a jigsaw or a fine‑tooth saw, then test the fit before snapping them into place.
For areas around vents or radiators, cut around the obstacle and install a transition strip after the floor is complete. This prevents gaps that could allow drafts or debris.
Step 5 – Finishing Touches
Once the last row is in place, remove the spacers and install baseboards or shoe molding to cover the expansion gap. Use a nail gun to attach the molding securely, but avoid nailing directly into the flooring—attach to the wall studs instead. If you have a transition to another flooring type (e.g., tile in the bathroom), install a transition strip such as a T‑molding or reducer.
Finally, give the floor a light sweep with a microfiber mop and a floor‑safe cleaner to remove any dust or debris left from cutting and tapping.
Quick Home Décor Tips for Enhancing Your New Floor

- Pair light‑colored laminate with a light wood furniture living room décor to amplify the sense of openness.
- Introduce a natural color palette in surrounding textiles and wall paint to let the flooring’s texture become the focal point.
- Use area rugs strategically in high‑traffic zones to protect the surface while adding layers of comfort.
Common Mistakes When Installing Home Decorators Collection Flooring and How to Avoid Them
Even seasoned DIYers can fall into traps that compromise the durability or appearance of their floor. Below are the most frequent errors and practical solutions.
Skipping Moisture Testing
Moisture is the silent enemy of wood‑based flooring. Failing to test concrete subfloors can lead to swelling, warping, or mold growth. Always perform a moisture test and install a suitable barrier if needed.
Inconsistent Expansion Gaps
Leaving too little space at the walls prevents the floor from expanding and contracting with temperature changes, leading to buckling. Keep a uniform ¼‑inch gap throughout the perimeter.
Improper Joint Staggering
Aligning the end joints in a straight line weakens the floor’s structural integrity and creates a noticeable visual line. Stagger each row by at least 12 inches to distribute stress evenly.
Rushing the Acclimation Period
Home Decorators Collection planks should acclimate to the room’s temperature and humidity for at least 48 hours before installation. This reduces the risk of post‑installation expansion or contraction.
Using the Wrong Tools for Cuts
Cheap utility knives can cause uneven cuts, especially on thicker laminate. Invest in a high‑quality snap cutter or a fine‑tooth saw for clean, precise edges.
Frequently Asked Questions
Can I install Home Decorators Collection flooring over existing hardwood?
Yes, as long as the existing hardwood is level, securely fastened, and in good condition. Install a moisture‑resistant underlayment to provide a smooth base and to prevent any movement from affecting the new floor.
Do I need a professional for large‑area installations?
While large spaces can be challenging, the click‑lock system used by Home Decorators Collection is designed for DIY. If you’re comfortable using basic tools and following a detailed plan, you can complete the project yourself. However, for irregular layouts or complex transitions, consulting a professional may save time.
How long does the flooring take to settle after installation?
Floating floors typically settle within 24–48 hours. Avoid heavy furniture and high‑traffic activities during this period to allow the planks to fully lock together.
Is it safe to install laminate flooring in a bathroom?
Most laminate products, including those from Home Decorators Collection, are not recommended for high‑moisture environments like bathrooms. For wet areas, consider luxury vinyl tile (LVT) or waterproof engineered wood designed specifically for bathrooms.
What maintenance routine will keep my floor looking new?
Regular sweeping or vacuuming with a soft‑bristle attachment removes grit that can scratch the surface. Use a damp (not wet) mop with a cleaner formulated for laminate or engineered wood. Avoid harsh chemicals, waxes, or steam cleaners.
Can I replace a single damaged plank without removing the entire floor?
Yes, Home Decorators Collection’s click‑lock design allows for individual plank removal. Carefully pry up the damaged board using a pry bar and a thin piece of wood to protect surrounding planks, then snap the new piece into place.
By following these guidelines, you’ll enjoy a floor that not only looks stunning but also stands the test of time.
Installing Home Decorators Collection flooring is a rewarding project that blends practical skill with creative design. With careful preparation, attention to detail, and the right tools, you can achieve a flawless result that elevates any room. Remember to respect expansion gaps, stagger joints, and allow the planks to acclimate—these small steps make a huge difference. Once your floor is complete, explore other design ideas, such as incorporating a natural color palette or experimenting with different lighting schemes, to fully realize your interior vision. Happy installing, and enjoy the new foundation for your home’s style!