
Table of Contents
- Preparing Your Space: Tools, Materials, and Measurements
- How to Install Carpet Stair Treads: Measuring Tips for Perfect Fit
- Step‑by‑Step Process for Installing Carpet Stair Treads
- Design Choices: Selecting Carpet Styles That Elevate Your Home
- How to Install Carpet Stair Treads While Maintaining Design Consistency
- Safety and Comfort: Why Carpeted Stairs Are a Smart Choice
- Finishing Touches: Trim, Molding, and Maintenance Tips
- Quick Tips for a Seamless Installation
- Common Mistakes to Avoid When Installing Carpet Stair Treads
- Frequently Asked Questions
- Bringing It All Together: Your New Staircase as a Design Statement
How to Install Carpet Stair Treads: A Complete Guide for Modern Homes
Carpeted stairs bring comfort, safety, and a touch of elegance to any residence. Whether you’re updating a vintage home or adding a cozy layer to a contemporary loft, learning how to install carpet stair treads can save you time, money, and the frustration of hiring a contractor.
In this guide we’ll walk you through every phase of the process— from measuring the perfect length to securing the final trim— while sharing practical design ideas that blend seamlessly with modern home décor trends. By the end, you’ll feel confident tackling the project yourself, and you’ll have a set of beautiful stairs that complement your interior design vision.
We’ll also sprinkle in a few helpful shortcuts, safety reminders, and links to related articles that can broaden your design perspective. Let’s get started on turning those plain risers into a stylish focal point.
Preparing Your Space: Tools, Materials, and Measurements
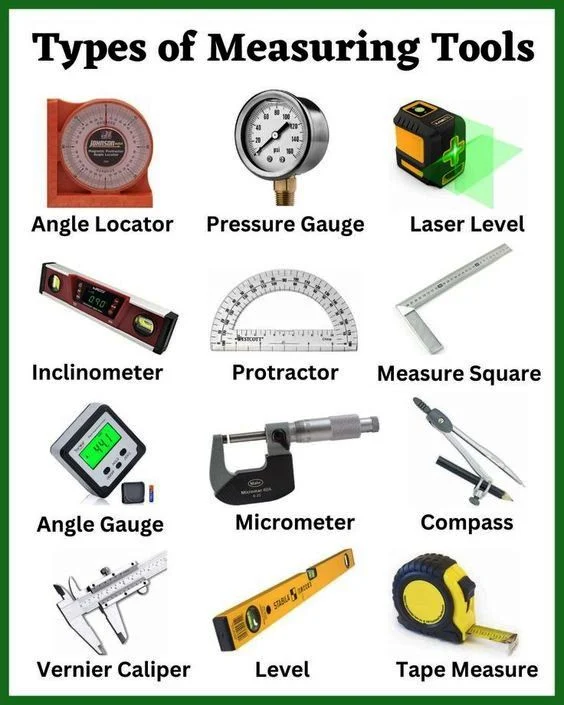
Before you even think about laying carpet, preparation is the cornerstone of any successful DIY flooring job. Gather the following essentials:
- Carpet treads (pre‑cut to match your stair dimensions)
- Carpet adhesive suitable for stairs
- Staple gun or tack strip system
- Utility knife, straight edge, and measuring tape
- Safety gear: gloves, goggles, and a dust mask
- Wood filler and sandpaper (for repairing any damaged risers)
Start by measuring each step precisely. Measure the tread depth (the horizontal part you step on) and the riser height (the vertical part). Write down the dimensions for every stair; older homes often have inconsistent sizes, and you’ll need to cut some treads to fit.
Once you have accurate measurements, purchase carpet treads that are slightly larger than the actual dimensions. This extra material allows for trimming and ensures a snug fit without gaps that could cause tripping hazards.
How to Install Carpet Stair Treads: Measuring Tips for Perfect Fit
- Measure from the front edge of the tread to the back wall for depth.
- Measure from the top of the riser to the bottom of the tread for height.
- Record each measurement on a spreadsheet to avoid confusion when ordering.
With your tools and measurements in hand, you’re ready to move on to the next critical stage: preparing the stairs themselves.
Step‑by‑Step Process for Installing Carpet Stair Treads
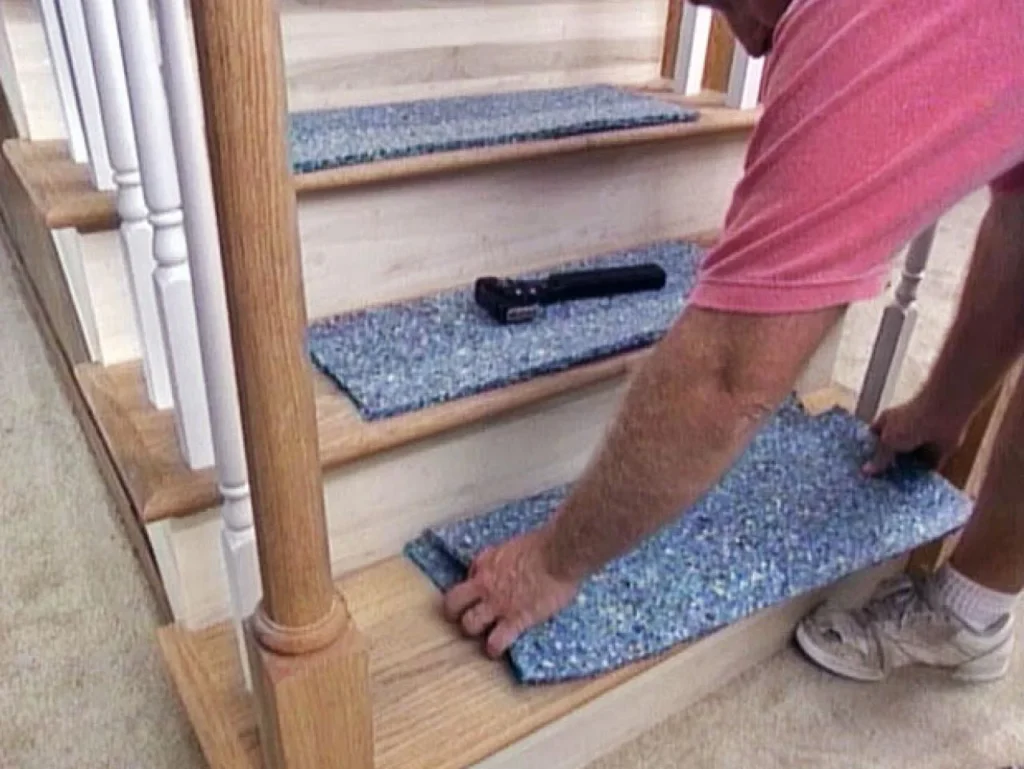
Now that you’ve prepared the workspace, let’s dive into the core of the project— the actual installation. Follow these steps meticulously to achieve a professional finish.
- Clean and Repair: Sweep each stair thoroughly, remove old adhesive, and fill any cracks in the wood with filler. Sand smooth once dry.
- Lay Out the Treads: Place each carpet tread on its corresponding step without adhesive to confirm the fit. Trim excess with a sharp utility knife if needed.
- Apply Adhesive: Spread a thin, even layer of carpet adhesive on the tread surface using a notched trowel. Work in small sections to prevent the glue from drying too quickly.
- Position the Tread: Carefully press the carpet onto the stair, starting at the back and working forward. Use a rubber mallet to ensure full contact and eliminate air bubbles.
- Secure the Edges: For added durability, install tack strips along the front edge of each tread. This helps keep the carpet from shifting over time.
- Trim the Excess: After the adhesive sets (usually 15‑20 minutes), trim any overhang with a utility knife, leaving a clean edge that aligns with the riser.
- Seal the Joint: Apply a thin bead of carpet seam sealant where the tread meets the riser. This prevents fraying and adds a polished look.
Repeat these steps for every stair. Patience during this stage pays off; a consistent, tight fit across all steps creates a cohesive aesthetic that ties the entire staircase together.
Design Choices: Selecting Carpet Styles That Elevate Your Home
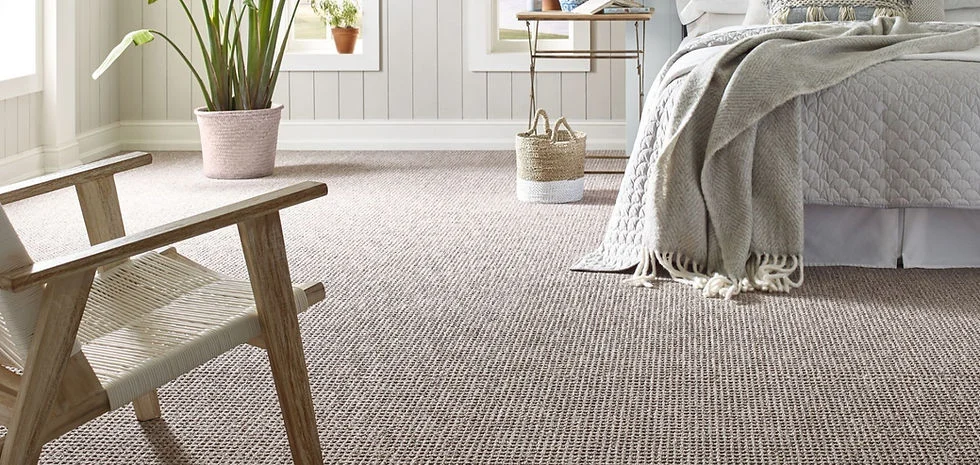
Choosing the right carpet isn’t just about durability; it’s also a design decision that can influence the feel of an entire room. Here are three popular styles and how they integrate with modern interior design concepts.
- Neutral Loop Pile: Ideal for high‑traffic areas, loop pile offers a sleek, low‑profile look that works well with minimalistic décor. Pair it with a monochrome color scheme for a sophisticated vibe.
- Plush Berber: The subtle texture adds warmth to traditional homes. Use earth tones to blend with natural wood staircases, creating a harmonious, cozy atmosphere.
- Patterned Textiles: Geometric or subtle floral patterns can become a statement piece. If you have a simple, modern stairwell, a patterned tread can act as an eye‑catching focal point without overwhelming the space.
When selecting a carpet, consider the overall theme of your home. For example, a modern minimalist home décor scheme often benefits from muted, low‑pile options, while a more eclectic interior might embrace bold colors and textures.
How to Install Carpet Stair Treads While Maintaining Design Consistency
To keep the look cohesive, use the same carpet material for both the treads and any adjacent flooring, such as a hallway runner. If you have a patterned rug in the living room, echo a smaller version of the pattern on the stair treads. This subtle continuity ties disparate spaces together, enhancing flow throughout the home.
Safety and Comfort: Why Carpeted Stairs Are a Smart Choice
Beyond aesthetics, carpeted stairs improve safety by providing traction, especially on hardwood or tile steps that can become slippery when wet. The soft surface also cushions impact, reducing wear on shoes and joints—a benefit for households with children or elderly members.
When installing carpet, make sure the adhesive you select is low‑VOC (volatile organic compounds) to maintain indoor air quality. Additionally, ensure the carpet is fire‑rated according to local building codes; many commercial‑grade carpet treads meet these standards out of the box.
Finishing Touches: Trim, Molding, and Maintenance Tips
After the carpet treads are securely in place, the final details make the difference between a DIY job and a showroom‑ready result.
- Install Stair Nosing: A wooden or metal nosing covers the front edge of each tread, protecting the carpet and adding a crisp visual line.
- Apply Cove Molding: Cove molding between the tread and riser hides seams and gives a finished appearance.
- Seal with Protective Spray: A fabric protector helps repel stains and extends the life of your carpet.
Maintenance is straightforward. Vacuum regularly with a brush‑roll attachment, and spot‑clean spills immediately using a mild carpet cleaner. For deep cleaning, a professional steam cleaning once a year keeps the fibers fresh and maintains color vibrancy.
Quick Tips for a Seamless Installation
- Test adhesive on a small scrap piece before applying to the full tread.
- Work from the bottom stair upward; gravity assists with alignment.
- Use a laser level to ensure each tread sits at the same height.
- Keep a spare roll of carpet for future repairs or touch‑ups.
Common Mistakes to Avoid When Installing Carpet Stair Treads
Even seasoned DIYers can slip up. Recognizing common pitfalls ahead of time helps you stay on track.
- Skipping Surface Preparation: Dirt or old adhesive can cause the new carpet to lift later.
- Applying Too Much Glue: Excess adhesive squeezes out and creates uneven surfaces.
- Neglecting Edge Sealing: Unsealed edges fray quickly, especially in high‑traffic homes.
- Using the Wrong Carpet Type: Low‑pile works best on stairs; high‑pile can feel plush but wears faster.
By addressing these issues before they arise, you’ll enjoy a longer‑lasting, visually appealing result.
Frequently Asked Questions
Can I install carpet stair treads over existing hardwood stairs?
Yes. As long as the hardwood is level, clean, and free of damage, carpet treads can be installed directly over it using a strong adhesive and tack strips for added security.
How long does the adhesive take to cure?
Most carpet adhesives reach full strength within 24 hours, but you can safely walk on the stairs after 2‑3 hours. Avoid heavy foot traffic during the curing period to ensure a solid bond.
Is it necessary to remove the old carpet before installing new treads?
Removing old carpet is recommended for the best adhesion. It also gives you a chance to inspect the stair structure for any rot or damage that needs repair.
What is the best way to cut carpet treads to size?
Use a sharp utility knife and a straight edge. Cut in a well‑lit area, and measure twice before making the cut to avoid waste.
Can carpet stair treads be installed on a spiral staircase?
Yes, but you’ll need custom‑cut pieces to follow the curve. Professional carpet manufacturers often provide pre‑curved treads for spirals, simplifying the process.
Bringing It All Together: Your New Staircase as a Design Statement
Now that you understand how to install carpet stair treads from start to finish, you can approach the project with confidence. The result isn’t just a safer, softer set of steps; it’s an opportunity to reinforce your home’s design language. Whether you opt for a subtle neutral loop pile that blends into a modern interior, or a bold patterned tread that draws the eye, the staircase becomes a canvas for your personal style.
Remember, the key to a successful installation lies in careful preparation, precise measurement, and attention to finishing details. By following the steps outlined above, you’ll create a staircase that feels custom‑made, even if you did the work yourself.
Feel inspired to explore more décor possibilities? Check out our guide on tiny apartment living room design for space‑saving ideas that complement stairway upgrades, or read about choosing the perfect fixtures to finish the look with cohesive hardware.
Enjoy the process, take your time with each step, and soon you’ll have a beautifully carpeted staircase that enhances both the function and the aesthetic of your home.