
Table of Contents
- Understanding the Basics: How to Decorate Sandals at Home Safely and Effectively
- Key Tools and Materials for How to Decorate Sandals at Home
- Step‑by‑Step Process: How to Decorate Sandals at Home from Start to Finish
- Phase 1 – Preparation and Masking
- Phase 2 – Applying the Base Coat
- Phase 3 – Adding Decorative Elements
- Phase 4 – Sealing and Curing
- Creative Inspiration: Themes that Connect Your Sandals to Home Décor Trends
- Bohemian Layering Meets Beach‑Ready Sandals
- Mid‑Century Modern Minimalism
- Tropical Vibes for Outdoor & Misc Spaces
- Quick Tips for Efficient and Long‑Lasting Results
- Common Mistakes to Avoid When Learning How to Decorate Sandals at Home
- Frequently Asked Questions
Summer brings the perfect excuse to let your footwear shine as much as your living space. Whether you own a pair of plain flip‑flops, simple slides, or classic espadrilles, a little creativity can turn ordinary sandals into statement pieces that reflect your personal style. Decorating sandals at home is not only budget‑friendly; it also offers a satisfying hands‑on project that can be tailored to any décor theme you love—whether that’s boho chic, minimalist modern, or vibrant tropical.
In this guide we’ll walk you through a comprehensive process for how to decorate sandals at home, covering everything from material selection and preparation to finishing techniques that ensure durability. You’ll discover how to blend home décor ideas with footwear design, making each pair an extension of your interior aesthetic. By the end, you’ll have a toolkit of ideas that let you refresh your sandals whenever the mood strikes, without needing a professional studio.
Understanding the Basics: How to Decorate Sandals at Home Safely and Effectively
Before diving into glitter, paint, or fabric, it’s essential to understand the structure of the sandals you plan to transform. Most casual sandals consist of a sole (often rubber, EVA, or leather), straps (fabric, leather, or plastic), and sometimes a footbed. Knowing the material composition helps you choose the right adhesives, paints, and embellishments that will adhere properly and survive regular wear.
Start by cleaning each component with a mild soap solution and a soft brush. This removes dust, oils, and any residues that could interfere with glue or paint adhesion. For leather straps, a quick wipe with a leather conditioner can also prepare the surface, ensuring that the finish looks even and lasts longer. Once clean, allow the sandals to dry completely—ideally for at least one hour—so that the next steps are truly effective.
Key Tools and Materials for How to Decorate Sandals at Home
- Acrylic paint or leather paint (depending on strap material)
- Fabric paint pens for detailed designs
- Strong, flexible adhesive such as E6000 or a clear silicone glue
- Brushes, sponges, and masking tape for precise application
- Embellishments: rhinestones, beads, sequins, pom‑poms, or small charms
- Protective sealant spray to lock in color and protect against moisture
- Optional: heat‑transfer vinyl (HTV) for crisp patterns
When choosing colors, think about the palette already present in your home décor. For example, if your living room features soft greys and muted blues, consider a muted teal or dusty rose for a subtle yet coordinated look. This connection between footwear and interior design creates a cohesive visual story that feels intentional rather than random.
Step‑by‑Step Process: How to Decorate Sandals at Home from Start to Finish
The transformation journey can be broken down into four manageable phases: preparation, base coating, decorative detailing, and protection. Following this structured approach keeps the project organized and ensures a professional‑looking result even if you’re a first‑time DIYer.
Phase 1 – Preparation and Masking
Begin by laying out a clean work surface covered with newspaper or a silicone mat. Use masking tape to cover areas you don’t want to paint, such as the sole tread or any logos. This step prevents accidental splatters and gives you clean edges once the paint dries. If you’re planning to add fabric or vinyl patches, cut them to size now and secure them lightly with a temporary adhesive spray.
Phase 2 – Applying the Base Coat
Choose a paint that matches the material of your sandal straps. Acrylic paint works well on synthetic fabrics and plastic, while leather paint is ideal for genuine leather. Apply a thin, even coat using a small foam brush or a sponge, allowing each layer to dry for 10–15 minutes before adding another. Two to three light coats give a solid foundation without making the straps stiff.
Phase 3 – Adding Decorative Elements
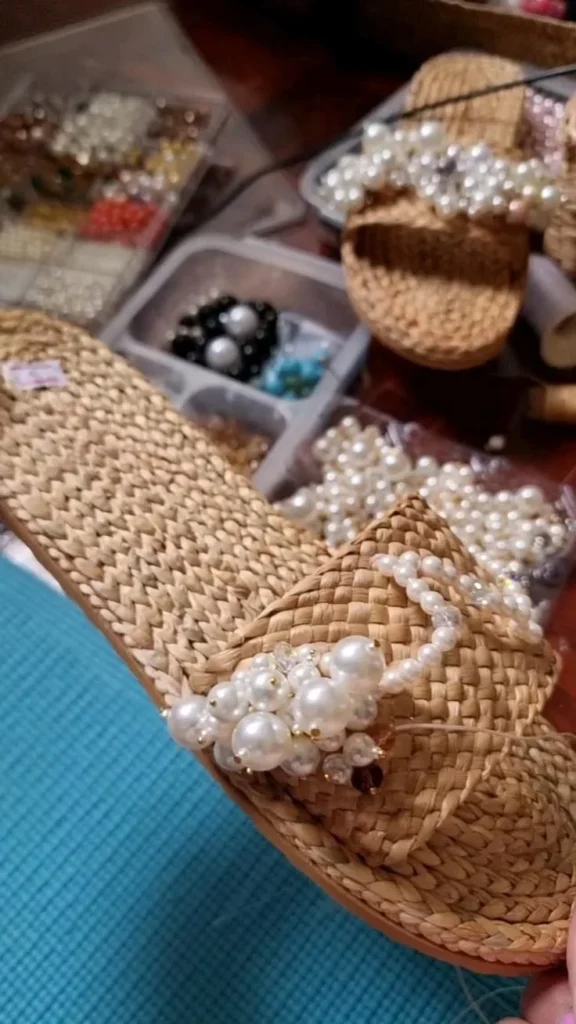
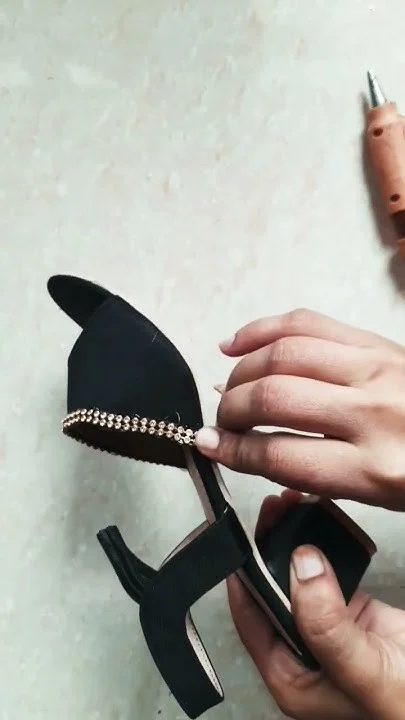
Now the fun begins. Use fabric paint pens to sketch outlines, write a short phrase, or draw a simple motif that echoes a pattern from your home décor—think geometric lines from a modern rug or a leafy silhouette reminiscent of a living‑room plant wall. For a more tactile effect, adhere rhinestones or beads along the strap edges. A good rule of thumb is to keep the design balanced: if one strap is heavily embellished, the opposite strap can stay simpler.
For those who love precision, heat‑transfer vinyl (HTV) can be cut with a digital cutter and then applied with a household iron. This method creates sharp, crisp designs that mimic professional branding.
Phase 4 – Sealing and Curing
After the decorative elements are in place, spray a light coat of clear sealant over the entire sandal. This protects the paint from chipping and the embellishments from falling off during wear. Allow the sealant to cure for at least 24 hours in a well‑ventilated area before you wear the sandals. Patience at this stage guarantees longevity, especially if you plan to wear them on sandy beaches or around the pool.
By following these steps, you’ll see how to decorate sandals at home with confidence, creating footwear that feels as thoughtfully curated as the cushions on your sofa.
Creative Inspiration: Themes that Connect Your Sandals to Home Décor Trends

One of the most rewarding aspects of how to decorate sandals at home is the ability to echo current interior design trends. By aligning your sandal designs with what’s popular in living rooms, bedrooms, or even outdoor patios, you reinforce a personal style narrative that travels from floor to foot.
Bohemian Layering Meets Beach‑Ready Sandals
Boho décor thrives on layered textures, earthy tones, and eclectic patterns. To echo this on sandals, consider using macramé rope as a strap overlay, or attach small wooden beads that match the driftwood décor in your balcony garden. Pair these with a muted terracotta or sage green base coat, mirroring the natural hues found in woven wall hangings.
Mid‑Century Modern Minimalism
If your home leans toward clean lines and muted palettes, opt for a monochrome approach. A simple black or white base coat paired with thin gold or copper geometric stickers can mimic the sleek metal accents of a mid‑century coffee table. Keep embellishments minimal—perhaps a single silver bar charm on each strap—to maintain that refined aesthetic.
Tropical Vibes for Outdoor & Misc Spaces
For homes with a strong outdoor‑living focus, think of bold botanical prints. Use fabric paint to add oversized palm leaves or hibiscus flowers on the straps, using colors that echo the cushions on your patio set. Adding a tiny seashell or a piece of natural cork as a decorative accent can further tie the footwear to your garden décor.
These thematic ideas illustrate how the same principles you apply when you decorate compact home spaces can be transferred to your sandals, reinforcing a cohesive style story throughout your environment.
Quick Tips for Efficient and Long‑Lasting Results
- Test paint on a hidden part of the strap first to ensure color compatibility.
- Use a hair dryer on low heat to speed up drying between coats, but avoid overheating.
- Apply sealant in thin, even layers; multiple light sprays work better than one heavy coat.
- Store decorated sandals away from direct sunlight to prevent fading.
- Refresh the sealant every 6–8 weeks if you wear the sandals frequently.
Common Mistakes to Avoid When Learning How to Decorate Sandals at Home
Even experienced DIYers can stumble on a few pitfalls. Recognizing these early saves time, money, and frustration.
- Skipping the cleaning step: Residual oils cause paint to peel. Always clean thoroughly.
- Using the wrong type of paint: Acrylic on leather can crack; leather paint is flexible and durable.
- Overloading embellishments: Too many heavy beads can strain the strap and cause tearing.
- Neglecting proper sealing: Without a protective coat, colors fade quickly, especially in humid climates.
- Applying sealant too soon: The paint must be fully dry; otherwise, it will smudge.
By keeping these cautions in mind, your journey on how to decorate sandals at home becomes smoother and the results more satisfying.
Frequently Asked Questions
Can I use regular household glue for attaching beads?
Household glue often lacks the flexibility needed for moving straps and can become brittle. It’s better to use a flexible adhesive like E6000, which remains pliable and withstands the flex of the sandal strap.
How long does the sealant need to cure before the sandals are wearable?
For most spray sealants, a 24‑hour cure in a well‑ventilated area is recommended. This ensures the protective layer fully sets and won’t transfer onto your skin or clothing.
Is it safe to wear decorated sandals in water?
If you used waterproof paint and a marine‑grade sealant, the sandals can handle occasional splashes. However, prolonged exposure to saltwater or chlorine may degrade the embellishments faster, so rinse and dry them promptly.
Can I personalize sandals for a wedding or special event?
Absolutely. Consider using monogrammed charms, coordinating colors from the event palette, or even tiny fabric roses that match the table décor. The same design principles used in small wall décor can guide you to a cohesive look.
Do I need a professional foot care routine after customizing sandals?
While decorating does not directly affect foot health, it’s wise to keep feet clean and moisturized, especially if you’ve added fabric or leather patches. For deeper care, check out our comparison of foot care solutions to keep your feet happy.
These FAQs address the most common concerns for anyone curious about how to decorate sandals at home, ensuring you feel prepared before you start.
Embracing the art of personalizing footwear can feel as rewarding as arranging a gallery wall in your living room. By treating sandals as another canvas for self‑expression, you extend your interior design vision beyond walls and furniture, stepping into a world where every detail—down to your shoes—reflects your unique style.
So gather your paints, brushes, and a pair of plain sandals, and begin the transformation. Remember, the same creativity that guides home office décor can bring fresh life to your feet. Happy decorating!