
Table of Contents
- Understanding the Basics of How to Decorate Envelopes at Home
- Why learning how to decorate envelopes at home enhances modern home styling
- Gathering Essential Supplies for How to Decorate Envelopes at Home
- Must‑have tools and materials
- Step‑by‑Step Techniques for How to Decorate Envelopes at Home
- Stamping and embossing
- Hand‑painted designs
- Using paper cut‑outs
- Creative Themes and Ideas for Personalized Envelopes
- Seasonal motifs that sync with home décor
- Minimalist modern for sleek interiors
- Vintage‑inspired charm for eclectic spaces
- Quick Tips for Efficient Envelope Styling
- Common Mistakes to Avoid When Learning How to Decorate Envelopes at Home
- Frequently Asked Questions
- Bringing Your Envelope Creations Into Everyday Spaces
How to Decorate Envelopes at Home – A Complete DIY Guide
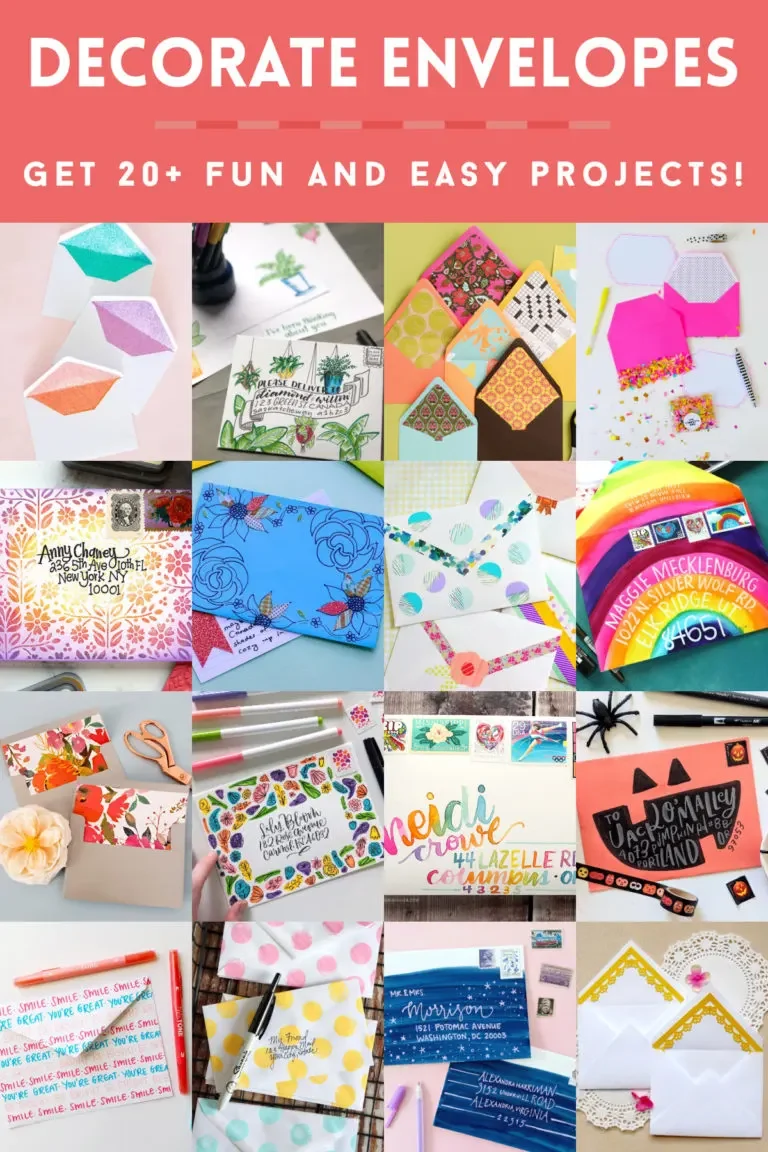
Envelope decoration may sound like a niche hobby, but it is a surprisingly powerful way to add a personal touch to everyday correspondence, gift‑giving, and even home‑styling projects. Whether you are sending thank‑you notes, creating invitations, or simply want a unique way to display small messages in a modern home, mastering how to decorate envelopes at home can transform a plain piece of paper into a miniature work of art. In this guide we will explore everything you need to know—from essential supplies and step‑by‑step techniques to creative themes that match contemporary interior design trends.
Why does this matter for homeowners and renters alike? A beautifully designed envelope can become an unexpected decorative element on a coffee table, a thoughtful accent on a bedroom nightstand, or a charming addition to a living‑room gallery wall. Moreover, the process is inexpensive, eco‑friendly, and adaptable to any space, making it a perfect small‑scale project for anyone who enjoys modern home décor ideas. Let’s dive into the world of paper craft and discover how to decorate envelopes at home with confidence and style.
Understanding the Basics of How to Decorate Envelopes at Home
Before you purchase any supplies, it helps to understand the fundamentals of envelope construction and the design possibilities that each component offers. Envelopes come in a variety of sizes, from tiny 2×3‑inch liners to larger invitation‑size formats. The material can be plain kraft, glossy cardstock, recycled fibers, or even textured linen. Knowing the surface you’ll work on informs the choice of inks, paints, and embellishments, ensuring that your designs adhere properly and last without smudging.
Why learning how to decorate envelopes at home enhances modern home styling
When you treat an envelope as a decorative object rather than a mere carrier of paper, you unlock a new dimension of interior design. A set of coordinated, hand‑decorated envelopes placed in a decorative tray can become a conversation starter, echoing the layered textures found in a living‑room styling project. The tactile quality of embossing, the subtle sheen of metallic inks, or the soft pastel tones of watercolor washes all echo the principles of interior design—balance, contrast, and harmony—making envelope craft a miniature extension of larger home décor concepts.
Gathering Essential Supplies for How to Decorate Envelopes at Home
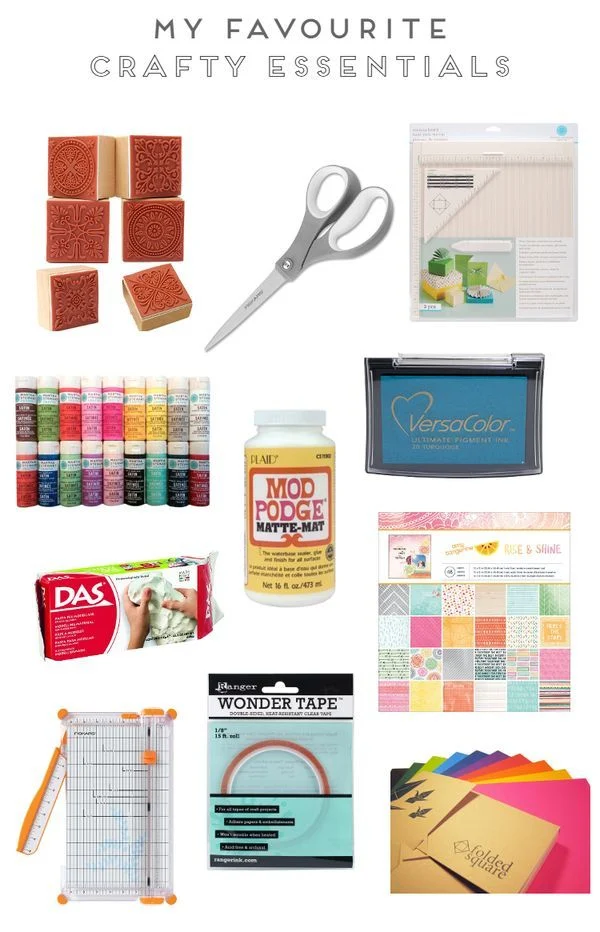
The right tools make the difference between a rushed, uneven finish and a polished, gallery‑worthy result. Below is a curated list of supplies that work well for most envelope projects, whether you are a beginner or an experienced crafter.
Must‑have tools and materials
- Quality envelopes: Choose acid‑free, heavyweight paper for durability.
- Stamping kit: Rubber or polymer stamps in patterns that match your aesthetic (floral, geometric, typographic).
- Ink pads: Water‑based inks for a soft finish, or alcohol‑based inks for vibrant, quick‑dry colors.
- Fine‑tip brushes: Ideal for hand‑painting delicate lines or watercolor washes.
- Embossing powder & heat gun: Creates a raised, glossy effect that feels luxurious to the touch.
- Paper cutters or craft knives: For precise trimming of decorative cut‑outs.
- Adhesives: Double‑sided tape, glue dots, or a low‑odor craft glue for attaching embellishments.
- Decorative elements: Ribbons, washi tape, dried flowers, sequins, or tiny metal charms.
Investing in a small set of high‑quality inks and a reliable heat gun will pay off in the long run, especially if you plan to incorporate envelope decoration into other home‑styling projects such as simple living room styling with candles. The synergy between paper craft and ambient décor creates a cohesive visual language throughout your home.
Step‑by‑Step Techniques for How to Decorate Envelopes at Home
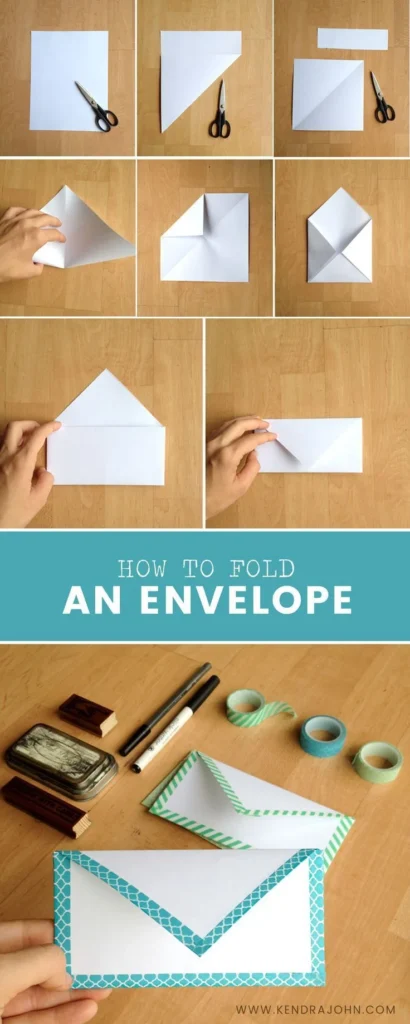
Now that you have the supplies, let’s walk through three core techniques that cover the majority of envelope‑decorating styles. Each method can be mixed, matched, or layered for a truly bespoke result.
Stamping and embossing
Stamping is the fastest way to add pattern and texture. Lay the envelope flat on a clean surface, position your chosen stamp, and press firmly. For a raised finish, apply embossing powder over a fresh ink mark, tap off the excess, and melt with a heat gun. The resulting glossy ridge catches light, echoing the reflective surfaces often used in modern interior design.
Hand‑painted designs
Fine‑tip brushes let you draw freehand motifs—think delicate line art, watercolor splashes, or minimalist geometric shapes. Start with a light pencil sketch if you’re hesitant, then paint over it using water‑based inks or diluted acrylics. Allow each layer to dry completely before adding details to avoid smearing. Hand‑painted envelopes work beautifully when paired with a home styling with plants arrangement; the organic brush strokes echo the natural lines of foliage.
Using paper cut‑outs
Cut‑out techniques give a three‑dimensional quality. Print or hand‑draw a motif on a contrasting paper, cut it out with a craft knife, and adhere it to the envelope using glue dots. This method is perfect for seasonal themes—think tiny snowflakes for winter or leaf silhouettes for autumn. When arranging a collection of such envelopes on a decorative tray, the layered effect mimics the depth created by layered textiles in interior design.
Creative Themes and Ideas for Personalized Envelopes
Choosing a theme helps unify the look of your envelope collection and ensures it complements your home’s overall aesthetic. Below are three versatile ideas that fit modern décor trends.
Seasonal motifs that sync with home décor
Spring: Soft pastels, botanical illustrations, and watercolor washes echo the fresh colors of a newly styled living room. Use light green washi tape and tiny pressed flowers for an elegant touch.
Summer: Bold, tropical prints, bright citrus hues, and geometric stripes can be paired with a coastal‑inspired interior. A navy‑blue envelope with a gold‑foil palm tree stamp adds a sophisticated vacation vibe.
Autumn: Warm amber, burnt orange, and deep burgundy tones work well with rustic wood accents. Adding a thin strip of twine and a tiny pine‑cone charm creates a cohesive look that mirrors a simple bedroom makeover featuring natural textures.
Minimalist modern for sleek interiors
Choose a neutral palette—charcoal, ivory, or soft gray—and focus on clean lines. A single metallic stamp (e.g., a thin gold circle) placed in the lower‑right corner gives a subtle luxe feel. Pair this with a matte finish envelope and a thin black ribbon for an understated yet sophisticated presentation.
Vintage‑inspired charm for eclectic spaces
Embrace distressed paper, sepia‑toned inks, and antique‑style motifs such as lace borders or calligraphic lettering. Adding a small pressed tea leaf or a miniature brass key as an accent can evoke nostalgia while still fitting into a modern eclectic room that mixes old and new elements.
Quick Tips for Efficient Envelope Styling
- Test inks on a scrap piece of the same envelope material before committing to the full design.
- Work on a flat, non‑slippery surface; a silicone mat prevents stamps from sliding.
- Use a light touch when embossing powder; too much can create clumps that look uneven.
- Allow each layer of paint or ink to dry completely before adding another element to avoid bleed‑through.
- Store finished envelopes in a cool, dry place, preferably in a flat file or a decorative box to keep them flat and protected.
Common Mistakes to Avoid When Learning How to Decorate Envelopes at Home
Even seasoned crafters can fall into traps that compromise the final look. Recognizing these pitfalls early saves time and material.
- Using the wrong envelope weight: Thin paper absorbs ink too quickly, causing blurring. Opt for a heavier stock for detailed work.
- Skipping a test run: Applying a new ink or adhesive directly onto the final envelope can lead to irreversible stains.
- Overloading with embellishments: Too many three‑dimensional pieces can cause the envelope to bulge, making it difficult to seal properly.
- Neglecting alignment: Random placement of stamps or cut‑outs can look chaotic. Use a ruler or light guide marks to keep patterns consistent.
- Improper drying time: Rushing the process often results in smudged designs. Patience is key, especially when using heat‑set embossing powder.
Frequently Asked Questions
Can I use regular printer ink on envelopes?
Printer ink works on some envelope types, but it may not dry quickly enough for stamping or hand‑painting. Water‑based or alcohol‑based inks are generally more reliable for a crisp finish.
How do I prevent my envelope from tearing when I add heavy embellishments?
Reinforce the envelope’s back with a thin piece of cardstock before attaching large elements. This adds strength without adding bulk to the front design.
Is it okay to use scented markers on envelopes?
Yes, as long as the scent is light and the marker is archival‑grade. Overly strong fragrances can cause paper to yellow over time.
What’s the best way to store decorated envelopes?
Place them flat in a large envelope, a portfolio sleeve, or a decorative box. Keep them away from direct sunlight to preserve colors.
Can envelope decoration be integrated into larger home‑decor projects?
Absolutely. Grouped envelopes can serve as a decorative wall collage, a tabletop accent, or even a unique backdrop for a coffee‑table book display.
Bringing Your Envelope Creations Into Everyday Spaces
Now that you understand how to decorate envelopes at home, think about where these pieces can live within your interior design scheme. A tray of coordinated envelopes on a hallway console can echo the color palette of the room’s artwork, while a set of hand‑painted invitation envelopes can sit beside a stylish vase of fresh flowers on the dining table. By treating each envelope as a miniature canvas, you extend the visual language of your home décor into a functional, personal medium.
Remember, the beauty of envelope decorating lies in its adaptability. Whether you favor bold, maximalist patterns or prefer a whisper‑soft minimalist approach, the techniques outlined above give you the flexibility to experiment, refine, and ultimately create pieces that reflect your unique style. As you practice, you’ll discover new ways to blend paper craft with broader interior design trends, turning everyday correspondence into a subtle yet impactful element of modern home décor.
Ready to start? Gather your supplies, choose a theme that resonates with your space, and let your creativity flow. The next time you send a thank‑you note or prepare a gift, you’ll be doing more than delivering a message—you’ll be sharing a piece of your home’s personality.