
Table of Contents
- Choosing the Right Canvas for DIY wall art using canvas
- DIY wall art using canvas: Material checklist
- Color‑blocking techniques that elevate modern home styling
- Abstract expression with palette knives and texture
- Mixed‑media collages: Combining paper, fabric, and found objects
- Hanging and arranging your canvas artwork like a pro
- Quick Tips for DIY wall art using canvas
- Common mistakes and how to avoid them
- Frequently Asked Questions
DIY wall art using canvas – Creative Ideas for Every Home
Whether you rent a compact apartment or own a spacious house, blank walls often feel like missed opportunities. Adding a personal touch doesn’t have to involve pricey paintings or custom prints. With a simple canvas, a few tools, and a pinch of imagination, you can create striking artwork that reflects your style and complements any interior. This guide walks you through the fundamentals of DIY wall art using canvas, from selecting the right materials to mastering techniques that look professional without the professional price tag.
In the sections that follow, you’ll learn how to choose canvas sizes that suit your space, explore color‑blocking, abstract, and mixed‑media methods, and discover practical tips for hanging and caring for your creations. By the end, you’ll feel confident enough to turn a plain wall into a focal point that sparks conversation and showcases your unique taste.
Choosing the Right Canvas for DIY wall art using canvas
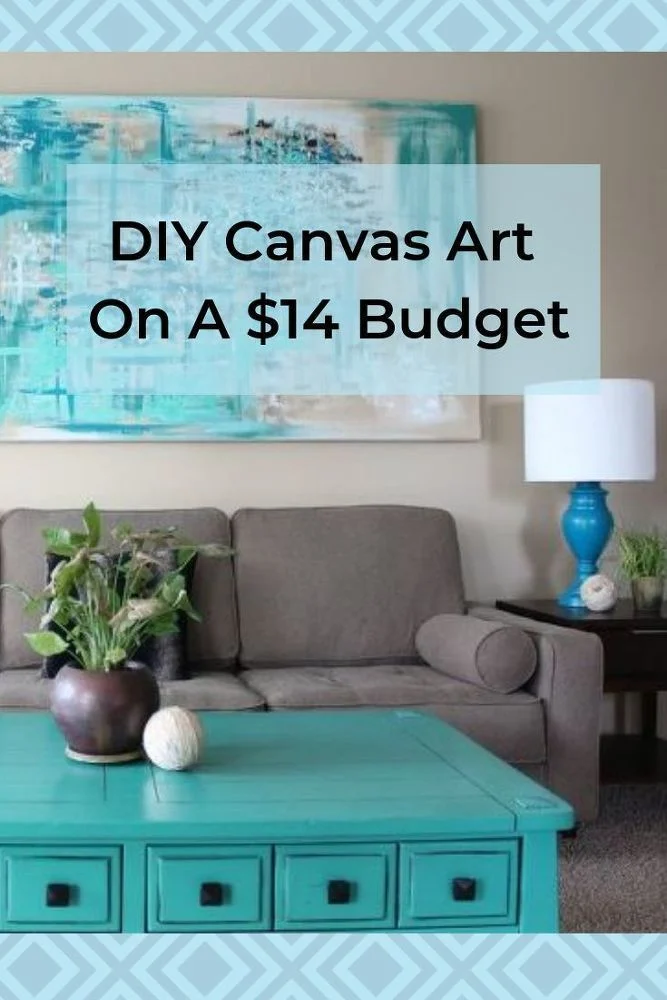
The foundation of any successful canvas project is the canvas itself. When selecting a canvas, consider the room’s scale, lighting, and existing décor. For a living room with high ceilings, a large 48‑inch canvas can serve as a bold centerpiece, while a bedroom or hallway may benefit from a series of smaller 12‑inch pieces arranged in a grid. Opt for pre‑stretched, acid‑free canvases if you plan to work with acrylics or mixed media; these provide a sturdy surface that won’t warp over time.
Texture also plays a role. A smooth, primed surface works well for fine detail and crisp lines, whereas a rough, unprimed canvas can add depth to abstract pieces. If you’re unsure, purchase a few different finishes and test a small swatch of your chosen paint. This experimentation helps you avoid costly mistakes and ensures the final artwork integrates seamlessly with your interior design style.
DIY wall art using canvas: Material checklist
- Pre‑stretched canvas (choose size based on wall space)
- Acrylic paints or watercolor‑compatible inks
- Palette knives, brushes, and sponges
- Painter’s tape for sharp edges
- Drop cloth or old newspapers
- Protective varnish (matte or glossy)
- Hanging hardware – D‑rings, picture hooks, or a French cleat system
Color‑blocking techniques that elevate modern home styling
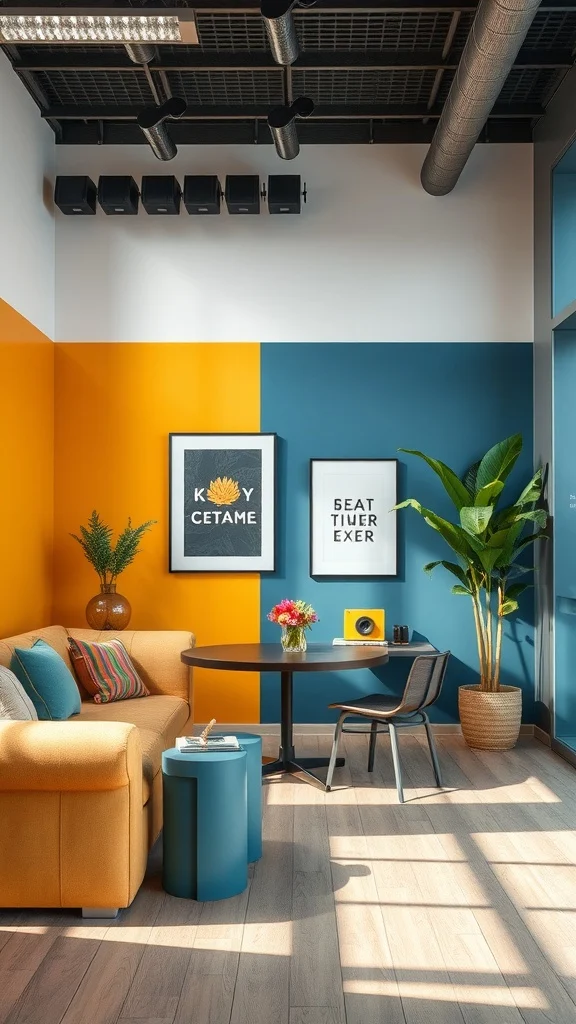
Color‑blocking is a favorite among interior designers because it creates visual impact with relatively simple execution. Start by selecting a palette that complements the room’s existing colors—neutral tones paired with a pop of teal, mustard, or coral work wonderfully in contemporary spaces. Using painter’s tape, divide the canvas into geometric sections. Fill each section with a solid color, allowing the paint to dry before removing the tape to reveal crisp, clean lines.
This method works particularly well in living rooms where you want to echo the shape of a sofa or rug. For example, a canvas featuring three vertical blocks of deep navy, soft gray, and bright orange can echo a sectional sofa’s silhouette while adding a vibrant accent. Pairing this DIY wall art using canvas with other home décor ideas, such as coordinating throw pillows or a rug, creates a cohesive look without overwhelming the space.
Abstract expression with palette knives and texture
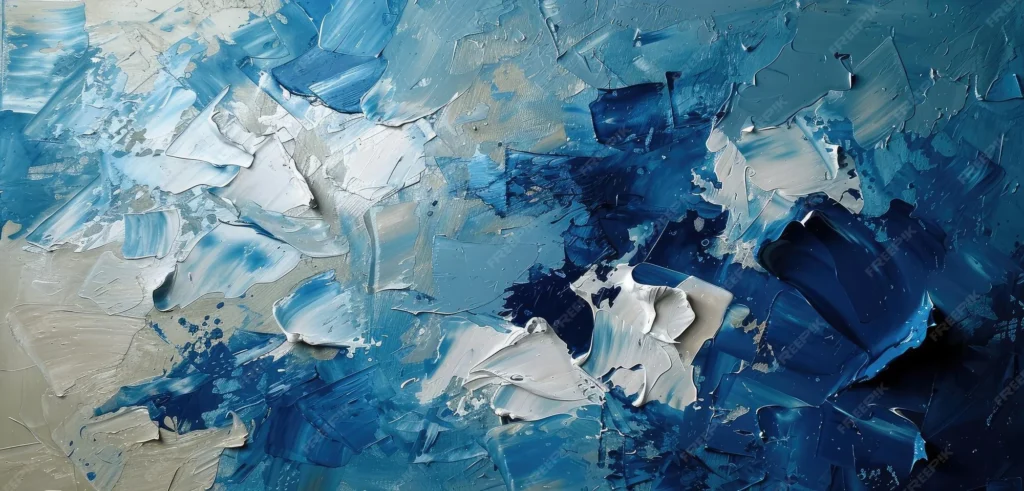
For those who prefer a more spontaneous aesthetic, abstract art using palette knives offers texture and movement that a brush alone cannot achieve. Begin by applying a thin base coat of a neutral hue; this will act as a unifying background. Then, load a palette knife with contrasting colors—think jewel tones like emerald, sapphire, and ruby—and spread, scrape, and layer the paint across the canvas. The resulting ridges catch light differently throughout the day, adding a dynamic quality to the piece.
When integrating this DIY wall art using canvas into a bedroom, consider a softer palette of muted blues and lavender to promote relaxation. In a kitchen or dining area, bolder colors can energize the space. Finish the piece with a clear varnish to protect the textured surface from dust and humidity, especially in high‑traffic rooms.
Mixed‑media collages: Combining paper, fabric, and found objects
Mixed‑media collages turn a simple canvas into a tactile masterpiece. Begin by gathering materials that reflect personal interests—a vintage map, sheet music, fabric scraps, or pressed flowers. Apply a thin layer of Mod Podge or acrylic medium to the canvas, then adhere your chosen elements using a brush or roller. Once dry, paint over sections to unify the composition, allowing the underlying textures to peek through.
This approach works beautifully in a home office, where a collage featuring old book pages, handwritten notes, and muted tones can inspire creativity while keeping the space grounded. For a more playful vibe in a child’s bedroom, incorporate bright paper cut‑outs and soft fabric pieces. The versatility of mixed‑media makes it an excellent addition to any DIY wall art using canvas portfolio, as each piece tells its own story.
Hanging and arranging your canvas artwork like a pro
Proper placement can transform a good piece into a great focal point. Measure the wall height and aim to hang the center of the canvas at eye level—typically 57 to 60 inches from the floor. When working with a series of canvases, maintain equal spacing (about 2–4 inches) between each frame to create visual harmony. Use a level and a stud finder to ensure secure mounting, especially for heavier canvases.
For renters concerned about wall damage, consider picture‑hanging strips or a tension‑rod system that avoids nails. In a living room, a gallery wall that mixes different canvas sizes can echo the eclectic spirit of modern interior design trends. If you’re unsure about layout, lay the canvases on the floor first and experiment with arrangements before committing to holes.
Quick Tips for DIY wall art using canvas
- Test paint colors on a scrap piece before committing to the whole canvas.
- Work in a well‑ventilated area and protect surfaces with a drop cloth.
- Seal finished artwork with a matte varnish to reduce glare in bright rooms.
- Use painter’s tape for clean lines, and remove it while the paint is still slightly tacky.
- Incorporate a single accent color that matches other décor items, like a vase or lamp shade.
Common mistakes and how to avoid them
Even seasoned hobbyists can stumble over a few pitfalls. One frequent error is choosing a canvas size that overwhelms the wall, making the room feel cramped. Always mock‑up the canvas on the wall with painter’s tape before purchasing. Another mistake is neglecting proper priming; unprimed canvases can absorb paint unevenly, leading to blotchy results. Apply a thin coat of gesso if you’re using a raw canvas.
Lastly, many overlook the importance of protecting finished pieces. Without a protective finish, colors may fade when exposed to direct sunlight. A quick spray of UV‑resistant varnish extends the life of your DIY wall art using canvas and keeps it looking fresh for years.
Frequently Asked Questions
Can I use watercolor on a stretched canvas?
Watercolor can work on canvas if you first apply a thick layer of acrylic gesso to create a less absorbent surface. This prevents the paper‑like feel and ensures the paint adheres properly.
How long does it take for acrylic paint to cure?
Acrylic paint typically dries to touch within 15–30 minutes, but full curing takes 24–48 hours. Wait at least 24 hours before applying varnish or hanging the piece.
Is it okay to hang canvas art directly on drywall without studs?
For lighter canvases (under 5 lb), adhesive picture‑hanging strips are safe and leave no holes. Heavier pieces should be anchored into studs or use heavy‑duty wall anchors to avoid sagging.
What’s the best way to clean dust from a finished canvas?
Use a soft, dry microfiber cloth to gently wipe the surface. Avoid water or cleaning solutions, as they can damage the paint or varnish.
Can I incorporate LED lighting into my canvas artwork?
Yes, LED strip lights placed behind the canvas frame or around the edges can create a backlit effect, adding depth and a modern touch to your DIY wall art using canvas.
How do I choose a color palette that matches my existing décor?
Start by picking a dominant color from a piece of furniture or rug in the room. Use a color‑wheel tool to find complementary or analogous shades, and limit the palette to three‑four colors for cohesion.
For more inspiration, see our guide on living room décor trends and explore how contemporary palettes can influence your canvas creations.
When selecting materials, consider the durability needed for high‑traffic areas. Our article on off‑white vs. cream provides insight into neutral tones that stay timeless, which can be an excellent base for any DIY wall art using canvas project.
Finally, if you’re curious about how to blend tile mortar colors for a seamless look in kitchen backsplashes, check out the comparison of Mapei Avalanche vs. White—the principles of color harmony apply across all design mediums.
Creating DIY wall art using canvas is not only an affordable way to personalize your space, but it also offers endless creative possibilities. By selecting the right canvas, mastering techniques, and thoughtfully arranging the final pieces, you’ll turn any blank wall into a gallery‑worthy statement. Embrace the process, experiment with textures, and enjoy the satisfaction of seeing your vision come to life on the walls of your home.