
Table of Contents
- DIY Simple Abstract Wall Art: Materials and Tools You’ll Need
- Choosing the Right Canvas or Base
- Paint and Medium Options
- Tools for Application
- DIY Simple Abstract Wall Art: Step‑by‑Step Process
- Step 1 – Prepare Your Workspace
- Step 2 – Prime the Surface
- Step 3 – Plan Your Composition
- Step 4 – Lay Down Base Colors
- Step 5 – Add Texture and Detail
- Step 6 – Refine and Finish
- Color Theory for Abstract Wall Art
- Choosing a Dominant Hue
- Balancing Warm and Cool Tones
- Using Neutrals as Anchors
- Placement Ideas: Where to Hang Your DIY Simple Abstract Wall Art
- Living Room Focal Point
- Bedroom Serenity
- Bathroom Accent
- Entryway Welcome
- Quick Tips for Successful DIY Simple Abstract Wall Art
- Common Mistakes and How to Avoid Them
- Over‑Planning the Design
- Neglecting Surface Preparation
- Using Incompatible Paints
- Poor Hanging Height
- Frequently Asked Questions
- Can I use household items as tools for abstract wall art?
- How long does it take for acrylic paint to dry completely?
- Is it okay to hang abstract art in a high‑traffic area?
- What size should my abstract piece be for a small apartment?
- Do I need a professional frame for my DIY abstract wall art?
- Can I incorporate metallic paints or leafing?
DIY Simple Abstract Wall Art – A Complete Guide for Modern Home Décor
Whether you’re a seasoned DIY enthusiast or just starting to explore creative home projects, abstract wall art offers a flexible canvas for personal expression. A well‑placed piece can transform a bland hallway, a cozy bedroom, or a bustling living room into a focal point that reflects your style. The beauty of DIY simple abstract wall art lies in its accessibility—minimal tools, affordable materials, and endless design possibilities make it an ideal project for renters, homeowners, and anyone looking to refresh their space without breaking the bank.
In this guide, we’ll walk you through everything you need to know, from selecting the right supplies to mastering color theory, and finally hanging your masterpiece with confidence. By the end, you’ll have a clear roadmap for creating pieces that not only look professional but also align with modern home styling trends. Let’s dive in and discover how a splash of abstract creativity can elevate any interior.
DIY Simple Abstract Wall Art: Materials and Tools You’ll Need
Before you pick up a brush, gathering the right supplies ensures a smooth creative process. The following list covers the essentials for a beginner-friendly project while still offering room for experimentation.
Choosing the Right Canvas or Base
- Canvas panels: Lightweight, inexpensive, and available in a range of sizes.
- Wood panels: Provide a sturdy surface that adds texture; ideal for larger statements.
- Recycled cardboard: Eco‑friendly option for temporary pieces or practice runs.
Paint and Medium Options
- Acrylic paints: Fast‑drying, water‑based, and perfect for layering.
- Oil paints: Offer richer blends but require longer drying times—great for advanced hobbyists.
- Ink or watercolor: Useful for fluid, translucent effects in abstract compositions.
Tools for Application
- Palette knives – create bold, impasto strokes.
- Wide‑flat brushes – ideal for smooth washes.
- Sponges and rags – perfect for textural gestures.
- Masking tape – defines clean edges and geometric sections.
Having these items on hand lets you focus on design rather than hunting for missing pieces. For a polished finish, consider a clear varnish or matte sealant to protect your DIY simple abstract wall art from dust and fading.
DIY Simple Abstract Wall Art: Step‑by‑Step Process
Now that you have your supplies, let’s break down the creation process into manageable stages. Each step is designed to keep the project approachable while still delivering a striking result.
Step 1 – Prepare Your Workspace
Choose a well‑ventilated area, cover surfaces with drop cloths, and lay out your materials. If you’re working on a larger panel, place it on an easel or lean it against a wall at a comfortable height.
Step 2 – Prime the Surface
Apply a thin coat of gesso (for canvas) or a primer (for wood) to create an even base. Let it dry completely—usually 20‑30 minutes—before moving on.
Step 3 – Plan Your Composition
Use masking tape to sketch out basic geometric zones or let the composition evolve organically. Remember, abstract art thrives on spontaneity, so feel free to adjust as you go.
Step 4 – Lay Down Base Colors
Start with broad washes of your chosen palette. Acrylics dry quickly, allowing you to layer without long waits. For deeper tones, work from dark to light, letting each layer dry before adding the next.
Step 5 – Add Texture and Detail
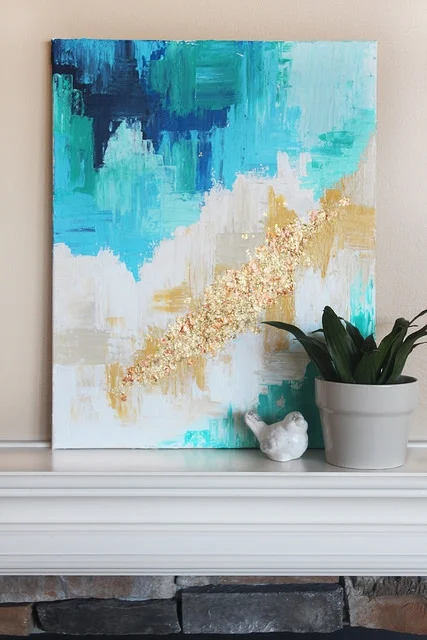
Introduce texture with palette knives, sponges, or even everyday objects like combs and toothbrushes. This is where the piece truly becomes “abstract”—experiment with drips, splatters, and impasto strokes.
Step 6 – Refine and Finish
Step back frequently to assess balance. Use a fine brush to add accent lines or subtle highlights. When satisfied, seal the artwork with a protective varnish.
Following this straightforward process, you’ll produce a piece that feels both intentional and free‑spirited—exactly what DIY simple abstract wall art aims to achieve.
Color Theory for Abstract Wall Art
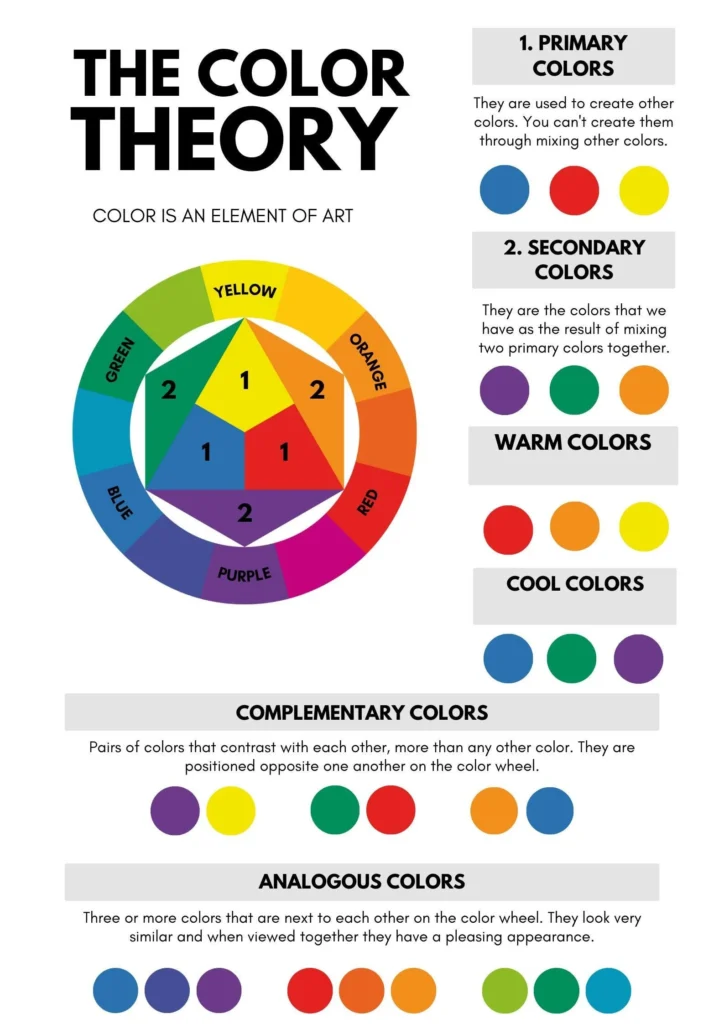
Color is the language of abstract composition. Understanding how hues interact can turn a simple splash of paint into a harmonious statement.
Choosing a Dominant Hue
Pick one dominant color that resonates with the room’s existing palette. For a living room with neutral furniture, a deep teal or mustard can provide a bold pop without clashing.
Balancing Warm and Cool Tones
- Warm tones (reds, oranges) add energy and intimacy.
- Cool tones (blues, greens) evoke calm and spaciousness.
- Mixing both creates visual tension, a hallmark of engaging abstract work.
Using Neutrals as Anchors
Incorporate whites, grays, or blacks to ground the composition. Neutrals act as visual “breathing space,” ensuring the piece doesn’t overwhelm the surrounding décor.
When selecting colors, consider the LSI keywords modern home styling and interior design tips to keep the artwork cohesive with broader design trends.
Placement Ideas: Where to Hang Your DIY Simple Abstract Wall Art
Strategic placement amplifies the impact of your creation. Below are room‑specific suggestions that align with current home décor ideas trends.
Living Room Focal Point
Center a large abstract piece above the sofa to anchor the seating area. Pair it with a Hallway Shelf Styling Inspiration guide to coordinate surrounding accessories for a seamless look.
Bedroom Serenity
Opt for softer palettes—muted blues or gentle mauves—placed above the headboard. This creates a tranquil backdrop that supports rest while still providing artistic intrigue.
Bathroom Accent
In moisture‑prone environments, use sealed canvas or coated wood. A modestly sized abstract work can add personality without competing with tiles. Check out Bathroom Shelf Décor with Glass Jars for complementary storage ideas.
Entryway Welcome
A vertical abstract piece flanking a console table sets a welcoming tone. Combine it with floating shelves for a modern entryway—see Hallway Décor with Floating Shelves for styling cues.
Quick Tips for Successful DIY Simple Abstract Wall Art
- Test colors on a small swatch before committing to the full panel.
- Work from background to foreground to maintain depth.
- Use a timer—short bursts of creativity often yield the most dynamic results.
- Protect your floor with newspaper or a plastic sheet to avoid accidental spills.
- Allow each layer to dry completely; this prevents unwanted color blending.
Common Mistakes and How to Avoid Them
Even seasoned crafters stumble occasionally. Recognizing pitfalls early saves time and materials.
Over‑Planning the Design
Abstract art thrives on spontaneity. If you find yourself rigidly adhering to a sketch, step back, breathe, and let the brush guide you.
Neglecting Surface Preparation
Skipping priming leads to uneven paint absorption, causing blotchy results. A thin gesso coat ensures consistent texture and color vibrancy.
Using Incompatible Paints
Mixing oil and acrylic on the same surface creates cracking over time. Stick to one medium per project for durability.
Poor Hanging Height
The art should be at eye level—approximately 57‑60 inches from the floor to the center of the piece. Too low or too high disrupts visual flow.
Frequently Asked Questions
Can I use household items as tools for abstract wall art?
Absolutely. Items like old credit cards, kitchen spatulas, or even crumpled paper can create interesting textures and lines. The key is to experiment and see what effects each tool produces.
How long does it take for acrylic paint to dry completely?
While surface drying occurs within 15‑30 minutes, full curing can take up to 24 hours. If you plan to add multiple layers, wait at least an hour between each to avoid unwanted smearing.
Is it okay to hang abstract art in a high‑traffic area?
Yes, provided you seal the artwork with a protective varnish. This shields the surface from dust, humidity, and occasional bumps.
What size should my abstract piece be for a small apartment?
Choose a size that balances the wall space—generally, a piece that occupies one‑third to one‑half of the wall works well. A tall, narrow canvas can add height without overwhelming the room.
Do I need a professional frame for my DIY abstract wall art?
Framing is optional. For a sleek, contemporary look, consider floating mounts or simple clip frames that keep the focus on the artwork itself.
Can I incorporate metallic paints or leafing?
Metallic accents add a modern touch and catch light beautifully. Apply them sparingly to highlight focal points or to create subtle shimmer.
Creating DIY simple abstract wall art is both an artistic adventure and a practical way to personalize your environment. By selecting the right materials, understanding color dynamics, and thoughtfully placing your piece, you’ll enjoy a fresh, gallery‑like vibe without the hefty price tag. Feel inspired to experiment further—perhaps explore our Cozy Minimalist Home Design guide for additional styling ideas that complement your new artwork. Embrace the process, trust your intuition, and let each brushstroke reflect the unique story of your home.