Table of Contents
- DIY décor with rope plant holders: Choosing Materials that Match Your Style
- DIY décor with rope plant holders: Mastering Essential Knot Techniques
- Integrating Rope Plant Holders into Different Rooms
- Living Room: Creating a Green Focal Point
- Bedroom: Softening the Sanctuary
- Kitchen: Functional Freshness
- Design Variations: Adding Personality to Your Rope Plant Holders
- Quick Tips for Perfect DIY décor with rope plant holders
- Common Mistakes and How to Avoid Them
- Frequently Asked Questions
- Putting It All Together: A Step‑by‑Step Project
DIY décor with rope plant holders – Creative, Affordable Home Styling
When it comes to refreshing a room without breaking the bank, few solutions are as versatile as rope‑wrapped plant hangers. Not only do they give your greenery a natural, airy feel, they also double as striking decorative accents that can be customized to match any interior theme. Whether you live in a compact apartment or a spacious house, incorporating DIY décor with rope plant holders can instantly add texture, depth, and a touch of handcrafted charm.
This guide walks you through everything you need to know: from selecting the right rope and plants, to mastering knot techniques and integrating the hangers into different rooms. By the end, you’ll have a toolbox of ideas that turn simple cords into eye‑catching statements, while keeping the process approachable for beginners and rewarding for seasoned crafters alike.
DIY décor with rope plant holders: Choosing Materials that Match Your Style

The foundation of any successful rope plant hanger is the material you choose. Natural fibers such as jute, hemp, or cotton rope lend a relaxed, organic vibe that pairs beautifully with boho‑inspired interiors. For a more polished look, consider manila rope or even synthetic options like nylon, which offer extra durability for high‑traffic areas or outdoor settings.
When selecting a rope, keep these factors in mind:
- Thickness: ¼‑inch to ½‑inch cords work well for most indoor plants. Thicker ropes can support larger pots but may look bulky in small spaces.
- Color: Natural beige and light brown tones blend seamlessly with wooden furniture, while black or dyed ropes add a contemporary edge.
- Strength: Check the rope’s weight rating. A good rule of thumb is to choose a rope that can hold at least twice the weight of your heaviest pot.
Pair the rope with containers that complement your overall décor—ceramic pots for a sleek modern feel, or terracotta for rustic charm. For more inspiration on matching finishes, see our modern living room décor ideas.
DIY décor with rope plant holders: Mastering Essential Knot Techniques
Even if you’ve never tied a knot before, creating a sturdy rope plant holder is straightforward once you learn a few basic patterns. The most popular are the clove hitch, the double fisherman’s knot, and the slip knot—each offering a balance of security and adjustability.
- Clove Hitch: Perfect for anchoring the rope around a ceiling hook. Loop the rope, cross it over itself, and snug it into place.
- Double Fisherman’s Knot: Ideal for joining two rope ends together when you need extra strength for heavier plants.
- Slip Knot: Allows you to easily adjust the hanging height without re‑tying the entire knot.
Practice these knots with a scrap piece of rope before moving on to your final project. A well‑tied knot not only looks tidy but also prevents accidental drops, keeping both your plants and décor safe.
Integrating Rope Plant Holders into Different Rooms
One of the biggest advantages of DIY décor with rope plant holders is their flexibility across spaces. Below are three room‑specific ideas that illustrate how these simple hangers can become focal points.
Living Room: Creating a Green Focal Point
In a living room, rope plant holders can frame a statement piece such as a large art canvas or a sleek fireplace. Suspend a trio of varying‑size planters at different heights to add visual rhythm. Use a neutral rope to keep the look cohesive, and select plants with bold foliage—like monstera or fiddle leaf figs—to draw the eye upward.
Bedroom: Softening the Sanctuary
For a tranquil bedroom retreat, consider hanging a small succulent or trailing pothos near the headboard. The gentle sway of the rope adds movement without disturbing sleep. Choose a muted, pastel‑colored rope to blend with soft bedding, and pair the plants with dimmable bedside lamps for a calming ambience. Explore more ideas in our modern sanctuary bedroom designs guide.
Kitchen: Functional Freshness
Rope plant holders are perfect for small‑space kitchens where counter real estate is at a premium. Hang herb pots just below a window or under a cabinet ledge for easy access while cooking. Opt for a shorter rope length to keep the herbs within reach, and use a moisture‑resistant synthetic rope to handle occasional splashes.
Design Variations: Adding Personality to Your Rope Plant Holders
Beyond the classic single‑rope design, there are numerous ways to inject personality into your DIY décor with rope plant holders. Here are three creative twists that keep the look fresh.
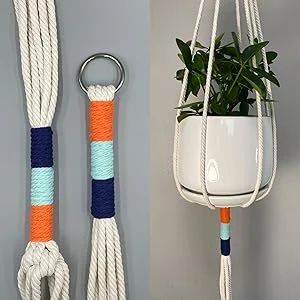
- Layered Ropes: Wrap two different colored ropes around the same knot for a subtle contrast.
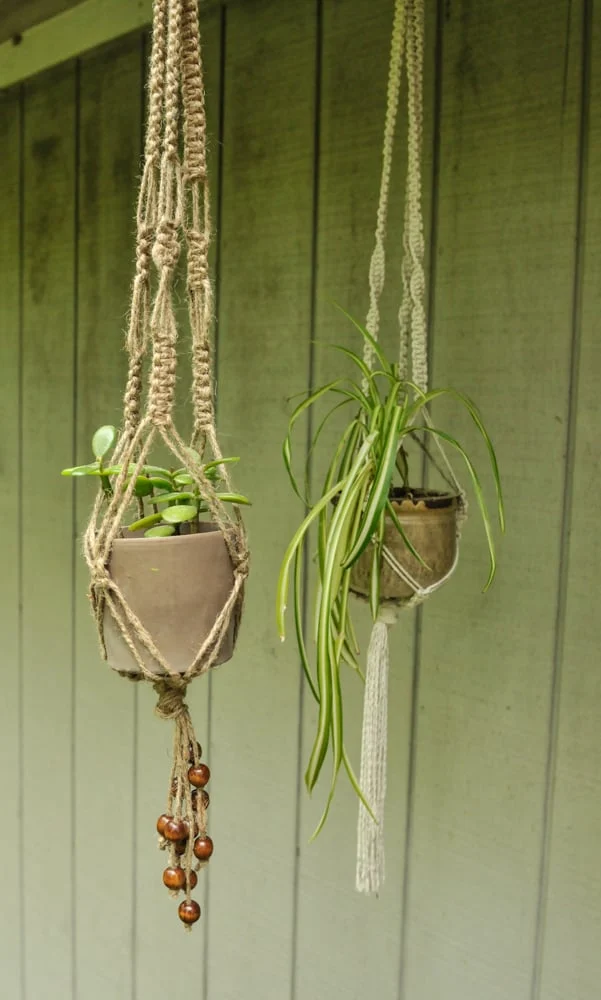
- Beaded Accents: Thread wooden or glass beads onto the rope before tying the knot, creating a decorative fringe that catches light.
- Macramé Integration: Combine basic macramé patterns (like square knots) around the hanger for a bohemian vibe.
These variations are especially effective when you want to tie the plant hangers into a broader design scheme—think coastal décor with rope and shells, or industrial spaces with metal hooks and dark rope.
Quick Tips for Perfect DIY décor with rope plant holders
- Measure the exact distance from the ceiling to the desired plant height before cutting rope.
- Use a lightweight, rust‑proof hook to avoid damage to plaster or drywall.
- Pre‑drill a small hole in the pot’s rim for the rope to pass through, ensuring a clean, centered look.
- Apply a clear sealant to natural fibers if you plan to use the hangers outdoors.
- Rotate plants regularly to promote even growth and prevent one side from becoming too heavy.
Common Mistakes and How to Avoid Them
Even seasoned DIY enthusiasts can stumble when working with rope plant holders. Below are the most frequent pitfalls and practical ways to sidestep them.
- Overloading the Rope: Exceeding the rope’s weight limit can cause it to fray or snap. Always calculate the combined weight of the pot, soil, and plant before installing.
- Improper Hook Placement: Installing a hook directly above a ceiling joist without a stud finder may lead to a weak anchor point. Use a stud finder or toggle bolt for secure attachment.
- Neglecting Water Drainage: Forgetting to add a drainage hole in the pot can cause water buildup, damaging both the rope and the ceiling. Drill a small hole and place a saucer beneath the pot.
- Choosing the Wrong Rope Material: Synthetic ropes look great but can become slippery when wet, increasing the risk of slippage. Pair them with a knot that tightens under moisture, like the double fisherman’s knot.
Frequently Asked Questions
Can I use rope plant holders outdoors?
Yes, but choose a weather‑resistant rope such as marine‑grade nylon or treat natural fibers with a waterproof sealant. Ensure the hook is rated for outdoor use and consider adding UV‑stable plant pots to prevent fading.
How often should I adjust the height of my hanging plants?
Plants grow and may become heavier over time. Check the tension of the rope every few months, and raise or lower the hanger as needed to keep the plant at a comfortable viewing level.
What is the best way to clean rope plant holders?
For natural fibers, gently shake off dust and spot‑clean with a damp cloth. Avoid submerging the rope unless it’s synthetic; excess moisture can lead to mold. Allow the rope to air‑dry completely before re‑hanging.
Are there eco‑friendly rope options?
Absolutely. Look for ropes made from organic cotton, recycled jute, or hemp. These materials are biodegradable and often sourced from sustainable farms, aligning with green décor principles.
Can I combine multiple plants in one rope holder?
Yes, by using a tiered design with separate knots at different heights. This creates a cascading effect that’s perfect for small spaces, allowing you to display a variety of species without clutter.
Putting It All Together: A Step‑by‑Step Project
Ready to bring your vision to life? Follow these concise steps to create a polished rope plant hanger that showcases your personal style.
- Gather Materials: Choose a 6‑foot length of rope, a sturdy ceiling hook, a pot with drainage, and your favorite plant.
- Measure and Cut: Decide the final hanging height, then cut the rope accordingly, leaving an extra foot for knotting.
- Attach the Hook: Locate a ceiling joist, drill a pilot hole, and secure the hook with a screw.
- Knot the Rope: Tie a clove hitch around the hook, then create a slip knot at the desired height.
- Thread the Pot: Pass the rope through a pre‑drilled hole in the pot’s rim, then tie a double fisherman’s knot to secure it.
- Finishing Touches: Trim any excess rope, add beads or a macramé fringe if desired, and gently place the plant inside.
- Display and Enjoy: Step back, adjust the height if needed, and admire the fresh, handcrafted look.
For a broader perspective on how rope plant holders can fit into an overall interior scheme, browse our comprehensive home décor guide, which outlines room‑by‑room styling strategies.
By integrating DIY décor with rope plant holders into your living environment, you not only enhance visual interest but also cultivate a sense of accomplishment. Each knot ties together aesthetics and function, turning everyday plants into curated works of art.
Take the first step today—pick up a length of rope, select a thriving green companion, and start experimenting. As your space evolves, you’ll find that these simple hangers become a staple in your design toolkit, adaptable enough to grow alongside your style.