
Table of Contents
- Understanding the Power of a Vision Board for Home Décor
- Step‑by‑Step Guide on How to Make a Home Decor Vision Board
- 1. Define Your Goal and Scope
- 2. Choose the Board Format
- 3. Gather Inspirational Sources
- 4. Curate and Trim
- 5. Arrange by Zones or Themes
- 6. Add Textual Anchors
- 7. Review and Refine
- Choosing Materials and Tools That Elevate Your Vision Board
- Physical Board Essentials
- Digital Board Essentials
- Curating Images, Textures, and Color Palettes
- Color Palette Development
- Texture and Material Sampling
- Balancing Scale and Proportion
- Incorporating Lifestyle Shots
- Translating Your Vision Board Into Real‑World Design Decisions
- Prioritize Action Items
- Use the Board as a Shopping Checklist
- Test Samples In‑Situ
- Document Progress
- Quick Tips for Maintaining Inspiration Momentum
- Common Mistakes to Avoid When Crafting Your Vision Board
- Overloading the Board
- Ignoring Practical Constraints
- Forgetting Lighting
- Skipping the Test Phase
- Frequently Asked Questions
- Conclusion
How to Make a Home Decor Vision Board – A Complete Step‑by‑Step Guide
Creating a visual roadmap for your living space can feel like unlocking a secret door to style. A home decor vision board gathers the colors, textures, furniture silhouettes, and inspirational images that speak to your aesthetic, helping you turn vague wishes into concrete design decisions. Whether you’re a first‑time renter, a seasoned homeowner, or simply love to experiment with trends, knowing how to make a home decor vision board empowers you to stay focused, avoid costly missteps, and enjoy a cohesive look across every room.
In this article we’ll walk through the entire process—from choosing the right board size to selecting images that truly represent your style. You’ll discover practical tools, learn how to blend online resources with physical samples, and get actionable tips for keeping the momentum alive after the board is finished. By the end, you’ll have a clear, personalized blueprint you can reference whenever you shop, paint, or rearrange furniture.
Understanding the Power of a Vision Board for Home Décor

A vision board isn’t just a collage of pretty pictures; it’s a psychological anchor that aligns your subconscious preferences with tangible design goals. When you regularly glance at a board that reflects your dream aesthetic, you reinforce the choices you want to make, making it easier to resist impulse buys that clash with your overall scheme. Moreover, a well‑crafted board serves as a communication tool for anyone involved in the project—designers, contractors, or family members—ensuring everyone interprets the style in the same way.
Research in interior design psychology suggests that visual planning reduces decision fatigue by 30 % on average. By consolidating ideas into one place, you streamline the selection process for paint colors, fabrics, lighting, and décor accessories. This is why learning how to make a home decor vision board is a foundational skill for anyone serious about curating a harmonious home environment.
Step‑by‑Step Guide on How to Make a Home Decor Vision Board
Below is a practical, easy‑to‑follow roadmap that shows exactly how to make a home decor vision board from start to finish. Each step includes optional tools and shortcuts for busy lifestyles.
1. Define Your Goal and Scope
- Decide whether the board will cover the entire home, a single room, or a specific project (e.g., a bedroom refresh).
- Write a one‑sentence “design mission” such as “Create a calm, minimalist bedroom that feels like a spa.” This sentence will guide every later decision.
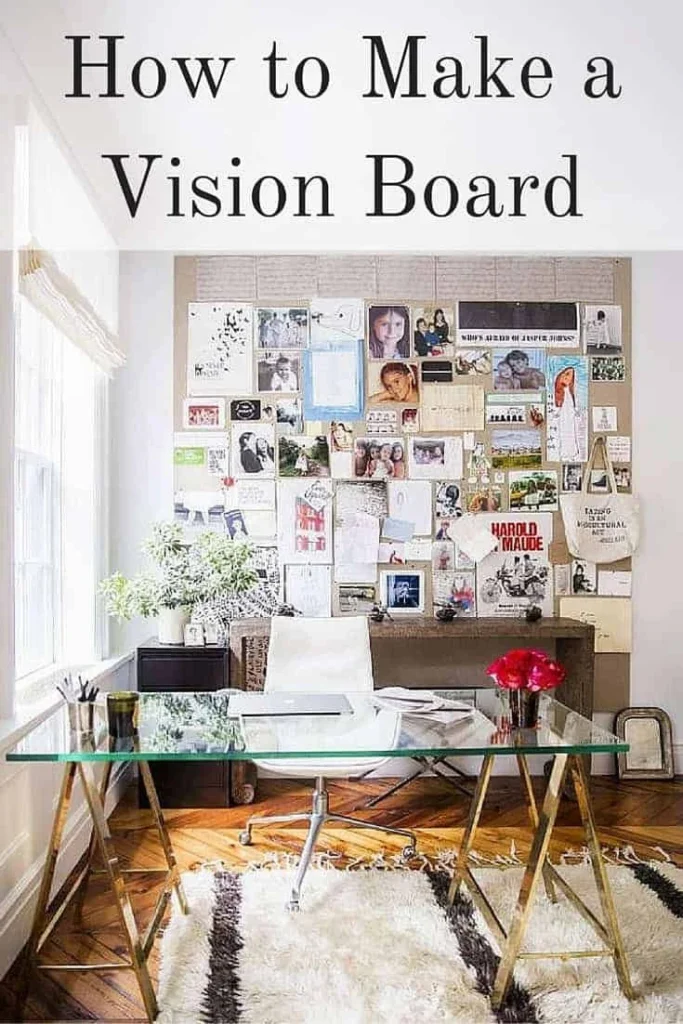
2. Choose the Board Format
Physical boards (corkboard, poster board, foam core) provide tactile interaction, while digital boards (Pinterest, Canva, Milanote) allow rapid swapping of images. Many designers use a hybrid approach: a physical core board for fabric swatches and paint chips, complemented by a digital folder for high‑resolution photos.
3. Gather Inspirational Sources
Start collecting images from magazines, Instagram, design blogs, and even Instagram stories. When you see a living room that catches your eye, screenshot it or clip it. Remember to keep the focus on elements that match your design mission—color palette, material, scale.
4. Curate and Trim
Lay out all your collected pieces and begin to prune. Ask yourself: Does this image support my mission? If not, set it aside. Aim for a balanced mix of large focal images (e.g., a full‑room photo) and detail shots (e.g., a texture close‑up).
5. Arrange by Zones or Themes
If you’re covering multiple rooms, create sections on the board for each zone (living room, kitchen, bedroom). Alternatively, arrange by theme—“organic textures,” “metallic accents,” “soft neutrals.” This visual grouping helps you spot patterns and gaps.
6. Add Textual Anchors
Write short notes directly on the board: “Matte white walls,” “Mid‑century wood coffee table,” “Hanging plants for vertical interest.” These keywords act as quick reminders when you’re shopping later.
7. Review and Refine
Step back and view the board from a distance. Does it feel cohesive? If any element feels out of place, replace it. This refinement stage is crucial; it ensures that your final board truly reflects the aesthetic you intend to achieve.
Choosing Materials and Tools That Elevate Your Vision Board

The right supplies can turn a simple collage into a professional‑looking mood board that you’ll actually want to display. Below are recommendations for both physical and digital setups.
Physical Board Essentials
- Corkboard or foam core: Provides a sturdy base and easy pinning.
- Acid‑free glue sticks: Prevents paper from yellowing over time.
- Scissors, craft knife, and a metal ruler: For clean cuts and precise measurements.
- Swatch samples: Collect fabric, wallpaper, and paint chips from local stores.
- Label tags or small sticky notes: To jot down quick ideas without clutter.
Digital Board Essentials
For those who love to work on the go, consider these tools:
- Pinterest: Ideal for quick pinning and collaborative boards.
- Canva: Offers drag‑and‑drop templates and the ability to add text overlays.
- Milanote: Great for mixing images, PDFs, and color swatches in one canvas.
- Google Drive folder: Store high‑resolution files for easy access during shopping trips.
Pro tip: If you’re using a digital board, export the final layout as a PDF and print it in a large format. Then you can place the printed sheet on your physical board for a hybrid experience.
Curating Images, Textures, and Color Palettes
Now that you know how to make a home decor vision board, the next step is mastering the art of curation. The goal is to create a visual story that feels both aspirational and achievable.
Color Palette Development
Start with a base color—often a neutral like warm gray or soft beige. From there, add 2‑3 accent colors that appear in your favorite images. Use tools such as Adobe Color or the Budget Wall Décor Ideas: Stylish Solutions on a Shoestring guide to test how these shades work together under different lighting conditions.
Texture and Material Sampling
Physical texture is essential for interior design. Pin fabric swatches, a piece of reclaimed wood, a sample of marble, or even a small basket. When you later see a photo of a living room with a natural basket, you’ll instantly recall the tactile feeling you want to replicate.
Balancing Scale and Proportion
Include images that showcase both large‑scale pieces (sofa, rug) and smaller accessories (lamps, cushions). This balance helps you visualize how each element will occupy space. For example, pair a living room décor with natural baskets photo with a close‑up of a metallic table lamp to see how materials interact.
Incorporating Lifestyle Shots
Beyond static décor, add photos of people using the space. A cozy reading nook with a plush throw and a steaming mug tells a story of comfort that pure product shots cannot. These lifestyle images reinforce the emotional goal of your design mission.
Translating Your Vision Board Into Real‑World Design Decisions
Having a polished board is only half the journey; the real magic happens when you start making purchases and arranging furniture based on the visual guide. Follow these steps to move from inspiration to execution.
Prioritize Action Items
Identify the three most critical items that will have the biggest impact on your space—often paint, a statement piece of furniture, and lighting. Purchase these first to anchor the rest of your design.
Use the Board as a Shopping Checklist
When you walk through a store or browse online, refer to your board’s notes. If the board says “Matte charcoal walls,” you’ll instantly know to look for that specific finish, reducing indecision.
Test Samples In‑Situ
Before committing, bring paint swatches and fabric samples home. Paint a small wall section and drape a fabric over a chair to see how the colors shift with your natural light. This step prevents costly returns.
Document Progress
Take photos after each major update—post‑paint, new sofa, added décor. Compare these photos with your original vision board to see how closely you’re aligning. If something feels off, you can adjust before moving on.
Quick Tips for Maintaining Inspiration Momentum
Even after you’ve completed your vision board, staying inspired can be a challenge. Here are three quick, actionable habits to keep the creative energy flowing.
- Weekly “Design Scan”: Spend 10 minutes scrolling through a curated Pinterest board or design magazine to spot fresh ideas.
- Seasonal Refresh: Swap out a few accessories each season—think cushions, throws, or artwork—to keep the space feeling updated without a full overhaul.
- Collaborate with Friends: Invite a friend over for a “design coffee” and ask for their perspective on one area of the room. Fresh eyes often reveal opportunities you missed.
Common Mistakes to Avoid When Crafting Your Vision Board
Even seasoned decorators can stumble. Recognizing common pitfalls early saves time, money, and frustration.
Overloading the Board
More isn’t always better. A cluttered board makes it hard to discern a clear direction. Aim for a curated selection that speaks directly to your design mission.
Ignoring Practical Constraints
It’s tempting to fill the board with high‑end pieces that exceed your budget or spatial limits. Always note realistic price ranges and measurements alongside aspirational images.
Forgetting Lighting
Lighting dramatically alters color perception. If your board lacks representation of natural and artificial lighting, you might end up with a palette that looks different once the lights are on.
Skipping the Test Phase
Purchasing without testing samples is a recipe for disappointment. Always test paint, fabrics, and finishes in the actual space before finalizing.
Frequently Asked Questions
Can I create a vision board on a small budget?
Absolutely. Use a simple corkboard, free digital tools like Pinterest, and collect magazine cutouts from thrift stores. The key is thoughtful curation, not expensive materials.
How often should I update my vision board?
Update whenever your style evolves or you complete a major project. Many homeowners refresh their board seasonally to incorporate new trends and personal preferences.
Do I need to involve a professional designer?
Not necessarily. A well‑structured vision board can serve as a clear brief for a designer if you choose to hire one later. It also empowers DIY enthusiasts to make confident decisions.
Is a digital vision board as effective as a physical one?
Both have strengths. Physical boards provide tactile interaction with samples; digital boards offer easy editing and instant sharing. Choose the format that fits your workflow, or combine both for best results.
What should I do if I feel stuck halfway through?
Take a short break, revisit your original design mission, and look for fresh inspiration in unexpected places—travel photos, nature, or even culinary plating. Often a new perspective reignites creativity.
Conclusion
Learning how to make a home decor vision board equips you with a powerful planning tool that bridges imagination and reality. By defining a clear goal, gathering purposeful images, and arranging them in a thoughtful layout, you create a visual contract with yourself that guides every purchase and design choice. The process is flexible—whether you prefer a tactile board with fabric swatches or a sleek digital canvas, the principles remain the same. Use the board as a living document: update it, test ideas, and let it evolve alongside your lifestyle.
Now that you have a step‑by‑step roadmap, a list of essential tools, and strategies to avoid common pitfalls, you’re ready to turn those inspirational snapshots into a beautifully styled home. Dive in, have fun, and remember that each pin, swatch, and note brings you one step closer to the space you’ve always imagined.