
Table of Contents
- How Thick Is Thinset Under Tile: Recommended Measurements for Different Situations
- How Thick Is Thinset Under Tile for Large Format Tiles?
- Measuring and Applying Thinset: Step‑by‑Step Process
- Tools and Materials That Influence Thinset Thickness
- Common Mistakes When Determining Thinset Thickness
- Quick Tips for Perfect Thinset Application
- Frequently Asked Questions
- What happens if thinset is applied too thin?
- Can I use regular mortar instead of thinset?
- Do I need a different thinset for bathroom versus kitchen tiles?
- How long should I wait before grouting after the thinset has set?
- Is it necessary to use a leveling system for large tiles?
- Can I reuse leftover thinset?
How Thick Is Thinset Under Tile? A Complete Guide for Perfect Installations
When you step into a beautifully tiled bathroom or kitchen, the flawless look often masks the meticulous work that went into the installation. One of the most critical, yet frequently overlooked, factors is the thickness of the thinset mortar beneath each tile. Getting this measurement right not only ensures a smooth, level surface but also prevents future problems like cracking, lippage, or tile movement.
In this article, we’ll explore exactly how thick is thinset under tile for various applications, how to measure and apply it correctly, and which tools can make the process easier. Whether you’re a DIY enthusiast tackling a small bathroom remodel or a professional contractor handling a large‑format tile project, understanding the proper thinset thickness will help you achieve durable, visually stunning results.
How Thick Is Thinset Under Tile: Recommended Measurements for Different Situations

Thinset is a cement‑based adhesive that bonds tile to the substrate. Its thickness varies depending on the type of tile, the size of the tile, and the condition of the substrate. Below are the most common guidelines:
- Standard Ceramic or Porcelain Tiles (4‑12 inches): 1/8 inch (3 mm) when applied with a ¼‑inch (6 mm) V‑notched trowel. This provides enough coverage for most even substrates.
- Large‑Format Tiles (12 inches and larger): 3/16 to 1/4 inch (5‑6 mm). For these tiles, a larger ½‑inch (12 mm) V‑notched trowel is recommended to achieve the necessary depth.
- Stone Tiles (Marble, Slate, etc.): 1/8 to 3/16 inch (3‑5 mm), depending on the stone’s porosity and the need for a stronger bond.
- Poor‑Condition Substrates (uneven, cracked, or low‑strength): 1/8 to 1/4 inch (3‑6 mm) using a medium‑bed thinset to level the surface.
These figures answer the core question of how thick is thinset under tile in most residential scenarios. Adjustments may be needed based on specific product recommendations, but the ranges above serve as a reliable starting point.
How Thick Is Thinset Under Tile for Large Format Tiles?
Large format tiles demand a deeper thinset layer to compensate for their weight and to avoid lippage, the uneven edge that can occur when adjacent tiles sit at different heights. Using a ½‑inch V‑notched trowel typically yields a thinset thickness of about 3/16 inch after the tile is pressed into place. For tiles over 24 inches, many professionals increase the thickness to ¼ inch and use a notched trowel with larger teeth (often ¼‑inch). Always follow the manufacturer’s recommendations, especially when dealing with specialty porcelain or glass tiles.
Measuring and Applying Thinset: Step‑by‑Step Process
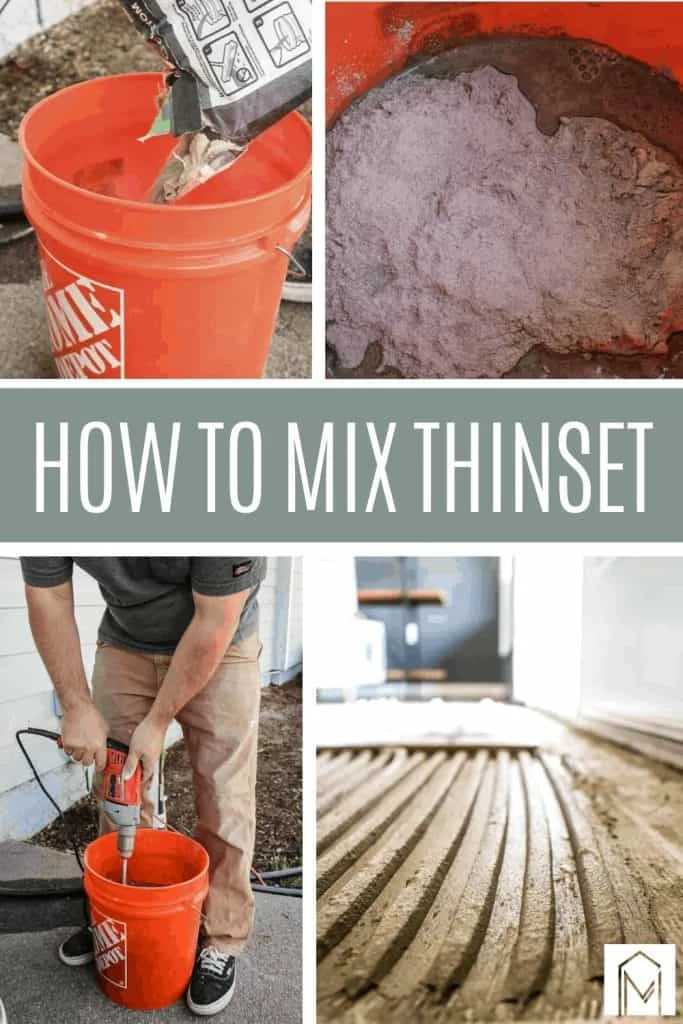
Accurately controlling how thick is thinset under tile starts with proper preparation. Follow these steps for consistent results:
- Prepare the Substrate: Clean, dry, and repair any cracks or holes. If the surface is glossy, scuff it with sandpaper to improve adhesion.
- Mix the Thinset: Follow the manufacturer’s water‑to‑powder ratio. Mix to a peanut‑butter consistency; avoid over‑mixing, which can weaken the bond.
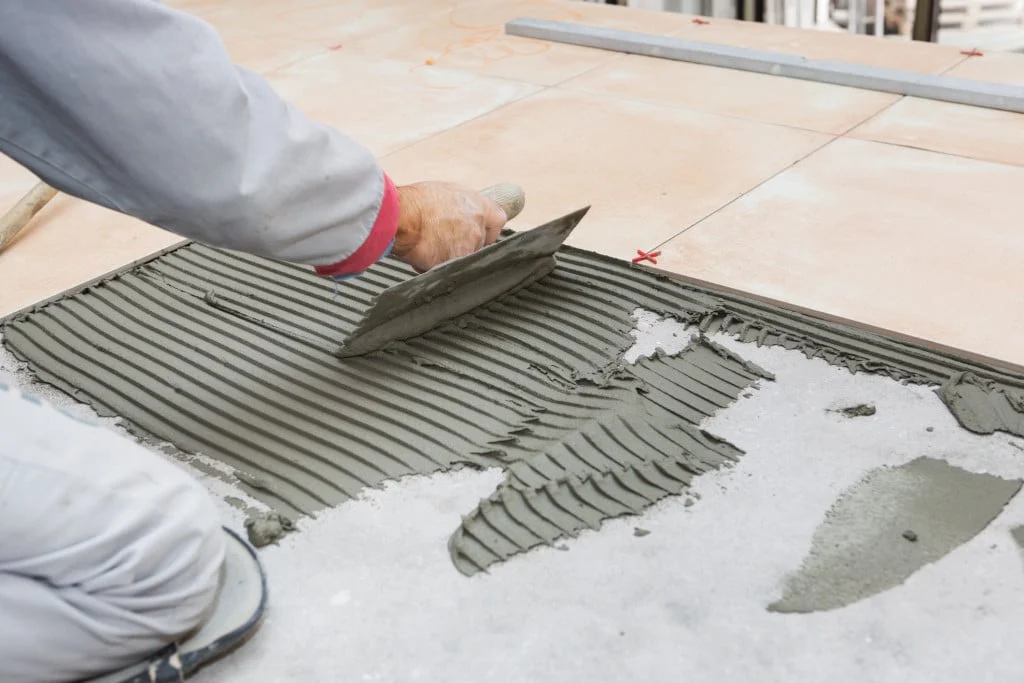
- Apply the Thinset: Using a notched trowel, spread a thin, even layer in a small area (about 3 ft²) to prevent premature drying.
- Set the Tile: Press the tile firmly, using a slight twisting motion to embed it fully. For larger tiles, place a slight weight (e.g., a rubber mallet) to achieve the desired depth.
- Check Coverage: After setting a few tiles, lift one to inspect the thinset pattern. You should see an even “ridges” pattern covering at least 80% of the back of the tile.
- Adjust as Needed: If coverage is low, add more thinset or use a larger trowel. Too much thinset can create voids; too little leads to weak bonds.
Regularly checking the thinset thickness during installation helps you stay within the recommended range of how thick is thinset under tile for each project.
Tools and Materials That Influence Thinset Thickness
The right tools make controlling thinset depth easier. Here are the essentials:
- Notched Trowels: Available in ¼‑inch, ½‑inch, and larger sizes. Choose the notch size based on the tile dimensions discussed above.
- Margin Trowels: Ideal for tight corners where a full‑size trowel can’t reach.
- Leveling Systems: Clips and wedges keep tiles at a uniform height, especially useful for large‑format installations where how thick is thinset under tile matters more.
- Rubber Mallet: Provides gentle pressure to embed tiles without damaging them.
- Mixing Buckets and Drills: Ensure a consistent mixture, which in turn affects how the thinset spreads and its final thickness.
Investing in high‑quality tools reduces the risk of inconsistent thinset layers and helps you answer the question “how thick is thinset under tile?” with confidence.
Common Mistakes When Determining Thinset Thickness
Even seasoned installers can stumble over thinset thickness. Below are frequent errors and how to avoid them:
- Using the Wrong Trowel Size: A ¼‑inch trowel on a 12‑inch tile may leave insufficient thinset, leading to tile movement.
- Applying Thinset Too Quickly: Thinset begins to set within 30 minutes. Working in small sections ensures you can adjust the thickness before it hardens.
- Ignoring Substrate Irregularities: Overlooking dips or high spots can cause uneven thinset layers, compromising the final tile level.
- Over‑mixing the Mortar: Excessive mixing incorporates too much air, creating a weaker bond and inconsistent thickness.
- Skipping Coverage Checks: Failing to lift a tile and inspect the thinset pattern often results in low coverage, which is a sign the thinset is too thin.
By staying mindful of these pitfalls, you can maintain the proper thinset depth throughout the project.
Quick Tips for Perfect Thinset Application
- Use a medium‑bed thinset for uneven floors to achieve the desired thickness without excessive buildup.
- Maintain a consistent ambient temperature (50‑85 °F) to prevent thinset from setting too fast.
- Employ tile spacers to keep joints uniform; this also helps monitor thinset thickness indirectly.
- For wall installations, especially in wet areas, consider a waterproof thinset to protect against moisture infiltration.
- When in doubt, consult the tile manufacturer’s technical data sheet for specific thinset thickness recommendations.
Frequently Asked Questions
What happens if thinset is applied too thin?
A thin layer may not provide enough bonding strength, leading to tile cracks, loosened tiles, or grout failure over time. The tile can also develop “lippage,” where the edges are uneven.
Can I use regular mortar instead of thinset?
Regular mortar lacks the additives that give thinset its superior bonding and flexibility. For tile installations, especially in wet areas, thinset is the recommended choice.
Do I need a different thinset for bathroom versus kitchen tiles?
Both spaces benefit from a waterproof, mold‑resistant thinset, but bathroom installations near showers often require a higher‑performance, epoxy‑based thinset to handle constant moisture.
How long should I wait before grouting after the thinset has set?
Typically, wait 24 hours for standard thinset to cure fully. For rapid‑set thinset, 2‑4 hours may be sufficient, but always follow the product’s curing guidelines.
Is it necessary to use a leveling system for large tiles?
While not mandatory, a leveling system helps ensure a uniform surface and prevents lippage, especially when how thick is thinset under tile varies across a large area.
Can I reuse leftover thinset?
Thinset begins to set once mixed with water. Any leftover that has begun to harden should be discarded. Only small amounts that remain workable within the working time can be used for touch‑ups.
Understanding how thick is thinset under tile and following these best practices will give you confidence in every tile project, from a modest bathroom remodel to a sprawling kitchen renovation.
Ready to elevate your home’s style? Explore our guide on modern home styling with wood and white trim, discover the latest bedroom color trends, and learn the differences between polished and matte porcelain tiles for showers. These resources will inspire you to apply your new knowledge of thinset thickness to create cohesive, beautiful spaces.
By mastering the correct thinset depth, you not only protect your investment but also achieve a seamless, professional finish that enhances the overall aesthetic of your home. Happy tiling!