
Table of Contents
- DIY tray decoration with paint: Getting Started
- DIY tray decoration with paint: Choosing the Right Paint
- Preparing Your Tray for Painting
- DIY tray decoration with paint: Surface Prep Checklist
- Painting Techniques for a Professional Finish
- Brush vs. Roller
- Layering for Depth
- Stenciling and Masking
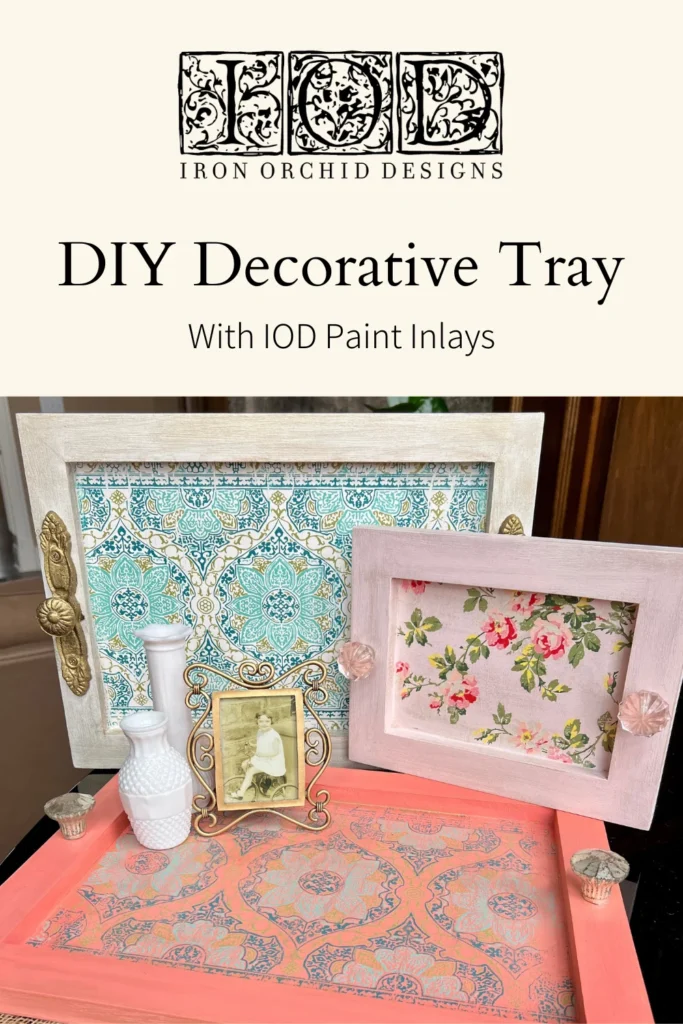
- Creative Design Ideas for Painted Trays
- Adding Finishing Touches and Protecting Your Artwork
- DIY tray decoration with paint: Final Inspection Checklist
- Quick Tips for DIY tray decoration with paint
- Common Mistakes in DIY tray decoration with paint
- Frequently Asked Questions
- What type of paint works best on a wooden tray?
- Can I paint a metal tray without rusting?
- How long should I wait before using the painted tray?
- Is it safe to use painted trays for serving food?
- How can I update the tray’s look without repainting the entire surface?
- Conclusion
DIY tray decoration with paint – Transform Your Space with Creative Color Ideas
Whether you’re looking to refresh a tired coffee table, add a pop of color to a bathroom vanity, or create a personalized gift, a painted tray can become the centerpiece of any room. The beauty of DIY tray decoration with paint lies in its versatility: you can choose bold hues for a statement piece or subtle tones for a minimalist vibe. With just a few tools, some patience, and a dash of imagination, homeowners and renters alike can achieve a professional‑looking finish without breaking the budget.
In this guide we’ll walk you through everything you need to know— from selecting the right tray and paint, to mastering application techniques, and finally sealing your masterpiece for lasting durability. Along the way you’ll find practical tips, common pitfalls to avoid, and inspiring ideas that fit seamlessly into modern home décor trends. By the end, you’ll be ready to pick up a brush and start creating a functional work of art that elevates your living space.
DIY tray decoration with paint: Getting Started
Before you dip your brush, it’s important to clarify the purpose of the tray you’re about to transform. Are you designing a decorative accent for a console table, a serving board for the kitchen, or a storage organizer for the entryway? The intended use will dictate the type of paint, finish, and protective coating you choose. For high‑traffic surfaces such as a coffee table, a durable acrylic enamel works well, while a soft matte latex is perfect for a decorative piece that won’t see heavy wear.
Start by gathering a few essential supplies:
- Plain wooden, metal, or acrylic tray (cleaned and sanded)
- Primer suitable for the tray material
- Acrylic or enamel paint in your chosen colors
- Fine‑grain sandpaper (120–220 grit)
- Paint brushes, foam rollers, and painter’s tape
- Clear sealant – matte, satin, or gloss depending on the desired sheen
Having these items on hand ensures a smooth workflow and reduces the temptation to rush, which often leads to uneven coverage or premature wear. When you feel ready, move on to the preparation stage, where surface treatment makes all the difference.
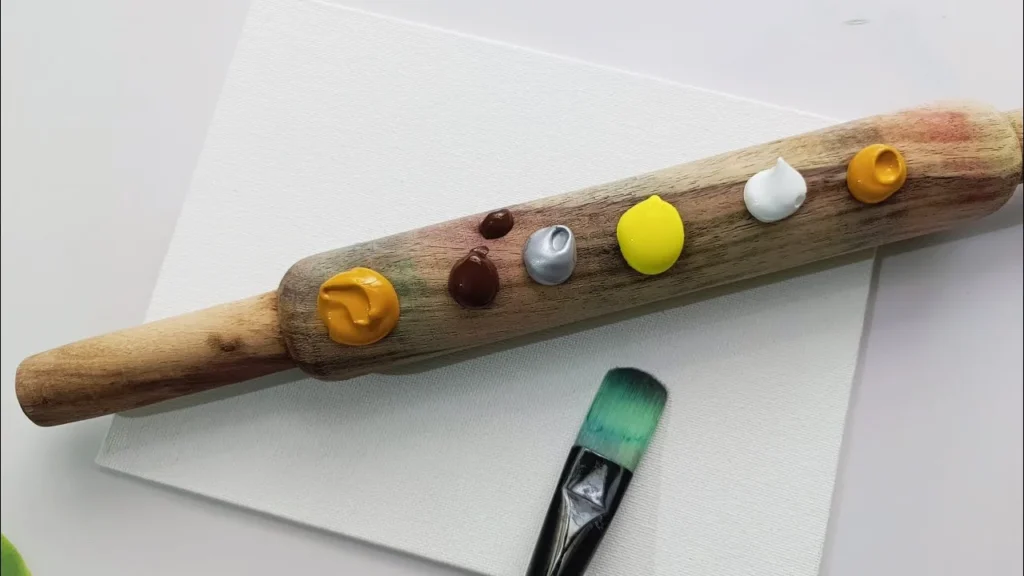
DIY tray decoration with paint: Choosing the Right Paint
The paint you select should match both the material of the tray and the environment where it will live. Water‑based acrylics are low‑odor, dry quickly, and are ideal for indoor projects. If you prefer a high‑gloss finish that mimics lacquer, opt for oil‑based enamel—just remember to work in a well‑ventilated area. For a truly unique look, consider metallic or chalk paints; these can be layered with stencils or masking to produce sophisticated patterns without the need for intricate hand‑painting.
When deciding on color, think about the surrounding décor. A muted pastel can soften a bold living‑room palette, while a deep navy or emerald adds drama to a neutral kitchen. The Neutral Kitchen Interior Inspiration article showcases how subtle tones can anchor a space, a principle that works equally well on a painted tray.
Preparing Your Tray for Painting

Surface preparation is the unsung hero of any successful DIY tray decoration with paint project. Even the most skilled painter will struggle to achieve an even coat on a glossy or uneven surface. Follow these steps to set a solid foundation:
- Clean the tray thoroughly – wipe away dust, grease, or residue with a mild soap solution, then let it dry completely.
- Sand the surface – using 120‑grade sandpaper, lightly roughen the tray to promote adhesion. For metal trays, a fine steel wool works well.
- Remove sanding dust – a tack cloth or vacuum will ensure no particles remain.
- Apply a primer – choose a primer compatible with your paint type. A single thin coat, brushed evenly, will seal the surface and prevent paint absorption.
- Let the primer cure – typically 30‑45 minutes for water‑based primers; follow the manufacturer’s instructions.
Skipping any of these steps can cause peeling, blotchy color, or a finish that feels rough to the touch. A well‑prepped tray not only looks better but also holds up longer against daily handling.
DIY tray decoration with paint: Surface Prep Checklist
Use this quick checklist before you open your paint can:
- Tray cleaned and dried?
- Surface sanded smooth?
- Dust removed?
- Primer applied and dry?
Once the checklist is complete, you’re ready to bring color to life.
Painting Techniques for a Professional Finish
Even if you’re new to DIY projects, mastering a few basic painting techniques can elevate your tray from “hand‑made” to “hand‑crafted.” Here are three reliable methods:
Brush vs. Roller
Brushes give you control over edges and are ideal for intricate designs or small surfaces. A synthetic‑bristle brush works best with acrylics, while natural bristles handle oil‑based enamel smoothly. Rollers, especially foam rollers, cover larger areas quickly and produce a uniform finish without brush marks. For a tray’s flat base, start with a roller, then switch to a brush for the edges and any decorative details.
Layering for Depth
Applying two thin coats rather than one thick coat prevents drips and ensures consistent color saturation. Allow each coat to dry for the recommended time—usually 20‑30 minutes for acrylics. If you desire a multi‑tone effect, let the first coat dry completely, then use masking tape to protect sections while you add a second hue. This technique creates a modern “color‑blocked” look that pairs well with contemporary interiors.
Stenciling and Masking
Stencils add pattern without demanding freehand precision. Secure the stencil with painter’s tape, apply paint using a stippling brush, and lift the stencil while the paint is still wet to avoid tearing. For geometric designs, consider using masking tape to form clean lines before painting. The result can echo the crisp aesthetics seen in Simple Kitchen Storage Décor Ideas, where structured shapes bring order to visual chaos.
Creative Design Ideas for Painted Trays
Now that you understand the basics, let your creativity roam. Below are ten inspiration‑rich ideas that demonstrate how versatile DIY tray decoration with paint can be:
- Ombré Gradient – blend three complementary colors from light to dark for a subtle, soothing effect.
- Geometric Color‑Blocking – use painter’s tape to create bold rectangles or triangles, perfect for a modern loft.
- Marble Effect – swirl white, gray, and gold paints with a dry brush to mimic natural stone.
- Botanical Stamps – press leaves or floral stamps into wet paint for an organic touch.
- Metallic Accents – add thin metallic lines or foil strips for a luxe finish.
- Chalk Paint Rustic Look – distress edges with sandpaper for a vintage farmhouse vibe.
- Monochrome Minimalism – choose a single muted hue and keep the design simple for a sleek look.
- Personalized Quote – use a fine brush or vinyl lettering to write an inspirational phrase.
- Abstract Brush Strokes – channel your inner painter with freeform, layered strokes.
- Seasonal Themes – swap colors and motifs to match holidays or seasonal décor changes.
These ideas can be mixed and matched to suit any room. A pastel ombré tray can brighten a bedroom nightstand, while a metallic geometric tray adds a striking focal point in a living‑room coffee table.
Adding Finishing Touches and Protecting Your Artwork
After the paint has cured, a protective layer safeguards your hard work from spills, scratches, and everyday wear. Choose a sealant based on the intended use:
- Matte Polyurethane – preserves a soft, non‑reflective look, ideal for decorative trays.
- Satin Varnish – offers a subtle sheen that enhances color depth without high gloss.
- Gloss Polycrylic – creates a high‑shine finish, perfect for modern, sleek aesthetics.
Apply the sealant in thin, even coats, allowing 2‑3 hours between layers. For trays that will hold food or drinks, ensure the sealant is labeled food‑safe. Once fully cured (usually 24‑48 hours), your tray is ready for everyday use or display.
DIY tray decoration with paint: Final Inspection Checklist
- All paint surfaces dry and even?
- Sealant applied and cured?
- Edges smooth, no brush marks?
- Tray stable on its legs or base?
Cross‑checking these items guarantees a polished, professional result that will impress guests and stand the test of time.
Quick Tips for DIY tray decoration with paint
- Test paint color on a small hidden area first to see how it reacts with the tray material.
- Use a light‑touch brushstroke; it’s easier to add more paint than to remove excess.
- Work in a well‑ventilated room to speed up drying and reduce fumes.
- Keep a damp cloth nearby to wipe away smudges while the paint is still wet.
- Store leftover paint in a sealed container for future touch‑ups.
Common Mistakes in DIY tray decoration with paint
Even seasoned crafters fall into traps that can compromise the final look. Recognizing these pitfalls early saves time and material:
- Skipping the primer – leads to uneven absorption and flaking later on.
- Applying thick coats – results in drips, brush marks, and extended drying times.
- Rushing the drying process – touching the surface too soon creates fingerprints and smears.
- Neglecting edge protection – unsealed edges are prone to chipping, especially on metal trays.
- Choosing the wrong sealant – a glossy finish on a matte design can look unintentionally harsh.
By addressing these issues before they arise, you’ll enjoy a smoother workflow and a finished product that looks intentionally crafted.
Frequently Asked Questions
What type of paint works best on a wooden tray?
Acrylic latex or acrylic enamel provides excellent coverage, dries quickly, and is low‑odor. For a more durable finish, especially on high‑traffic surfaces, opt for oil‑based enamel and follow safety precautions.
Can I paint a metal tray without rusting?
Yes. Start with a rust‑inhibiting primer designed for metal, then apply acrylic or enamel paint. Finish with a clear, food‑safe sealant if the tray will hold dishes.
How long should I wait before using the painted tray?
Allow the paint to cure for at least 24 hours and the sealant for an additional 24‑48 hours. This ensures the colors have fully set and the protective layer is hardened.
Is it safe to use painted trays for serving food?
Only if you use food‑grade paint or a sealant that is explicitly labeled as food‑safe. Otherwise, keep painted trays decorative or use a separate, unpainted surface for direct food contact.
How can I update the tray’s look without repainting the entire surface?
Consider adding removable decals, a fresh layer of chalk paint on the edges, or a new sealant in a different sheen. Small updates can refresh the piece without a full repaint.
Conclusion
DIY tray decoration with paint offers a rewarding blend of creativity, functionality, and personal expression. By selecting the right materials, preparing the surface meticulously, and applying thoughtful painting techniques, you can produce a tray that feels both handcrafted and professionally finished. Whether you aim to complement a modern living‑room aesthetic, add a splash of color to a minimalist bedroom, or craft a thoughtful gift, the possibilities are virtually endless. Remember to protect your work with an appropriate sealant, avoid common pitfalls, and enjoy the process of turning a simple tray into a statement piece. For more inspiration, explore other home styling ideas on The Homara and let your next project shine.