

Table of Contents
- Understanding Ceiling Structure Before You Drill
- Tools of the Trade: What You Need for a Clean, Safe Drill
- Selecting the Proper Drill Bit
- Choosing a Stud Finder with Joist Detection
- Safety Gear You Can’t Skip
- Step‑by‑Step Process: How to Safely Drill Through Joists in a Finished Ceiling
- Step 1 – Locate the Joist Centerline
- Step 2 – Verify Clearance for Utilities
- Step 3 – Create a Small Pilot Hole
- Step 4 – Enlarge the Hole with the Correct Bit
- Step 5 – Clean Up and Reinforce If Needed
- Design Considerations: Integrating the Hole Into Modern Décor
- Choosing Fixtures That Complement Your Style
- Finishing the Edge for a Polished Look
- Coordinating with Wall and Floor Treatments
- Quick Tips for a Smooth Drilling Experience
- Common Mistakes and How to Avoid Them
- Frequently Asked Questions
- Can I drill through a joist without compromising its structural strength?
- Do I need a permit to drill through joists for lighting?
- What’s the best way to locate joists behind plaster?
- Is it safe to use a hammer drill on a finished ceiling?
- How do I repair a small crack caused by drilling?
- Can I run speaker wires through the same hole I drilled for a light?
- Bringing It All Together: From Safety to Style
How to Safely Drill Through Joists in a Finished Ceiling
Whether you’re installing a new chandelier, running speaker wiring, or creating a subtle recessed lighting scheme, the task often comes down to one critical question: how to safely drill through joists in a finished ceiling without compromising structural integrity or creating costly repairs. For homeowners who love to blend modern décor with practical upgrades, mastering this skill can open up endless design possibilities while protecting the safety of the space.
In many older homes, the ceiling is already finished with plaster, drywall, or decorative panels, making it tempting to simply guess where the joists lie and start drilling. However, an uninformed approach can lead to cracked plaster, damaged wiring, or, worst of all, weakened load‑bearing members. This guide walks you through every step— from locating joists to choosing the right tools and protecting surrounding finishes—so you can confidently complete your project and keep your interior design vision intact.
By the end of this article you’ll understand the best practices for planning, measuring, and executing a clean, safe hole in a finished ceiling. You’ll also pick up practical tips that align with modern home styling, ensuring that the final result looks intentional rather than a patched afterthought.
Understanding Ceiling Structure Before You Drill

Before you even pick up a drill, it’s essential to know what lies behind that smooth surface. Most residential ceilings consist of a series of wooden joists spaced 16 inches on center, covered by drywall or plaster. These joists carry the load of the floor above and any attached fixtures, so any modification must respect their strength.
In addition to joists, you may encounter hidden utilities: electrical wiring, HVAC ducts, fire sprinklers, or even plumbing pipes. A thorough inspection helps you avoid accidental punctures that could lead to expensive repairs or safety hazards. The following checklist will keep you organized:
- Identify joist direction using a stud finder or a small test hole.
- Mark the exact spot where the fixture or conduit will be placed.
- Check for live wires with a non‑contact voltage detector.
- Locate any HVAC ducts or sprinkler heads that may intersect the drilling line.
When you have a clear map of the ceiling’s anatomy, you’ll be ready to answer the core question: how to safely drill through joists in a finished ceiling without compromising structure or aesthetics.
Tools of the Trade: What You Need for a Clean, Safe Drill

The right tools make the difference between a seamless installation and a cracked ceiling. Below is a curated list of equipment that balances precision, safety, and efficiency.
Selecting the Proper Drill Bit
For wood joists, a high‑speed steel (HSS) or a carbide‑tipped auger bit works best. If you’re drilling through plaster or drywall first, start with a ¼‑inch spade bit to create a pilot hole, then switch to a larger wood‑specific bit. A hole‑saw is ideal for larger openings (e.g., for recessed lights) because it cuts cleanly and reduces vibration.
Choosing a Stud Finder with Joist Detection
A basic magnetic stud finder can locate metal nails, but a more advanced model with deep‑scan capabilities will detect wooden joists through multiple layers of finish. Some devices even offer live‑wire detection, which is a valuable safety feature when you’re trying to determine how to safely drill through joists in a finished ceiling.
Safety Gear You Can’t Skip
- Safety glasses – protect your eyes from dust and debris.
- Dust mask or respirator – especially important when drilling through plaster.
- Gloves – give you a better grip on the drill and keep hands clean.
- Ear protection – power drills can be loud in enclosed spaces.
Having these tools at hand not only speeds up the process but also ensures you stay within best practices for interior design projects that demand a polished finish.
Step‑by‑Step Process: How to Safely Drill Through Joists in a Finished Ceiling
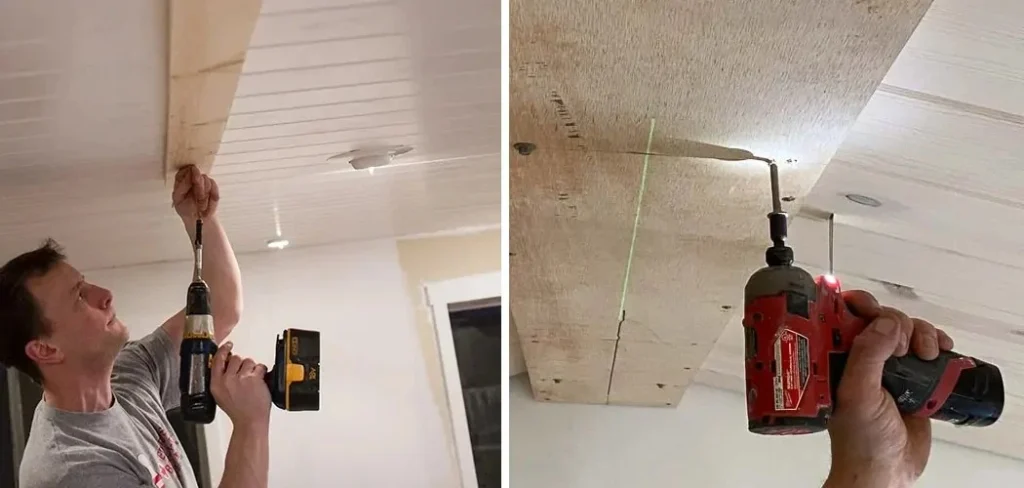
Now that you know the layout and have the right equipment, follow this systematic approach to achieve a professional result.
Step 1 – Locate the Joist Centerline
Place the stud finder on the ceiling and slide it slowly across the area where the fixture will sit. Mark the joist edges with a thin pencil line; the centerline is where you’ll aim to drill. If you’re working in a room with decorative crown molding, start the scan a few inches away to avoid false readings.
Step 2 – Verify Clearance for Utilities
Before making any cuts, run a non‑contact voltage tester over the marked line. This step confirms that no live wires are present. For added assurance, turn off the circuit breaker for the room and double‑check with a multimeter.
Step 3 – Create a Small Pilot Hole
Using a ¼‑inch spade bit, drill a shallow pilot hole just deep enough to break through the surface layer. This hole serves two purposes: it confirms you’re not hitting a hidden pipe and it provides a guide for the larger bit. Keep the drill perpendicular to the ceiling to avoid angled cuts that could weaken the joist.
Step 4 – Enlarge the Hole with the Correct Bit
Swap to the appropriate wood‑specific bit (e.g., 1‑inch auger) and slowly increase the depth until you reach the required size for your fixture. Apply steady pressure—don’t force the drill, as this can split the joist fibers. Periodically withdraw the bit to clear debris and maintain accuracy.
Step 5 – Clean Up and Reinforce If Needed
After the hole is drilled, use a vacuum or brush to remove dust from the opening. If the fixture will bear weight (like a heavy chandelier), consider installing a short piece of metal or wooden backing inside the joist to distribute the load. This reinforcement preserves structural integrity while keeping the aesthetic clean.
Following these steps will answer the core question of how to safely drill through joists in a finished ceiling with confidence and precision.
Design Considerations: Integrating the Hole Into Modern Décor
Even the most technically perfect drill job can feel out of place if it doesn’t blend with the room’s design language. Here are a few ways to make the new opening a seamless part of your interior design narrative.
Choosing Fixtures That Complement Your Style
If you’re installing lighting, opt for fixtures that echo the clean lines of modern décor—think sleek brushed nickel or matte black pendants. For a softer look, a semi‑flush recessed light with a dimmable LED module can create ambience without drawing attention to the ceiling cutout.
Finishing the Edge for a Polished Look
After drilling, the raw wood or drywall edge can be unsightly. Use a small round file or a sandpaper disc to smooth the perimeter. For a truly finished appearance, apply a thin coat of joint compound, feather it into the surrounding ceiling, and prime before painting.
Coordinating with Wall and Floor Treatments
Consider the color palette of the room. If you have a neutral ceiling, a white or light‑gray paint will hide any minor imperfections. For bold ceilings—perhaps a deep navy or charcoal—use a paint that matches the existing finish to maintain visual continuity.
These design touches ensure that the process of learning how to safely drill through joists in a finished ceiling also contributes to a cohesive, modern aesthetic.
Quick Tips for a Smooth Drilling Experience
- Mark both joist edges before drilling; it reduces guesswork.
- Use a piece of masking tape over the drill point to prevent plaster chipping.
- Drill at a slow speed when nearing the joist core to avoid splintering.
- Keep a scrap of drywall handy to patch any accidental overshoot.
- Test the fixture’s weight on a temporary support before final installation.
Common Mistakes and How to Avoid Them
Even seasoned DIYers can stumble when tackling ceiling work. Recognizing typical errors helps you stay on track.
- Drilling at an angle: This weakens the joist and can cause cracks. Always keep the drill perpendicular.
- Ignoring hidden wiring: A simple voltage test can prevent dangerous electrocution.
- Using the wrong bit size: An oversized bit forces the joist to split; start small and work up.
- Skipping the reinforcement step: Heavy fixtures need added support to keep the ceiling safe.
- Failing to clean the opening: Dust left inside can interfere with wiring or reduce fixture stability.
By keeping these pitfalls in mind, your journey of learning how to safely drill through joists in a finished ceiling becomes smoother and more reliable.
Frequently Asked Questions
Can I drill through a joist without compromising its structural strength?
Yes, provided the hole is no larger than one‑third the depth of the joist and is centered away from the joist’s edge. Reinforcing the area with a backing plate adds extra safety for heavier fixtures.
Do I need a permit to drill through joists for lighting?
Most residential lighting installations don’t require a permit, but if you’re adding structural support or altering electrical circuits, check your local building codes. When in doubt, consult a licensed contractor.
What’s the best way to locate joists behind plaster?
A deep‑scan stud finder works well, but you can also tap the ceiling lightly; joists produce a solid, less resonant sound compared to plaster alone. Combining both methods gives the highest accuracy.
Is it safe to use a hammer drill on a finished ceiling?
Hammer drills are designed for masonry and can damage drywall or plaster. Stick to a standard drill with appropriate wood bits for joist work to avoid unnecessary damage.
How do I repair a small crack caused by drilling?
Apply a thin layer of joint compound over the crack, feather the edges, sand smooth once dry, then prime and paint to match the surrounding ceiling.
Can I run speaker wires through the same hole I drilled for a light?
Yes, as long as the hole is sized to accommodate both the fixture and the wire bundle without crowding. Keep wires separated from electrical cables to meet code requirements.
These answers address the most common concerns for anyone researching how to safely drill through joists in a finished ceiling while maintaining a stylish home environment.
Bringing It All Together: From Safety to Style
Understanding the structural layout, equipping yourself with the right tools, and following a methodical drilling process are the pillars of safely navigating a finished ceiling. Once the hole is made, thoughtful design choices—such as selecting fixtures that complement your modern décor, finishing the edge cleanly, and coordinating colors—turn a technical task into a design triumph.
Remember, the goal isn’t just to get a hole through the joist; it’s to create an opening that enhances the room’s functionality and visual appeal without compromising safety. When you combine technical precision with interior design savvy, the result feels intentional, seamless, and truly modern.
For more inspiration on integrating functional upgrades into stylish spaces, explore our guide on small home storage ideas, or learn how to attach a 4×4 at 90 degrees for custom shelving that can double as a decorative accent.
Now you’re equipped with the knowledge to answer the essential question—how to safely drill through joists in a finished ceiling—while keeping your home’s aesthetic on point. Happy drilling, and enjoy the fresh, modern look that follows!