Table of Contents
- how to remove shiplap a step by step guide – Overview of the Process
- how to remove shiplap a step by step guide – Safety First
- Preparing the Work Area and Gathering Tools
- Detaching the First Row of Shiplap
- Removing the Remaining Boards Safely
- Post‑Removal Clean‑Up and Wall Preparation
- Re‑using or Disposing of Old Shiplap
- Quick Tips for Shiplap Removal
- Common Mistakes and How to Avoid Them
- Frequently Asked Questions
How to Remove Shiplap: A Step‑by‑Step Guide for Homeowners
Shiplap has enjoyed a resurgence in modern interior design, but there comes a time when the look no longer fits your vision, or you need to replace damaged boards. Removing shiplap can feel intimidating, especially if you’ve never taken apart wall paneling before. The good news is that with the right preparation, tools, and a systematic approach, the process can be straightforward, clean, and even enjoyable.
This article walks you through how to remove shiplap a step by step guide that covers everything from safety precautions to post‑removal wall preparation. Whether you’re a seasoned DIYer or a first‑time homeowner tackling a renovation, you’ll find practical tips, common pitfalls to avoid, and answers to the most frequent questions about shiplap removal.
By the end of this guide you’ll feel confident enough to strip away old paneling, protect your underlying walls, and set the stage for the next design chapter—whether that means painting, installing new wood, or exposing brick for an industrial vibe.
how to remove shiplap a step by step guide – Overview of the Process
Before you dive into the physical work, it helps to visualize the entire workflow. The removal process can be broken into four main phases: preparation, detachment, board removal, and cleanup. Each phase builds on the previous one, ensuring you maintain the integrity of the underlying wall and minimize dust and debris.
In this guide, we’ll discuss the specific tools you’ll need, safety measures, and the most efficient techniques for loosening each board without causing unnecessary damage. By following the steps in order, you’ll avoid the common frustration of “stubborn” panels that crack or split, which can lead to costly repairs later.
how to remove shiplap a step by step guide – Safety First
- Wear protective gear: safety goggles, dust mask, and gloves are non‑negotiable.
- Turn off electricity: shiplap often covers outlets or switches; shut off the circuit to prevent shocks.
- Test for asbestos: if the shiplap was installed before the 1980s, have a professional test a sample before proceeding.
Keeping safety at the forefront not only protects you but also ensures the work proceeds without interruptions.
Preparing the Work Area and Gathering Tools
A tidy work zone is the foundation of an efficient removal. Clear furniture, lay drop cloths, and tape off doorways to contain dust. You’ll also want to set up a staging area for the removed boards—whether you plan to reuse them or recycle them.
Here’s a concise checklist of the essential tools:
- Utility knife (for cutting caulk and paint)
- Reciprocating saw with a fine‑tooth blade (optional for stubborn nails)
- Pry bar or flat‑head screwdriver (for prying boards)
- Hammer and nail puller
- Stud finder (to locate framing behind the shiplap)
- Dust sheet or heavy‑duty canvas drop cloths
- Vacuum with HEPA filter (for cleanup)
If you’re dealing with painted shiplap, a range hood comparison guide can help you choose proper ventilation to keep the air clear while you work.
Detaching the First Row of Shiplap
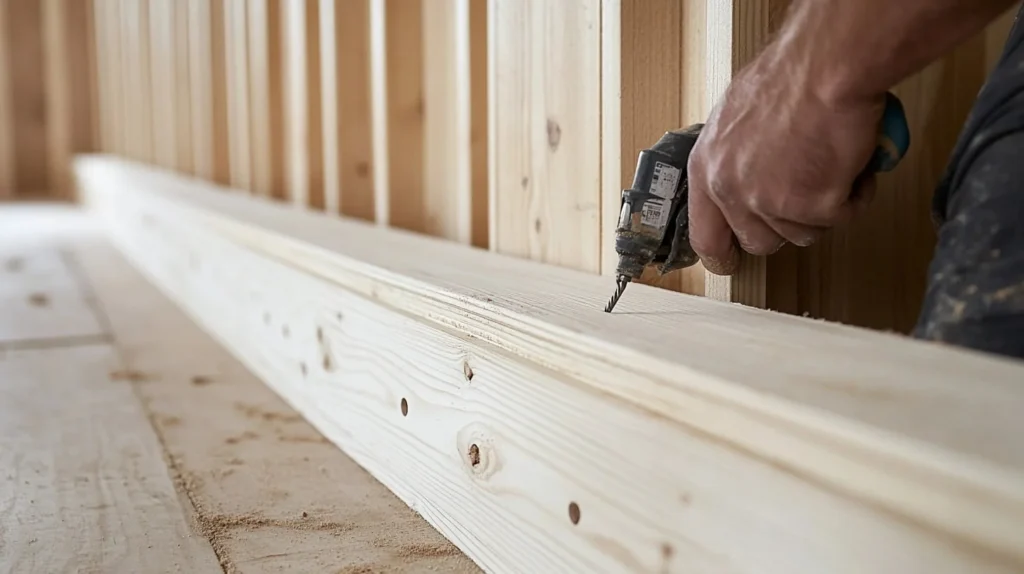
The first row (usually the bottom) is the key to unlocking the rest of the wall. Start by locating the nail heads or screws that secure the board. Often, shiplap is nailed directly into studs, with fasteners concealed in the groove.
- Score the caulk: Use a utility knife to cut through any caulking or paint sealing the board edges. This prevents tearing the next board when you pry.
- Insert a pry bar: Slip the thin end of a flat pry bar into the groove at the board’s end. Gently lever upward to expose the nail heads.
- Remove fasteners: Use a hammer and nail puller to extract nails. If nails are stubborn, a reciprocating saw set to a low speed can cut them cleanly.
- Lift the board: Once the fasteners are cleared, lift the board away from the wall. Work slowly to avoid snapping the board, especially if you intend to reuse it.
After the first board is removed, you’ll see the tongue of the next board. This “key” will make subsequent removal easier, as the tongue provides a natural lever point.
Removing the Remaining Boards Safely
With the first row gone, the rest of the panels can be removed using the same technique, but with a few adjustments to keep the work smooth.
- Use the tongue as a handle: Insert the pry bar under the exposed tongue of the next board, applying gentle pressure to lift it.
- Work from top to bottom: Gravity assists when you start at the bottom and move upward, reducing the risk of the board snapping.
- Watch for hidden nails: Some installers used hidden fasteners that run perpendicular to the board. A stud finder can help you locate them.
If you encounter a board that refuses to budge, backtrack a few inches and re‑score the caulk. This often releases the grip without damaging the underlying drywall.
Post‑Removal Clean‑Up and Wall Preparation
Once all the shiplap is off, you’ll be left with a wall that may have nail holes, residual adhesive, or uneven surfaces. Proper cleanup sets the stage for a flawless finish, whether you’re painting, installing new paneling, or exposing brick.
- Remove nail remnants: Use a nail puller or pliers to extract any protruding nails.
- Scrape off old adhesive: A putty knife works well for leftover glue or caulk.
- Sand the surface: Lightly sand to smooth out any gouges.
- Patch holes: Apply joint compound to larger nail holes, feather the edges, and sand once dry.
- Prime the wall: If you plan to paint, a coat of primer will seal the surface and improve color adherence.
For inspiration on how to treat the newly exposed wall, check out our article on choosing the right wall paneling. It offers ideas for turning a plain surface into a design statement.
Re‑using or Disposing of Old Shiplap
Before you toss the removed boards, consider whether they can be salvaged. Re‑using shiplap adds character to other rooms—think accent walls, ceiling beams, or even rustic shelving.
- Inspect each board: Look for rot, warping, or severe nail damage. Boards in good condition can be sanded and refinished.
- Store properly: Stack flat in a dry area, using spacers to prevent warping.
- Recycle options: If the wood is beyond salvage, many municipalities accept untreated wood for recycling.
Choosing to repurpose shiplap aligns with sustainable design trends and can save you money on new materials.
Quick Tips for Shiplap Removal
- Start with a small test area to gauge how the boards are fastened.
- Use a heat gun on stubborn paint to soften the adhesive.
- Keep a bucket handy for nails; you’ll collect a lot.
- Work in sections to prevent dust from spreading throughout the house.
- Label each board if you plan to reuse them; orientation matters.
Common Mistakes and How to Avoid Them
Skipping the caulk cut. Skipping this step often leads to tearing the next board’s tongue, which can cause additional repair work.
Using excessive force. Over‑prying can crack the underlying drywall. Apply steady, moderate pressure and let the tools do the work.
Neglecting dust control. Shiplap removal creates fine wood dust that can linger. Seal off HVAC vents and use a shop‑vac with a HEPA filter.
Discarding reusable boards. Evaluate each piece; reclaimed wood is a valuable design resource that many readers appreciate. For more ideas on reusing wood, see our guide on DIY décor with ceramic décor pieces, which explores creative repurposing.
Frequently Asked Questions
Can I remove shiplap without damaging the drywall behind it?
Yes, by scoring caulk, gently prying with a thin bar, and removing nails carefully, you can preserve the drywall. Patience is key; avoid using crowbars that can gouge the surface.
Do I need to turn off electricity before starting?
Always turn off the circuit for any outlets or switches that the shiplap covers. This prevents accidental shocks and makes it safer to work around wiring.
What if the shiplap was painted over multiple times?
Multiple paint layers can make boards harder to pry. A heat gun or a paint stripper applied lightly to the edge can soften the paint, making it easier to separate the boards.
How should I handle nails that are rusted or broken?
Use a reciprocating saw with a metal cutting blade to cut through stubborn nails. For broken nail heads, a nail punch and pliers can extract the remaining shank.
Is it possible to expose brick after removing shiplap?
If brick is behind the shiplap, remove the boards as described, then clean the brick surface. You may need to use a masonry brush and a sealant to protect the brick from moisture.
Can I install new shiplap over the old drywall without removing the old boards?
While it’s possible, it adds thickness and may affect trim alignment. Removing the old shiplap ensures a flatter surface and better adhesion for the new installation.
Removing shiplap doesn’t have to be a daunting chore. By following this how to remove shiplap a step by step guide, you’ll protect your walls, keep the work area tidy, and set the stage for the next phase of your interior design project.
Now that you’ve learned the systematic approach, gather your tools, protect your space, and start the transformation. Whether you’re updating a living room, bedroom, or kitchen, the clean canvas you create will invite fresh design possibilities and keep your home looking modern and intentional.