
Table of Contents
- Understanding the Role of Cabinet Filler Strips
- How to Install Cabinet Filler Strips: Tools and Materials Checklist
- Essential Tools
- Materials
- Step‑by‑Step Process: How to Install Cabinet Filler Strips
- Design Considerations: Making Filler Strips Part of Your Aesthetic
- Quick Tips for a Flawless Installation
- Common Mistakes and How to Avoid Them
- Frequently Asked Questions
- Can I use cabinet filler strips on existing cabinets without removing them?
- What’s the difference between solid wood and MDF filler strips?
- Do I need to paint the filler strips before or after installation?
- How do I handle uneven walls when installing filler strips?
- Are filler strips necessary for open‑shelf kitchen designs?
- Can I replace a damaged filler strip without redoing the whole cabinet?
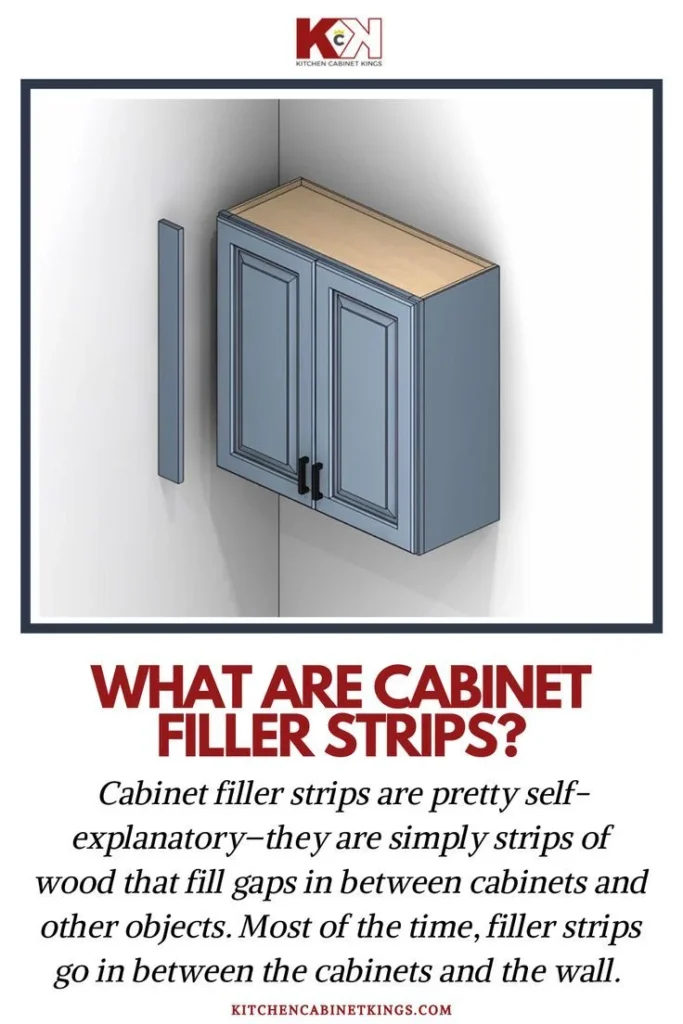
Cabinet filler strips, sometimes called end panels or side fillers, are thin pieces of wood or MDF that cover the gaps between cabinets and walls, appliances, or adjoining cabinets. While they might seem like a minor detail, the right filler strips give a kitchen a polished, custom‑built look and prevent dust from gathering in hard‑to‑reach corners.
Whether you’re remodeling a dated kitchen, moving into a new home, or simply want a cleaner aesthetic, learning how to install cabinet filler strips can save you time and money compared to hiring a carpenter. This guide walks you through the process from planning to finishing touches, offering practical advice that fits both seasoned DIYers and beginners alike.
We’ll also sprinkle in a few design ideas—like pairing filler strips with modern hardware or using them to highlight a bold backsplash—to keep your project stylish as well as functional. By the end, you’ll feel confident tackling this detail‑oriented task and elevating your interior design.
Understanding the Role of Cabinet Filler Strips
Before you grab a saw, it helps to know why filler strips matter. They serve three main purposes:
- Visual continuity: They hide unsightly gaps, creating a seamless line between cabinets and adjacent surfaces.
- Structural support: When installed correctly, they reinforce the cabinet frame, especially on the ends of tall pantry units.
- Protection: They keep moisture, crumbs, and small objects from slipping behind cabinets where cleaning becomes difficult.
Choosing the right material—solid wood, MDF, or PVC—depends on your kitchen’s humidity level, budget, and the finish you plan to apply. For a high‑gloss modern kitchen, a painted MDF strip works well; for a warm, traditional feel, a hardwood strip stained to match existing cabinets is ideal.
How to Install Cabinet Filler Strips: Tools and Materials Checklist

Gathering the right tools before you start makes the installation smoother. Here’s a concise checklist:
Essential Tools
- Measuring tape and a sturdy ruler
- Table saw or circular saw with a fine‑tooth blade
- Level and square
- Clamps (preferably spring clamps)
- Drill with countersink bit
- Finish nails or 1‑inch brad nails
- Wood glue (PVA or hide glue for a stronger bond)
- Sanding block or orbital sander
- Paint or stain and finishing supplies
Materials
- Cabinet filler strip stock (cut to the appropriate width—usually 1/4” to 1/2”)
- Matching finish (paint, varnish, or stain)
- Protective edge tape (optional, for a clean look)
Having these items on hand ensures you won’t need to pause mid‑project, keeping momentum and precision high.
Step‑by‑Step Process: How to Install Cabinet Filler Strips

The following numbered steps break down the entire installation, from measurement to final trim work.
- Measure the Gap Accurately. Use a tape measure to determine the distance from the cabinet edge to the wall or adjacent appliance. Record the length at three points (top, middle, bottom) to account for any wall irregularities.
- Cut the Strip to Length. Set your saw to the exact width you need (commonly 1/4” or 1/2”). Cut the strip to the longest measured length; you’ll trim the ends later for a perfect fit.
- Dry‑Fit the Strip. Place the cut piece against the cabinet without fastening. Use a level to ensure it sits flush vertically and horizontally. Mark any excess at the ends.
- Trim the Ends. If the strip extends beyond the cabinet, trim the ends using a fine‑tooth saw or a miter box for a clean 45° angle, especially when the strip meets a corner.
- Apply Adhesive. Spread a thin bead of wood glue along the back of the strip. This adds stability and reduces the number of nails needed.
- Secure with Nails. Position the strip, then drive finish nails every 6–8 inches using a nail set to avoid surface dents. For a cleaner look, countersink the nails and fill the holes with wood filler.
- Clamp and Let Dry. Clamp the strip gently for 10–15 minutes while the glue sets. This step ensures a tight bond and prevents movement during sanding.
- Sanding and Finishing. Sand the surface lightly to smooth any imperfections. Apply your chosen paint or stain, following the grain direction. Finish with a protective coat of polyurethane for durability.
- Install Protective Edge Tape (Optional). If you want a seamless transition between the filler strip and the cabinet face, apply edge tape before painting. This prevents paint bleed and gives a crisp line.
By following these steps, you’ll achieve a professional‑looking result that blends the filler strip with the rest of your cabinetry.
Design Considerations: Making Filler Strips Part of Your Aesthetic
Cabinet filler strips are more than just functional; they can enhance the visual rhythm of your kitchen. Here are three design ideas to consider:
- Color‑Coordinated Finish: Paint the strip the same color as the cabinet doors for an invisible effect, or use a contrasting hue to create a subtle accent line.
- Integrated Lighting: Add a thin LED strip behind the filler for a soft glow that highlights the cabinet edge—especially effective in modern kitchens with dark cabinetry.
- Hardware Matching: If you’re updating handles, choose a finish that matches the strip’s material. A brushed‑nickel strip pairs well with stainless steel hardware, creating a cohesive look.
For more inspiration on cohesive design, check out our article on choosing the perfect entry door for your home. The same principles of color and material harmony apply to filler strips.
Quick Tips for a Flawless Installation
- Use a moisture‑resistant material if your kitchen tends to be steamy.
- Apply painter’s tape to protect cabinet surfaces while nailing.
- Test the finish on a scrap piece before applying it to the strip.
- Work in a well‑ventilated area when using paints or stains.
- Keep a small scrap of the filler strip for future repairs or replacements.
Common Mistakes and How to Avoid Them
Even experienced DIYers can stumble on a few pitfalls. Recognizing them early saves time and money.
- Skipping the Dry‑Fit: Measuring without a dry‑fit often leads to gaps or the need for excessive trimming. Always place the strip before gluing.
- Using the Wrong Nail Length: Nails that are too long can protrude through the strip, ruining the finish. Stick to 1‑inch brads for most filler strip thicknesses.
- Neglecting Wall Irregularities: Walls are rarely perfectly flat. If you notice a sloping wall, shim the strip lightly with a thin piece of cardboard before nailing.
- Rushing the Finish: Applying paint before the glue fully cures can cause the strip to shift. Wait at least 24 hours for the adhesive to set.
Frequently Asked Questions
Can I use cabinet filler strips on existing cabinets without removing them?
Yes. Most filler strips are installed onto the cabinet face without dismantling the cabinet. Just ensure the area is clean, measure precisely, and use a short nail length to avoid damaging the cabinet interior.
What’s the difference between solid wood and MDF filler strips?
Solid wood offers natural grain and can be stained, making it ideal for traditional or high‑end kitchens. MDF is smoother, takes paint well, and is generally more affordable, but it may swell in high‑humidity environments.
Do I need to paint the filler strips before or after installation?
Both methods work, but painting after installation ensures seamless color matching with any touch‑ups later. If you prefer a clean edge, paint the strip first, then use edge tape to prevent paint bleed during final sanding.
How do I handle uneven walls when installing filler strips?
Use thin shims—like pieces of cardboard or wood—to fill gaps where the wall isn’t flush. Clamp the strip and shim together, then nail and glue as usual.
Are filler strips necessary for open‑shelf kitchen designs?
Even in open‑shelf setups, filler strips can hide gaps between the back of a shelf and the wall, creating a more intentional look and preventing dust buildup.
Can I replace a damaged filler strip without redoing the whole cabinet?
Absolutely. Keep a scrap of the original material. Remove the old strip, sand the area lightly, and install a new piece using the same glue and nail method.
Installing cabinet filler strips may sound like a small project, but the impact on your kitchen’s overall appearance is significant. With careful measurement, the right tools, and a few design tricks, you’ll enjoy a sleek, finished look that feels custom‑crafted.
Ready to start? Grab your materials, follow the steps outlined above, and watch your kitchen transform from “bare” to beautifully seamless. For more DIY inspiration, explore our guide on easy DIY home décor ideas to transform any space. Happy installing!