
Table of Contents
- Why Installing a Range Hood on a Slanted Ceiling Is Different
- How to Install a Range Hood on a Slanted Ceiling: The Essential Tools
- Step 1: Measure the Ceiling Angle and Determine Placement
- Step 2: Choose the Right Ductwork and Plan the Exhaust Path
- Step 3: Install the Mounting Brackets at the Correct Angle
- Step 4: Wire the Range Hood Safely
- Step 5: Attach the Hood, Connect Ducting, and Seal Everything
- Quick Tips for a Flawless Installation
- Common Mistakes and How to Avoid Them
- Frequently Asked Questions
- Can I install a range hood on a slanted ceiling without a professional?
- Do I need a vent to the outside, or can I use a recirculating hood?
- What size duct should I use for a 900 cubic‑foot‑per‑minute hood?
- How do I hide the ductwork for a cleaner look?
- Is it necessary to balance the fan speed with the stove’s burners?
How to Install a Range Hood on a Slanted Ceiling
Cooking in a kitchen with a slanted ceiling can be a design delight, but it also presents a unique set of challenges when you want to add a functional range hood. A properly installed hood not only removes smoke and odors, it also becomes a stylish focal point that ties the room together. Whether you’re renovating a farmhouse‑style kitchen or a modern loft with vaulted ceilings, understanding the specific steps for a sloped roof will save you time, money, and frustration.
In this guide we’ll walk you through every stage of the process—from measuring the angle and selecting the right hood model to wiring, venting, and finishing touches. You’ll learn practical tips that blend safety with aesthetics, so your new range hood looks as good as it works. By the end, you’ll feel confident tackling this project yourself or guiding a professional installer with clear expectations.
Why Installing a Range Hood on a Slanted Ceiling Is Different

A slanted ceiling changes the geometry of the vent path, the mounting plane, and the airflow dynamics. Unlike a flat ceiling where the hood sits parallel to the floor, a sloped surface means the hood must be angled to maintain proper clearance from the cooktop while still directing exhaust upward. This angle affects duct length, the type of ducting you can use, and the positioning of the electrical box. Ignoring these variables can lead to reduced ventilation efficiency, noisy operation, or even premature wear on the motor.
Choosing a hood designed for angled installations—often labeled “tilt‑mount” or “adjustable”—makes the job far easier. These models include brackets that can be set at the exact degree of your ceiling, ensuring a tight seal and a clean look. When you pair the right hardware with accurate measurements, the final result feels seamless, as if the hood were always meant for that space.
How to Install a Range Hood on a Slanted Ceiling: The Essential Tools
Before you start, gather the following tools and materials. Having everything on hand reduces interruptions and helps you maintain a steady workflow.
- Adjustable range hood designed for angled ceilings
- Stud finder and laser level
- Measuring tape and protractor or digital angle finder
- Drill with wood and metal bits
- Sheet metal screws and lag bolts
- Flexible or rigid duct (preferably insulated metal)
- Electrical cable, wire nuts, and a junction box
- Silicone sealant and foil tape
- Safety glasses, ear protection, and a dust mask
Step 1: Measure the Ceiling Angle and Determine Placement
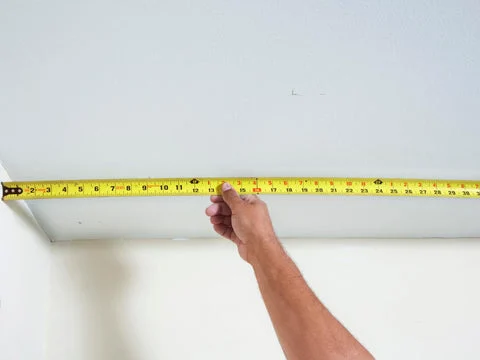
Accurate measurements are the foundation of a successful installation. Begin by locating the joists or rafters using a stud finder. Mark the exact spot where the center of the hood will align with the cooktop, typically 30 inches above the burners for standard hoods.
Next, use a protractor or a digital angle finder to record the ceiling’s pitch. Most slanted ceilings range from 10 to 30 degrees. Write this angle down; you’ll need it when setting the mounting brackets. Verify the distance from the ceiling to the floor at the hood’s location to ensure there’s enough headroom once the hood is angled.
Step 2: Choose the Right Ductwork and Plan the Exhaust Path
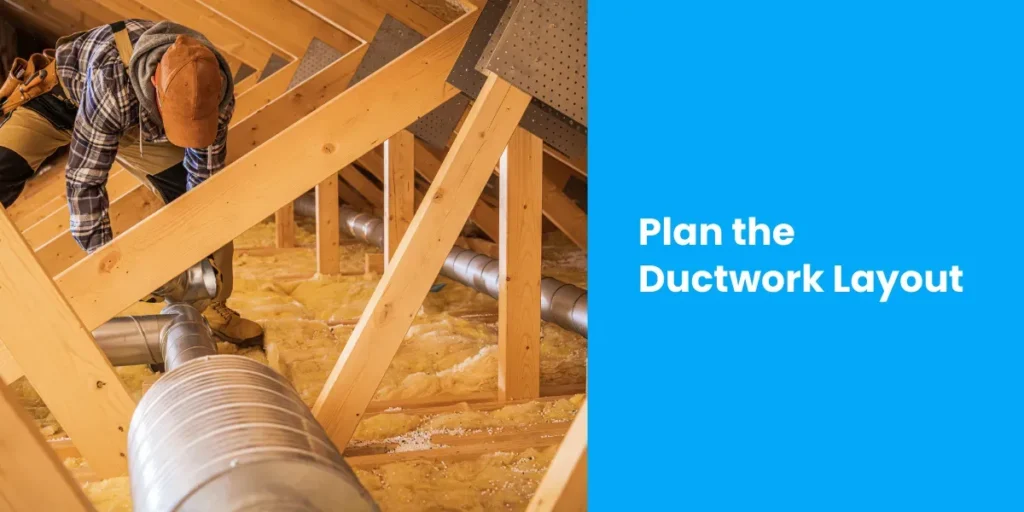
Ventilation efficiency depends on a short, straight duct run with minimal bends. Because the ceiling is slanted, the duct will often travel horizontally before turning upward toward the roof or an exterior wall. Opt for rigid metal duct where possible; it resists condensation and maintains airflow better than flexible plastic.
Measure the distance from the hood’s outlet to the nearest exterior vent. Add a few extra inches for elbows and connectors. If the duct must pass through the ceiling, cut a circular opening that matches the duct diameter, then reinforce the opening with a metal grommet to protect the duct and prevent drywall damage.
Step 3: Install the Mounting Brackets at the Correct Angle
Most adjustable hoods come with a pair of brackets that can be set at various angles. Using the angle you recorded earlier, set each bracket to match the ceiling pitch. Tighten the bracket screws just enough to hold the angle without fully locking them; you’ll fine‑tune the position once the hood is lifted into place.
Secure the brackets to the joists or rafters with lag bolts. If a joist isn’t directly under the mounting point, use a sturdy wood backing board anchored between two joists to provide a solid base. Double‑check that the brackets are level along the slope using a laser level; any deviation will be magnified once the hood is attached.
Step 4: Wire the Range Hood Safely
Electrical work should follow local building codes, and if you’re not comfortable with wiring, hire a licensed electrician. Begin by turning off power at the circuit breaker. Install a junction box inside the ceiling cavity, positioned so the hood’s power cord can reach it without strain.
Run a dedicated 15‑amp (or 20‑amp for high‑power models) circuit from the breaker panel to the junction box. Connect the hood’s wiring to the box using wire nuts, matching black to black (hot), white to white (neutral), and green or bare copper to ground. Secure the junction box cover, then route the power cord through the hood’s back panel, making sure there’s enough slack for adjustments.
Step 5: Attach the Hood, Connect Ducting, and Seal Everything
With the brackets firmly in place, carefully lift the hood onto them. Because the unit may be heavy, enlist a helper to keep it steady while you align the mounting holes. Tighten the mounting screws, checking the angle once more with a level.
Connect the duct to the hood’s exhaust port using foil tape and a metal clamp. If the duct runs through the ceiling, secure it with additional clamps at each turn to prevent sagging. Apply silicone sealant around the duct opening in the ceiling to stop air leaks. Finally, test the hood by turning it on; you should feel a strong, steady airflow without rattling.
Quick Tips for a Flawless Installation
- Use a digital angle finder for the most precise ceiling pitch measurement.
- Choose a hood with a removable back panel; it simplifies wiring and duct connections.
- Insulate the duct if it passes through unconditioned attic space to prevent condensation.
- Leave at least 4‑inches of clearance between the hood and any combustible surfaces.
- Check local building codes for required vent termination heights and fire safety clearances.
Common Mistakes and How to Avoid Them
Even experienced DIYers can slip up when dealing with slanted ceilings. Below are typical pitfalls and simple ways to sidestep them.
- Incorrect angle setting: If the brackets aren’t set precisely, the hood will look crooked and airflow may be reduced. Double‑check the angle before tightening the final screws.
- Too many duct bends: Each 90‑degree turn cuts airflow by up to 30 %. Plan the shortest, straightest route possible.
- Undersized duct: Using a duct smaller than the hood’s recommended size creates back pressure. Always match the manufacturer’s specifications.
- Improper electrical grounding: Skipping the ground wire can be a fire hazard. Verify all connections with a voltage tester before restoring power.
- Neglecting sealant: Air leaks around the duct opening waste energy and diminish ventilation performance. Seal with high‑temperature silicone.
Frequently Asked Questions
Can I install a range hood on a slanted ceiling without a professional?
Yes, if you have basic carpentry and electrical skills, you can handle the project yourself. The key is to follow safety guidelines, use the right tools, and double‑check measurements. When in doubt, especially with wiring, consult a licensed electrician.
Do I need a vent to the outside, or can I use a recirculating hood?
While recirculating (ductless) hoods are an option, they are less effective at removing heat and grease, especially in high‑use kitchens. An exterior vent provides superior performance and is recommended for most slanted‑ceiling installations.
What size duct should I use for a 900 cubic‑foot‑per‑minute hood?
For a hood moving 900 CFM, a 6‑inch rigid metal duct is typically required. Always consult the hood’s manual, as some models may need a larger diameter to maintain optimal airflow.
How do I hide the ductwork for a cleaner look?
Consider routing the duct behind a decorative soffit or building a custom cabinet that conceals the pipe. Paint the duct the same color as the ceiling to blend it in, or use a decorative metal cover that matches your kitchen’s hardware.
Is it necessary to balance the fan speed with the stove’s burners?
Modern hoods often have multiple fan speeds that correspond to low, medium, and high cooking. Choose a speed that matches the heat output of your burners to avoid over‑ventilating or under‑ventilating the space.
Installing a range hood on a slanted ceiling can feel daunting, but with careful planning and the right tools, it becomes a rewarding upgrade that enhances both function and style. Remember to measure twice, set the brackets at the exact angle, and seal every joint for maximum efficiency. Once your hood is up and running, you’ll notice cleaner air, reduced cooking odors, and a sleek focal point that elevates your kitchen’s overall design.
Ready to bring the whole kitchen together? Pair your new range hood with a cozy breakfast corner for a welcoming atmosphere, or explore modern living room inspiration to keep the design flow seamless throughout your home. For a touch of nature, add botanical wall décor that complements the sleek lines of your new ventilation system.