

Table of Contents
How to Change a Double Light Switch to a Single – A Step-by-Step Guide
Switching from a double light switch to a single can instantly simplify a room’s look, reduce clutter, and give you more flexibility when arranging décor. Whether you’re updating a dated hallway, creating a cleaner backdrop for artwork, or just want a single‑pole control for a new lighting layout, the process is straightforward when you understand the basics.
This guide walks you through every stage of the conversion, from safety checks and tool selection to wiring the new device and blending the finished switch into your modern home aesthetic. By the end, you’ll feel confident handling the electrical work yourself and know how to keep the result both functional and stylish.
Before diving in, remember that working with electricity always demands caution. If you ever feel unsure, it’s wise to call a licensed electrician. With the right preparation, however, you can complete the job in an afternoon and enjoy a cleaner, more cohesive look in your living space.
How to Change a Double Light Switch to a Single: Essential Preparation
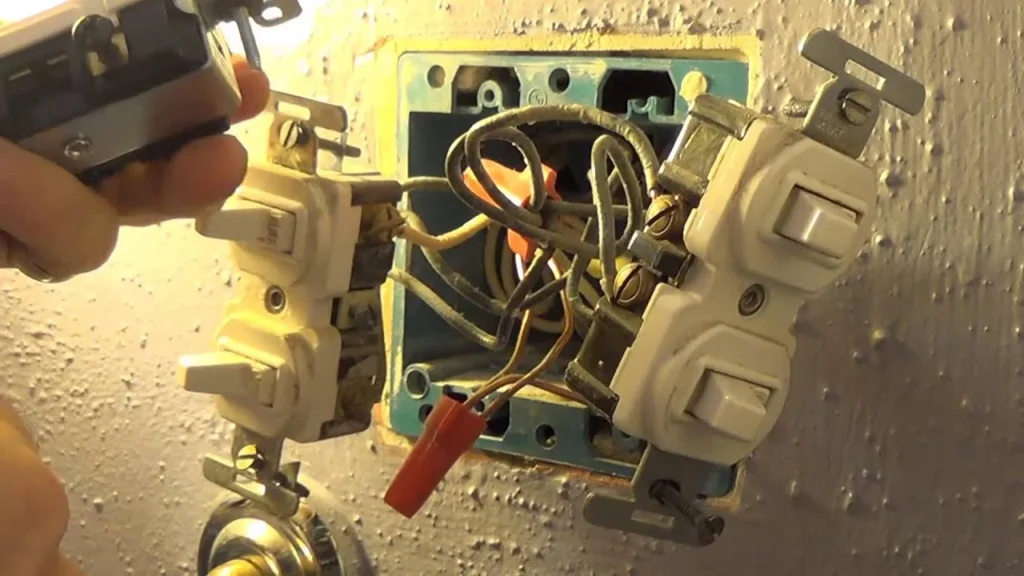
The first step in how to change a double light switch to a single is to plan your work area and gather the proper tools. You’ll need a flat‑head screwdriver, a Phillips screwdriver, a voltage tester, wire strippers, and a new single‑pole switch that matches the voltage rating of your circuit. A small flashlight or headlamp can also be handy for dimly lit switch boxes.
Start by turning off the circuit at your home’s main breaker panel. Use the voltage tester on each wire in the box to confirm that power is truly off—this extra check prevents accidental shocks. While you wait for the breaker to reset, take a photo of the existing wiring configuration. This visual reference will be invaluable when you connect the new single switch.
If your double switch controls two separate lights, decide which fixture you’ll keep on the single switch. You may need to cap off the unused wires with wire nuts and electrical tape to maintain safety and code compliance. For those who love organized spaces, labeling each wire with a piece of masking tape can keep the re‑wiring process tidy.
Removing the Existing Double Switch

With power safely off, remove the faceplate by loosening the screws around its perimeter. Gently pull the double switch out of the electrical box, taking care not to disturb the attached wires. You’ll typically see two sets of black (hot) wires, each paired with a white (neutral) wire and a bare copper ground.
Disconnect the wires by loosening the terminal screws on the double switch. If the wires are looped around the screw, release them using needle‑nose pliers. Keep the removed wires separated so you can identify which pair belongs to the light you’ll continue to control.
At this point, you’ve completed the most visible part of how to change a double light switch to a single. The box is now ready for the new device, but you still need to decide how to handle any extra wiring left behind.
Wiring the New Single Switch
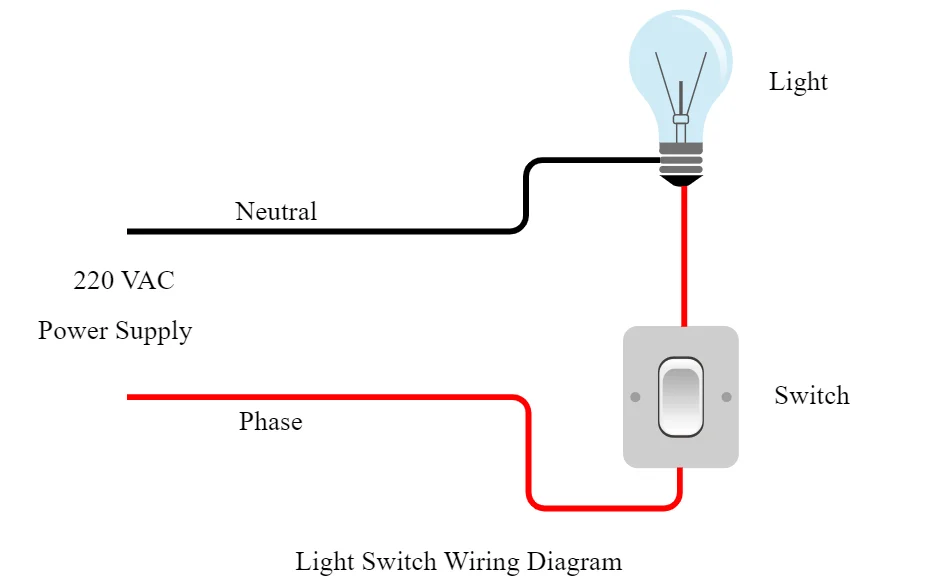
Take your new single‑pole switch and identify the terminals: one brass screw for the hot (line) wire, one silver screw for the load, and a green screw for the ground. Connect the ground wire (bare copper or green‑insulated) to the green screw and tighten securely.
Next, attach the hot wire that supplies power to the brass terminal. The load wire—leading to the light you want to control—connects to the silver terminal. If you have an extra set of wires from the second half of the original double switch, cap them with wire nuts and tuck them neatly into the back of the box. Use electrical tape around the nuts for added security.
Once all connections are tight, gently fold the wires back into the box, ensuring no copper is exposed. Secure the new single switch to the box with the mounting screws provided, then reattach the faceplate.
Finishing Touches and Aesthetic Integration
After you’ve completed how to change a double light switch to a single, turn the breaker back on and test the switch. The light should respond immediately. If it doesn’t, double‑check each connection and verify that the correct wires are attached to the appropriate terminals.
To keep the look cohesive with modern décor, consider selecting a switch plate that matches your wall color or metal finish. Brushed nickel or matte black plates can complement contemporary interiors, while a clear glass plate adds a subtle, minimalist touch. If you enjoy layered décor, pair the new switch with floating plant shelves—a design element highlighted in our guide on wall décor with floating plant shelves. The sleek shelves draw the eye upward, making the single switch appear as a deliberate design choice rather than a functional afterthought.
For homeowners who love a DIY vibe, you might even paint the switch plate yourself. Use a high‑quality spray paint designed for metal surfaces, and protect surrounding walls with painter’s tape. This small custom touch can tie the switch into a broader colour scheme, reinforcing the sense of intentional design throughout the room.
Quick Tips for a Smooth Conversion
- Label wires before removal to avoid confusion later.
- Use a voltage tester on every wire, even if the breaker appears off.
- Choose a switch style that matches your décor—consider matte finishes for a modern look.
- Cap any unused wires with wire nuts and double‑wrap with electrical tape.
- Keep a small screwdriver set nearby for tight spaces inside the electrical box.
Common Mistakes to Avoid When Changing Light Switches
Even experienced DIYers can slip up during a conversion. One frequent error is neglecting to turn off the correct breaker, which can lead to a dangerous shock. Always verify power with a tester before touching any wires.
Another pitfall is mixing up the line and load wires. Connecting the load to the line terminal will cause the light to stay on constantly, defeating the purpose of the new single switch. Double‑check the orientation of each wire against the photo you took earlier.
Lastly, many people forget to secure the ground wire properly. An unsecured ground can cause a subtle hum or interfere with the switch’s operation over time. Make sure the green screw is tight and that the ground wire is fully wrapped around it.
Frequently Asked Questions
Can I replace a double switch with a single without changing the wiring?
Yes, if the two switches control the same fixture, you can simply cap the unused hot wire and connect the remaining hot and load wires to the new single switch. Ensure the extra wires are safely insulated.
Do I need a special single switch for dimming?
If you want dimming capability, purchase a compatible single‑pole dimmer switch rated for the load’s wattage. Follow the same wiring steps, but connect the dimmer’s load and line terminals accordingly.
Is it safe to use a switch rated for 15 A on a 20 A circuit?
No. The switch must match or exceed the circuit’s amperage rating. Using a lower‑rated switch can cause overheating and fire hazards.
What if my double switch has a three‑way configuration?
Three‑way switches are more complex because they use traveler wires. Converting a three‑way double to a single usually requires additional wiring changes and may be best handled by an electrician.
Can I paint over a metal switch plate?
Absolutely—just clean the surface, apply a primer suitable for metal, and finish with a spray paint designed for durability. This is a quick way to customize the look without replacing the hardware.
Changing a double light switch to a single not only streamlines your wall but also opens up new possibilities for styling your space. By following the steps above, you’ll enjoy a safer, cleaner, and more intentional design.
For more inspiration on modern lighting and décor, explore our Modern Home Office Styling guide, which shows how thoughtful lighting choices can boost productivity while keeping aesthetics on point.
Now that you know how to change a double light switch to a single, feel confident tackling the project yourself. A simple switch swap can make a big impact on the visual flow of any room—especially when paired with curated décor elements that reflect your personal style.