Table of Contents
- Why DIY handmade shelf décor Is Worth the Effort
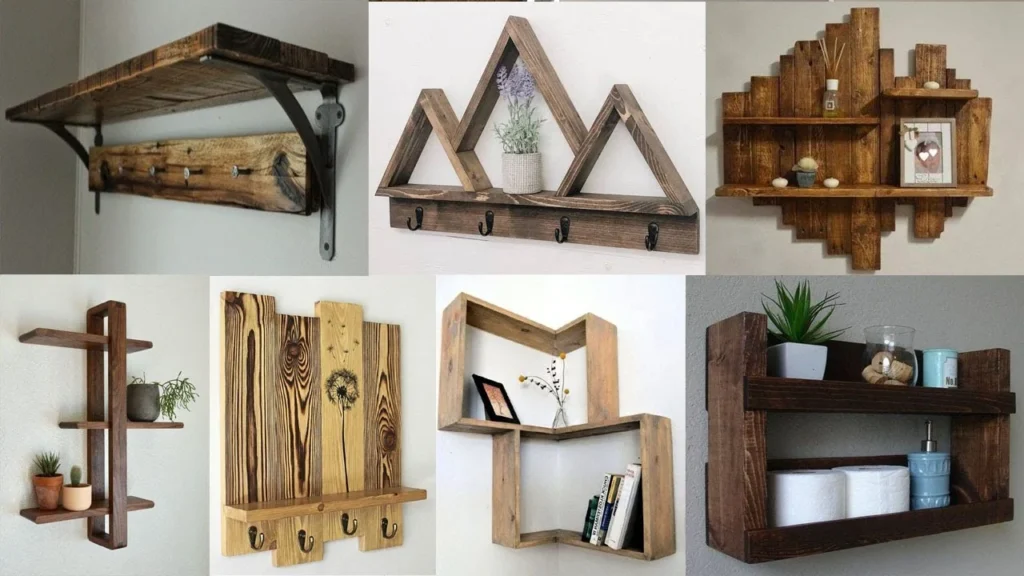
- Choosing the Right Materials for DIY Handmade Shelf Décor
- Essential Tools and Safety Gear for Your DIY Project
- Step‑by‑Step Guide to Building Your First DIY Handmade Shelf Décor
- 1. Planning and Measuring
- 2. Cutting the Wood
- 3. Sanding and Pre‑Finishing
- 4. Painting or Staining
- 5. Installing Brackets
- 6. Mounting the Shelf
- 7. Styling Your DIY Handmade Shelf Décor
- Creative Styling Ideas for Different Rooms
- Living Room
- Bedroom
- Kitchen
- Home Office
- Small Apartments
- Quick Tips for Perfect DIY Handmade Shelf Décor
- Common Mistakes to Avoid When Crafting DIY Handmade Shelf Décor
- Frequently Asked Questions
- Bringing It All Together: From Concept to Completed Shelf
DIY handmade shelf décor – Creative Ideas for Every Home
When it comes to personalizing a living space, nothing says “you” quite like a handcrafted shelf. A well‑designed shelf does more than hold books or plants; it becomes a focal point that reflects your taste, adapts to your room’s layout, and can even solve storage challenges. Whether you live in a compact apartment or a spacious house, DIY handmade shelf décor offers a flexible, budget‑friendly way to add visual interest without hiring a professional carpenter.
This guide walks you through the entire process—from choosing the right materials and tools, to styling the finished piece with décor that feels cohesive and modern. You’ll learn practical techniques, discover common pitfalls, and get inspiration for integrating shelves into the living room, bedroom, kitchen, or any nook that needs a little lift. By the end, you’ll be ready to create a shelf that not only serves a function but also elevates the overall aesthetic of your home.
Why DIY handmade shelf décor Is Worth the Effort

Before you dive into the toolbox, it helps to understand the advantages of making your own shelves. First, customization is limitless. You can select the exact wood grain, paint color, and dimensions that suit a particular wall or corner. Second, cost savings are significant; a few sheets of plywood, some brackets, and a coat of paint often cost a fraction of a pre‑made unit. Third, the sense of accomplishment that comes from building something with your own hands adds emotional value that no store‑bought item can match.
Beyond economics, handmade shelf décor contributes to sustainability. By reusing reclaimed wood or opting for low‑VOC finishes, you reduce waste and lower your home’s carbon footprint. Plus, the hands‑on process encourages mindfulness—a therapeutic break from screen time that many homeowners find surprisingly rewarding.
Choosing the Right Materials for DIY Handmade Shelf Décor
Material selection sets the tone for the entire project. Here are the most popular choices, along with pros and cons to help you decide:
- Plywood: Affordable, stable, and easy to cut. Ideal for a clean, modern look when painted.
- Solid wood boards: Offer natural grain and warmth. More expensive but perfect for rustic or Scandinavian styles.
- MDF (Medium‑Density Fiberboard): Smooth surface that takes paint beautifully; however, it’s heavier and less moisture‑resistant.
- Reclaimed lumber: Adds character and eco‑friendliness. May require additional sanding and treatment.
When working in humid areas like kitchens or bathrooms, prioritize moisture‑resistant options such as marine‑grade plywood or properly sealed solid wood. For a sleek, contemporary vibe, consider painting MDF in matte black or soft pastel tones, then pairing it with metal brackets.
Essential Tools and Safety Gear for Your DIY Project

Even beginners can achieve professional‑looking results with a modest toolkit. Below is a checklist of must‑have items:
- Measuring tape and carpenter’s square – for accurate dimensions.
- Circular saw or hand saw – to cut boards to length.
- Power drill with assorted bits – for pre‑drilling and driving screws.
- Level and stud finder – to ensure shelves sit perfectly straight.
- Sander (orbital or hand) – for smoothing rough edges.
- Paintbrushes or roller – for finishing the surface.
- Safety goggles, ear protection, and dust mask – essential for eye, ear, and respiratory safety.
Investing in quality tools not only speeds up the build but also reduces the risk of mistakes that could compromise the shelf’s stability. If you’re unsure about a particular step, many online tutorials demonstrate each technique in detail.
Step‑by‑Step Guide to Building Your First DIY Handmade Shelf Décor
Follow this structured workflow to create a sturdy, stylish shelf that fits your space perfectly.
1. Planning and Measuring
Start by assessing the wall where the shelf will live. Use a stud finder to locate vertical studs; anchoring into studs provides the strongest support. Measure the width, depth, and desired height of the shelf, keeping in mind the objects you plan to display. Sketch a simple diagram showing the dimensions and placement of brackets.
2. Cutting the Wood
Transfer your measurements onto the chosen board using a pencil and square. Cut the board with a circular saw, ensuring a clean, straight edge. If you’re using reclaimed lumber, you may need to trim uneven edges or remove old nails.
3. Sanding and Pre‑Finishing
Smooth all surfaces with medium‑grit sandpaper, followed by fine‑grit for a polished feel. Wipe away dust with a tack cloth before applying any finish. This step is crucial for achieving an even paint or stain absorption.
4. Painting or Staining
Apply a primer if you’re using paint, especially on MDF. For a natural look, use a wood stain that enhances the grain. Allow the first coat to dry completely, then lightly sand with fine‑grit paper before adding a second coat. Finish with a clear sealant for durability.
5. Installing Brackets
Choose brackets that complement your décor style—metal brackets for industrial looks, wooden floating brackets for a seamless appearance. Mark the bracket locations on the wall, drill pilot holes into the studs, and secure the brackets with sturdy screws. Ensure the brackets are level before attaching the shelf board.
6. Mounting the Shelf
With the brackets in place, lift the finished board onto them. Secure the board to the brackets using short screws from underneath (if the brackets have pre‑drilled holes) or use construction adhesive for extra hold.
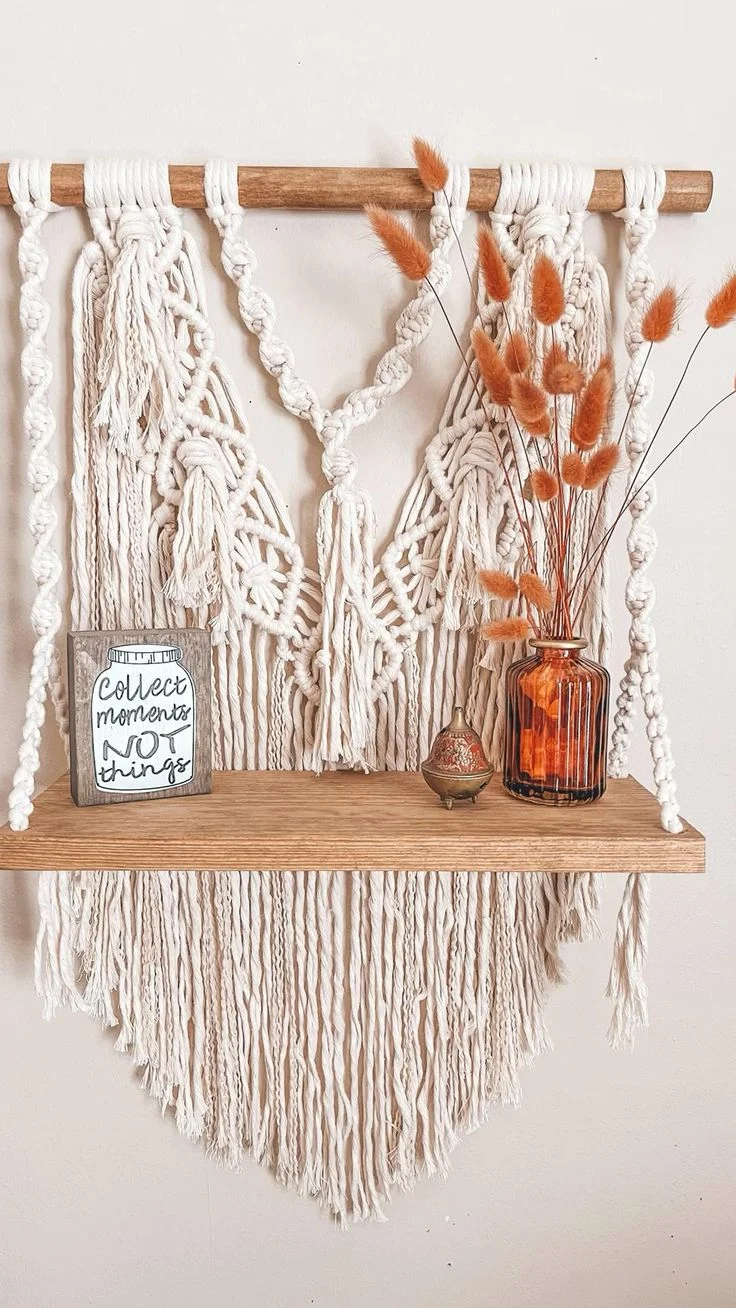
7. Styling Your DIY Handmade Shelf Décor
Now comes the fun part—decorating! Mix functional items (books, baskets) with decorative objects (vases, candles). Keep a balance of heights and textures to create visual intrigue. For a cohesive feel, stick to a limited color palette that matches the room’s existing tones.
Creative Styling Ideas for Different Rooms
One of the most rewarding aspects of DIY handmade shelf décor is its adaptability. Below are tailored suggestions for various spaces.
Living Room
A floating shelf behind a sofa can serve as a subtle backdrop for framed art or a collection of small plants. Pair the shelf with a sleek metal lamp to add a touch of modern elegance. For a cozy vibe, incorporate woven baskets to hide remote controls or magazines.
Bedroom
Install a narrow shelf above the nightstand to display a few favorite books and a small scented candle. This not only frees up surface space on the nightstand but also adds a curated look that aligns with the soft aesthetic bedroom interior ideas. Choose a pastel paint finish for a calming effect.
Kitchen
Open shelving is a staple in modern kitchens. Use a sturdy pine board, paint it in a muted gray, and mount it near the prep area to hold frequently used spices, a sleek mug rack, or a decorative herb planter. This approach echoes the cozy kitchen corner décor inspiration we love at The Homara.
Home Office
A side wall can accommodate a series of staggered shelves for books, files, and tech accessories. Adding a few wooden trays keeps loose papers organized while maintaining a clean aesthetic. Pair the shelves with a minimalist desk lamp for a functional yet stylish workstation.
Small Apartments
When square footage is limited, vertical storage becomes essential. Install a tall, narrow shelf that runs from floor to ceiling, using the uppermost shelf for decorative pieces and the lower levels for daily essentials. This strategy maximizes storage without crowding the floor.
Quick Tips for Perfect DIY Handmade Shelf Décor
- Measure twice, cut once – it saves material and frustration.
- Use a level for every bracket; a slight tilt is noticeable from a distance.
- Opt for concealed mounting hardware for a floating effect.
- Mix textures—metal, wood, glass—to add depth to the shelf display.
- Limit the number of large items per shelf to avoid visual overload.
Common Mistakes to Avoid When Crafting DIY Handmade Shelf Décor
Even seasoned DIYers can slip up. Recognizing common errors early helps ensure a polished final product.
- Skipping stud anchoring: Relying only on drywall anchors can lead to sagging over time, especially with heavier items.
- Using the wrong wood type for humid areas: MDF and untreated pine can warp or swell in kitchens and bathrooms.
- Neglecting sandpaper between coats: Skipping this step can cause uneven paint finish and visible brush strokes.
- Overloading the shelf: Keep weight distribution even; a single heavy object can stress the brackets.
- Choosing brackets that clash with the décor: The bracket is part of the visual story—pick a style that complements the room’s theme.
Frequently Asked Questions
Can I use reclaimed wood for a modern DIY handmade shelf décor project?
Absolutely. Reclaimed wood adds character while still fitting modern aesthetics if you sand it smooth and apply a contemporary paint or stain finish. Pair it with sleek metal brackets for contrast.
How much weight can a floating shelf safely hold?
Weight capacity depends on the bracket system and wall material. Generally, a well‑installed floating shelf anchored into studs can support 30–40 kg (66–88 lb). Always follow the manufacturer’s specifications for the brackets you choose.
Is it better to paint or stain my shelf?
Painting provides a uniform color and can hide imperfections, making it ideal for modern looks. Staining highlights natural grain and works well with rustic or Scandinavian styles. Your decision should align with the overall room palette.
Do I need a professional to finish the edges of my shelf?
No. Using a router or a simple hand sanding block can give you clean, beveled edges. If you lack tools, a fine‑grit sandpaper applied with steady pressure will also do the job.
What are some budget‑friendly accessories to style my DIY handmade shelf décor?
Consider thrifted ceramic pots, DIY‑painted picture frames, or repurposed wooden crates. Even inexpensive LED strip lights can add ambiance without breaking the bank.
Bringing It All Together: From Concept to Completed Shelf
Building DIY handmade shelf décor is a journey that blends practicality with personal expression. Begin with a clear plan, select materials that suit your space, and follow each step methodically. As you assemble the shelf, remember that the finish is just as important as the construction; a well‑painted surface can transform a simple board into a centerpiece.
Finally, styling is where your personality shines. Curate items that tell a story—perhaps a travel souvenir, a stack of favorite books, or a small collection of vintage cameras. Keep the arrangement balanced: a tall vase beside a short stack of books creates rhythm, while a splash of greenery introduces life.
By mastering the fundamentals of DIY handmade shelf décor, you’ll gain confidence to tackle larger projects, experiment with new materials, and continuously refresh your home’s look. The flexibility of a handmade shelf means you can relocate, repaint, or redesign it whenever inspiration strikes—making it a truly dynamic element of your interior design toolkit.
Ready to start your next project? Explore more ideas on soft minimalist home décor or discover how to choose the best ladder for your upcoming renovation in our guide on Gorilla Ladder vs Little Giant. With the right tools, a dash of creativity, and the confidence gained from this article, your DIY handmade shelf décor will become a beloved feature in any room.
Enjoy the process, celebrate each small victory, and watch as your handcrafted shelf transforms the look and feel of your home.