
Table of Contents
- how to fill gap under exterior door threshold – Why It Matters
- Assessing the Gap – Tools and Measurements
- Choosing the Right Material for Filling the Gap
- Step‑by‑Step Guide to Fill the Gap Properly
- Finishing Touches – Sealing and Painting for a Seamless Look
- Maintaining the Threshold Over Time
- Quick Tips for a Professional‑Grade Result
- Common Mistakes and How to Avoid Them
- Frequently Asked Questions
- Conclusion
Every homeowner knows that a small, unnoticed gap beneath an exterior door can become a big problem over time. Cold drafts, moisture intrusion, insects, and increased energy bills are just a few of the issues that arise when the space between the door and the threshold isn’t sealed properly. Whether you live in a historic bungalow or a modern condo, learning how to fill gap under exterior door threshold is an essential skill that protects your comfort and the structural integrity of your home.
In this article we’ll walk you through the entire process, from measuring the opening to selecting the perfect filler material, applying it with professional precision, and finishing with a flawless seal that blends with your home’s aesthetic. You’ll also discover maintenance tips, common pitfalls to avoid, and quick actionable ideas you can start using today. By the end, you’ll feel confident tackling this repair yourself—saving money while boosting curb‑appeal and energy efficiency.
how to fill gap under exterior door threshold – Why It Matters
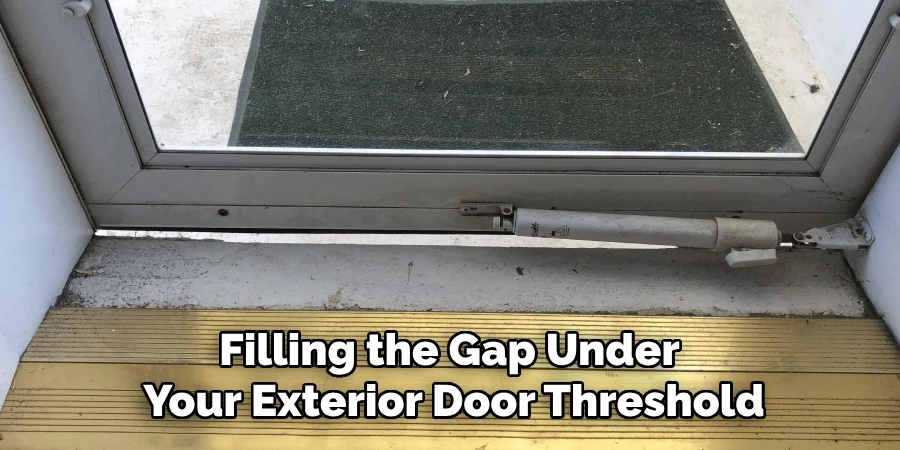
Before you gather tools, it helps to understand why the gap matters. Even a narrow opening of a few millimeters can let conditioned air escape in winter and hot air infiltrate in summer. This not only raises heating and cooling costs but also creates a conduit for moisture that can damage sub‑floors, promote mold growth, and attract pests. Moreover, a visible gap detracts from the polished look of an entryway, reducing curb‑appeal.
Addressing the issue early prevents larger repairs down the line. A well‑filled threshold also contributes to the overall home décor ideas you may be planning, as a seamless entrance sets the tone for interior design continuity. Think of the threshold as the visual bridge between exterior and interior spaces—keeping it tight and tidy is a subtle yet powerful design statement.
Assessing the Gap – Tools and Measurements

Accurate assessment is the foundation of a successful fill. Start by removing any existing weatherstripping or debris, then use a thin ruler or a flexible measuring tape to determine the depth, width, and length of the gap. Most exterior doors have a gap ranging from 1/8 in to 1/4 in, but older homes can have larger spaces that need more substantial filler.
Key tools you’ll need:
- A sturdy utility knife for trimming excess material.
- A flexible caulk gun (if you choose a sealant‑based filler).
- A putty knife or scraper for smoothing the filler.
- A moisture meter to check for hidden dampness that might affect adhesion.
When measuring, note any irregularities—such as a warped threshold or uneven floor—that may require extra preparation. If you discover moisture, consider addressing drainage issues first; otherwise, the filler may not adhere correctly and could fail prematurely.
Choosing the Right Material for Filling the Gap
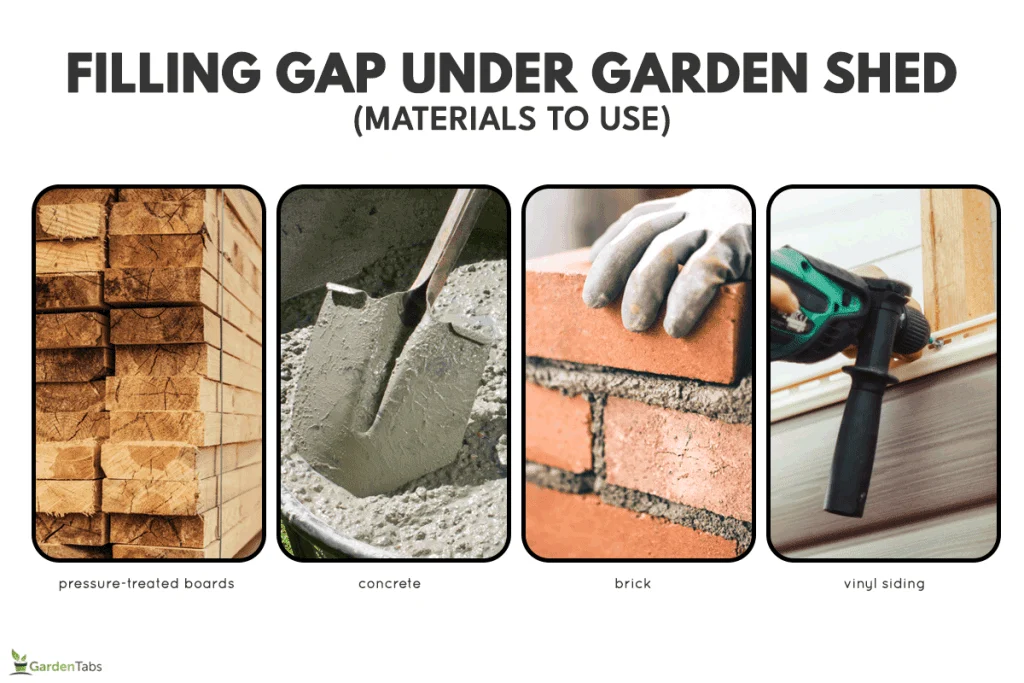
The material you select depends on the size of the gap, the climate, and the aesthetic you aim for. Here are the most common options:
- Expandable foam sealant: Ideal for larger gaps (up to 1 in). It expands to fill voids and provides good insulation, but it can be messy and may require trimming.
- Backer rod + silicone caulk: For gaps up to 1/2 in, a foam backer rod placed first creates a uniform depth, followed by silicone caulk for a flexible, weather‑proof seal.
- Wood or metal threshold strips: If the existing threshold is damaged, replace it with a new strip that fits snugly, eliminating the need for filler.
- Self‑adhesive weatherstripping: A quick fix for narrow gaps; it adds a cushion that blocks drafts and can be layered over a thin sealant.
For a finish that complements modern home styling, many homeowners choose a low‑profile silicone caulk that can be painted to match the threshold. If you’re exploring a minimalist look, check out our Minimalist Apartment Décor Ideas – Simple, Stylish, Space‑Saving Solutions for inspiration on clean lines and subtle finishes.
Step‑by‑Step Guide to Fill the Gap Properly
Now that you have the right material, follow these detailed steps to achieve a professional result:
- Clean the area: Sweep away dust, old caulk, and any loose debris. Wipe the surface with a mild detergent solution and let it dry completely.
- Apply backer rod (if needed): For gaps larger than 1/8 in, press a foam backer rod into the space until it sits just below the surface. This ensures an even depth for the sealant.
- Load the caulk gun: Cut the tip of the silicone or acrylic caulk tube at a 45‑degree angle, choosing an opening size that matches the gap width.
- Seal the gap: Squeeze a continuous bead of caulk into the gap, moving steadily to avoid gaps or air bubbles. Use a wet finger or a caulk‑smoothing tool to press the caulk into the backer rod and smooth the surface.
- Trim excess material: If you used expanding foam, let it cure per the manufacturer’s instructions (usually 10‑15 minutes), then cut away the excess with a utility knife.
- Allow curing: Most sealants need 24 hours to fully cure. Keep the area dry and avoid heavy foot traffic during this time.
Throughout the process, maintain a consistent temperature (ideally 65‑75 °F) to ensure optimal curing. If you’re unsure about the type of sealant, consult the product label for specific temperature and humidity recommendations.
Finishing Touches – Sealing and Painting for a Seamless Look
After the filler cures, the final step is to blend it with the surrounding threshold. Lightly sand any rough spots, then wipe away dust. If you used a paintable silicone or acrylic caulk, apply a coat of exterior‑grade paint that matches your door frame or siding. This not only hides the repair but also adds an extra layer of protection against UV rays.
For a touch of style, consider adding decorative hardware—like a sleek brass door sweep—to complement modern décor. Pairing functional upgrades with aesthetic details can elevate the entryway from merely functional to a design focal point. For more creative ideas, see our DIY décor with wood bead garlands – Creative Home Styling Ideas article, where we explore how small accents can transform a space.
Maintaining the Threshold Over Time
Even the best‑executed fill will benefit from periodic inspection. Schedule a quick check‑up each season:
- Winter: Look for cracks where cold air may be seeping through.
- Spring: Verify that water isn’t pooling near the threshold, indicating drainage issues.
- Summer: Ensure that the sealant hasn’t become brittle under UV exposure.
- Fall: Re‑apply a thin bead of caulk if you notice any shrinkage.
Promptly addressing minor wear prevents larger repairs and maintains the energy efficiency you gained from the initial fill. Keeping a small caulk tube and a putty knife on hand makes touch‑ups quick and inexpensive.
Quick Tips for a Professional‑Grade Result
- Work in moderate weather; extreme cold or heat can affect sealant adhesion.
- Use painter’s tape on either side of the gap to achieve crisp, clean edges.
- Choose a caulk with a “paintable” label if you plan to match the threshold color.
- For a greener option, look for low‑VOC or water‑based sealants that emit fewer chemicals.
- Test the seal by holding a lit incense stick near the seam—any movement of the smoke indicates a leak.
Common Mistakes and How to Avoid Them
Even seasoned DIYers can slip up when filling door thresholds. Here are frequent errors and the solutions:
- Skipping the backer rod: Without a proper depth guide, caulk can shrink, leaving gaps. Always insert a backer rod for gaps larger than 1/8 in.
- Over‑filling with foam: Expanding foam can overflow, making it hard to trim. Apply in small bursts and let it cure before cutting.
- Using interior‑grade sealant outdoors: Exterior sealants resist UV and temperature changes; interior versions will crack.
- Neglecting surface preparation: Paint, dust, or old caulk left on the surface prevents adhesion. Clean thoroughly.
- Not allowing proper cure time: Rushing back into use can deform the seal. Respect the manufacturer’s cure recommendations.
Frequently Asked Questions
Can I use regular paint‑and‑caulk for an exterior door threshold?
While interior paint‑and‑caulk may work temporarily, it isn’t formulated for outdoor temperature fluctuations and UV exposure. An exterior‑grade silicone or acrylic caulk provides the durability and flexibility needed for long‑term performance.
How often should I re‑apply sealant around my exterior door?
Most high‑quality exterior sealants last 5‑10 years, but it’s wise to inspect annually. Re‑apply if you see cracks, shrinkage, or if the sealant has become hard and brittle.
Is expandable foam safe for wooden thresholds?
Expandable foam can be used, but it may expand too forcefully and warp delicate wood. If you have a wooden threshold, a backer rod with silicone caulk is a gentler, more controllable solution.
Do I need to remove the existing threshold before filling the gap?
Not necessarily. In many cases you can fill the gap without removal, especially if the threshold is still solid. However, if the threshold is cracked or rotted, replace it first for a lasting repair.
Will filling the gap improve my home’s energy bill?
Yes. By eliminating drafts, you reduce the workload on heating and cooling systems, which can lower energy consumption by up to 10 % in extreme climates.
Conclusion
Understanding how to fill gap under exterior door threshold empowers you to protect your home from drafts, moisture, and pests while enhancing its visual appeal. By measuring accurately, selecting the right filler, following a systematic application process, and finishing with a paint‑matched seal, you achieve a durable, energy‑efficient entrance that complements your overall décor. Regular maintenance will keep the repair looking fresh for years, and the confidence you gain from completing this project will inspire you to tackle other DIY home improvement tasks. Explore more design inspiration and practical tips on The Homara, and let your entryway set the tone for a welcoming, stylish home.