
Table of Contents
- DIY Clay Vase Decoration: Materials and Tools You’ll Need
- DIY Clay Vase Decoration: Step‑by‑Step Process
- Step 1: Prepare the Clay Surface
- Step 2: Prime (Optional but Recommended)
- Step 3: Apply Base Color
- Step 4: Add Design Elements
- Step 5: Seal the Finish
- DIY Clay Vase Decoration: Creative Finishes and Techniques
- DIY Clay Vase Decoration: Styling in Different Rooms
- Living Room
- Bedroom
- Kitchen
- Bathroom
- DIY Clay Vase Decoration: Budget‑Friendly Tips
- DIY Clay Vase Decoration: Care and Longevity
- Quick Tips for DIY Clay Vase Decoration
- Common Mistakes to Avoid in DIY Clay Vase Decoration
- Frequently Asked Questions
- Conclusion
DIY Clay Vase Decoration: A Complete Guide for Modern Home Styling
Clay vases offer a timeless canvas for personal expression, yet many homeowners overlook their potential as a focal point in a room. Whether you live in a compact apartment or a spacious house, a thoughtfully decorated clay vase can instantly elevate your décor without breaking the bank. This guide walks you through everything you need to know about DIY clay vase decoration—from selecting the right materials to mastering finishing techniques and integrating the finished piece into various interior settings. By the end, you’ll feel confident turning ordinary clay into a statement accessory that reflects your style and enhances the ambience of any space.
Beyond aesthetics, DIY clay vase decoration is an engaging hands‑on activity that encourages sustainability, creativity, and a sense of accomplishment. You’ll learn how to source affordable clay, experiment with color palettes, and apply finishes that complement modern home décor ideas. Let’s dive into the process, explore innovative design concepts, and discover practical tips that make each vase a unique work of art.
DIY Clay Vase Decoration: Materials and Tools You’ll Need

Successful DIY clay vase decoration begins with the right foundation. High‑quality, air‑dry clay is ideal for beginners because it cures without a kiln, while polymer clay offers vibrant colors straight out of the package. Choose a clay that matches the size and weight of the vase you plan to decorate. For a smooth surface, a gentle sanding block or fine‑grit sandpaper works wonders after the clay dries.
In addition to clay, gather these essential tools:
- Paintbrushes (various sizes for detail work)
- Acrylic paints or water‑based glazes
- Masking tape or painter’s tape for crisp lines
- Sponges, stencils, and rubber stamps for texture
- Clear sealant (matte or glossy) to protect the finish
- Protective gloves and a well‑ventilated workspace
When you have these items ready, you’re set to begin the DIY clay vase decoration journey. For inspiration on color coordination, check out the ultimate guide to soundproof blackout curtains, which showcases palettes that work beautifully with neutral clay tones.
DIY Clay Vase Decoration: Step‑by‑Step Process
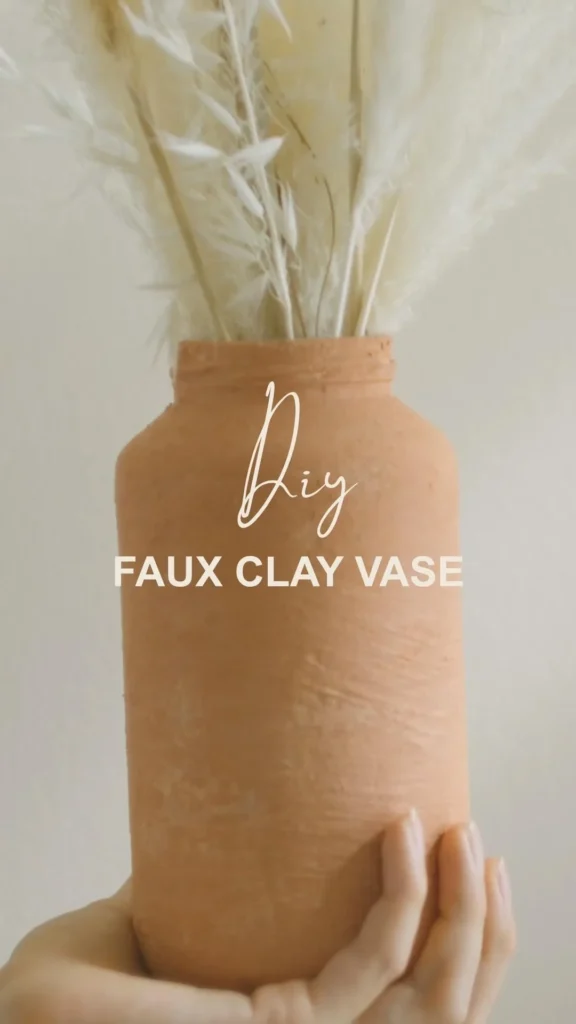
Transforming a plain vase into a custom masterpiece is easier than you think. Follow these stages for consistent results:
Step 1: Prepare the Clay Surface
Start by cleaning the vase with a damp cloth to remove dust. Lightly sand any rough spots, then wipe clean. If the vase has a glossy glaze, gently scuff it with fine‑grit sandpaper so the paint adheres better.
Step 2: Prime (Optional but Recommended)
Apply a thin coat of acrylic gesso to create an even base. This step is especially useful when working with dark paints on light clay, ensuring vibrant color payoff.
Step 3: Apply Base Color
Choose a base hue that reflects the room’s color scheme. Use a broad brush to cover the entire vase, allowing each coat to dry completely before adding the next. Two to three light coats usually achieve full coverage.
Step 4: Add Design Elements
This is where your creativity shines. Use stencils for geometric patterns, sponges for ombre effects, or free‑hand brushwork for a hand‑painted look. Masking tape helps create clean, sharp lines for modern, linear designs.
Step 5: Seal the Finish
Once the paint is fully dry, spray or brush on a clear sealant. A matte sealant maintains a natural, earthy feel, while a glossy finish adds a contemporary shine. The sealant protects the vase from moisture and everyday handling.
By following these steps, you’ll achieve a professional‑looking result that can rival store‑bought decorative vases.
DIY Clay Vase Decoration: Creative Finishes and Techniques
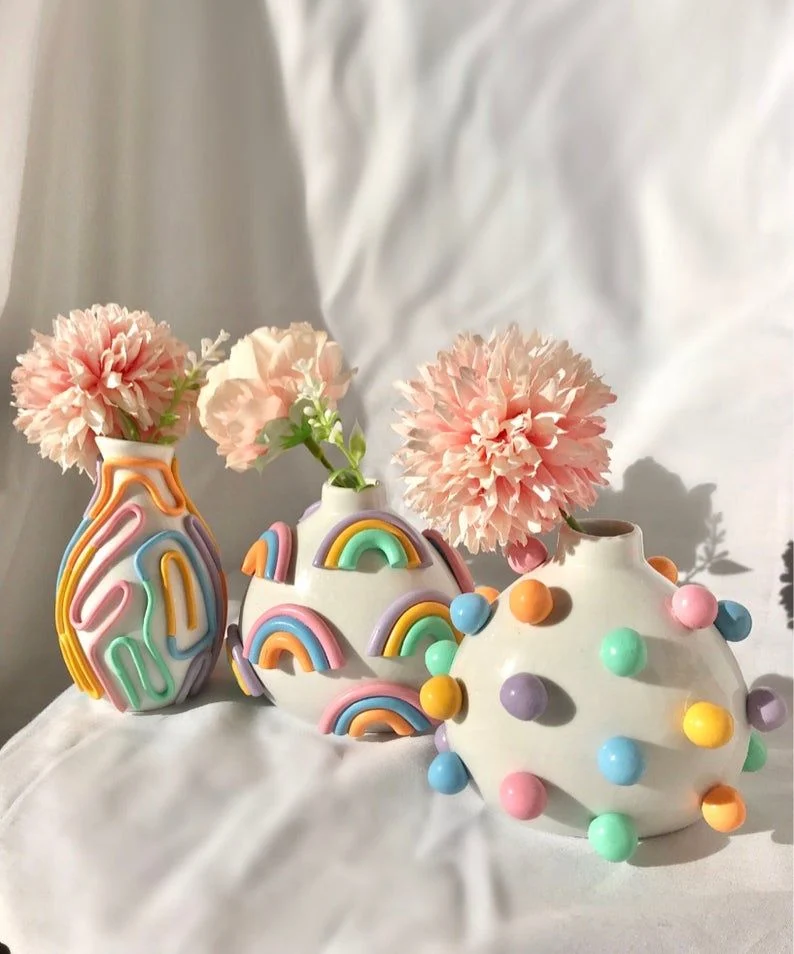
Beyond basic painting, explore these advanced techniques to give your vase a distinctive personality:
- Metallic Accents: Apply copper or gold leaf to small sections for a luxe touch.
- Texture Play: Press textured fabric or natural materials (e.g., leaves) into wet clay before it dries, then paint over the relief.
- Decoupage: Adhere thin paper cutouts or fabric pieces using Mod Podge, then seal.
- Ombre Gradient: Blend two or three colors while the paint is still wet for a seamless transition.
- Glaze Overlays: Use a translucent glaze to create depth, especially effective on light‑colored bases.
These options let you tailor the vase to any design direction, whether you prefer minimalist monochrome or bold, eclectic statements. For a cohesive look across your home, consider pairing your DIY clay vase decoration with complementary accessories like budget-friendly home décor ideas that share similar textures or colors.
DIY Clay Vase Decoration: Styling in Different Rooms
A well‑decorated vase can serve multiple purposes, from a floral holder to a standalone art piece. Here’s how to integrate your DIY clay vase decoration into key living spaces:
Living Room
Place a tall, matte‑finished vase on a side table beside a sofa, pairing it with a simple bouquet of white lilies. The neutral tones keep the focus on the vase’s texture, while the flowers add a soft contrast.
Bedroom
Use a smaller, pastel‑colored vase on a nightstand to hold a single stem of lavender. This not only adds a calming scent but also introduces a subtle splash of color that complements bedding.
Kitchen
Display a set of three varying‑size vases on the countertop, each painted in complementary shades of muted teal and gray. Fill them with dried herbs or citrus fruits for an organic, functional display.
Bathroom
Hang a lightweight clay vase on a wall-mounted rack to hold rolled towels. Choose a waterproof sealant to protect against humidity, and pick a soothing sea‑foam hue to echo spa‑like vibes.
When arranging vases, remember the rule of odd numbers—grouping three or five creates visual interest. For a cohesive aesthetic, refer to cozy entryway styling inspiration, which demonstrates how strategic placement can transform a space.
DIY Clay Vase Decoration: Budget‑Friendly Tips
Creating stunning décor doesn’t have to be expensive. Implement these cost‑saving strategies while maintaining high quality:
- Buy clay in bulk during seasonal sales; large packs often reduce the price per pound.
- Repurpose old jars or broken pottery as base vessels, giving them new life through DIY clay vase decoration.
- Mix your own paint using inexpensive acrylics and a small amount of water for a custom shade.
- Use household items like toothpicks for fine detailing instead of specialized tools.
- Seal with a DIY mixture of equal parts white glue and water for a low‑cost protective finish.
These tricks keep your project affordable while still delivering a polished, modern look that aligns with contemporary home décor ideas.
DIY Clay Vase Decoration: Care and Longevity
Proper maintenance ensures your vase remains a cherished piece for years. Follow these guidelines:
- Dust gently with a soft cloth; avoid abrasive cleaners that can scratch the sealant.
- If using the vase for fresh flowers, replace water daily to prevent mold growth.
- For outdoor placement, apply an additional coat of exterior‑grade sealant every six months.
- Store the vase in a cool, dry area when not in use to prevent warping.
By treating your DIY clay vase decoration with care, you preserve its color vibrancy and structural integrity, making it a lasting element of your interior design.
Quick Tips for DIY Clay Vase Decoration
- Test paint colors on a scrap piece of clay before committing to the full vase.
- Use a light hand when applying multiple layers of paint to avoid drips.
- Combine matte and glossy finishes for a dynamic, tactile contrast.
- Plan your design on paper first; a quick sketch saves time and reduces mistakes.
- Allow at least 24 hours of drying time between each major step for optimal adhesion.
Common Mistakes to Avoid in DIY Clay Vase Decoration
Even experienced crafters can slip up. Here are pitfalls to watch for:
- Skipping the primer: Skipping gesso can lead to uneven paint absorption, especially on glazed surfaces.
- Overloading paint: Thick coats may crack as the vase dries; thin, even layers are more durable.
- Using the wrong sealant: A water‑based sealant on a vase intended for outdoor use will degrade quickly.
- Neglecting drying time: Rushing between steps compromises adhesion and can cause flaking.
- Choosing clashing colors: Refer to a color wheel or existing room palette to ensure harmony.
Avoiding these errors helps you achieve a flawless finish that looks professionally crafted.
Frequently Asked Questions
Can I use regular pottery clay for DIY clay vase decoration?
Yes, but air‑dry clay is more convenient for beginners because it hardens at room temperature, eliminating the need for a kiln.
How long does the sealant need to cure?
Most clear sealants reach full hardness within 24‑48 hours. For heavy‑use items, allow a full 72 hours before placing flowers or other objects inside.
Is it safe to place a painted vase in a kitchen with food prep?
If you use non‑toxic, water‑based acrylic paints and a food‑grade sealant, the vase is safe for decorative kitchen use. Avoid direct contact with food surfaces.
Can I repaint a vase after it’s already sealed?
Yes, lightly sand the sealed surface to create a “tooth” for new paint to adhere, then re‑apply primer and paint as usual.
What’s the best way to achieve a marble effect on a clay vase?
Use a sponge to dab a mixture of gray and white acrylic paint onto a base coat of light beige. Blend gently and seal for a realistic marble look.
Conclusion
DIY clay vase decoration is a versatile, affordable way to inject personality into any room. By selecting the right materials, mastering essential techniques, and thoughtfully styling the finished piece, you can transform a simple piece of clay into a striking focal point that reflects modern home styling trends. Remember to experiment with textures, color palettes, and placement ideas to keep your décor fresh and engaging. As you continue to explore these creative possibilities, you’ll discover that each vase becomes not just an accessory but a testament to your unique design sensibility. Happy crafting, and enjoy the new energy your custom vases bring to your home.