
Table of Contents
- Understanding the Overflow Cover Mechanism
- Step‑by‑Step: How to Remove Bathtub Overflow Cover with No Screws
- Tools and Materials You’ll Need
- Safety First: Avoiding Common Pitfalls
- Design Opportunities After the Cover Is Removed
- Upgrade to a Decorative Overflow Plate
- Add a Waterproof Paint Accent
- Install a Small Shelf for Bath Essentials
- Quick Tips for a Smooth Removal
- Common Mistakes When Reinstalling the Cover
- Frequently Asked Questions
- Can I use a suction cup to pull off the overflow cover?
- What if the overflow cover is stuck with old silicone?
- Do I need to replace the cover after removal?
- Is it safe to use a metal pry bar on a porcelain tub?
- Will removing the cover affect my tub’s warranty?
- How often should I check the overflow cover for wear?
How to Remove Bathtub Overflow Cover with No Screws – A Complete DIY Guide
Every homeowner eventually faces a small but frustrating bathroom issue: a stubborn overflow cover that refuses to come off without a screwdriver. Whether you’re updating the look of your tub, fixing a leak, or simply need to access the plumbing behind it, learning how to remove bathtub overflow cover with no screws can save you time, money, and the headache of calling a plumber.
Unlike other bathroom fixtures, many overflow covers are designed to snap in place, relying on friction or a hidden latch rather than visible screws. This design keeps the look sleek, but it also means the removal process is a little less obvious. In the following guide, we’ll walk through the tools you’ll need, the step‑by‑step technique, safety tips, and even some design ideas to make the most of the space once the cover is off.
By the end of this article, you’ll feel confident tackling the job yourself, and you’ll have a few extra ideas for refreshing your bathroom’s overall style. Let’s dive in.
Understanding the Overflow Cover Mechanism
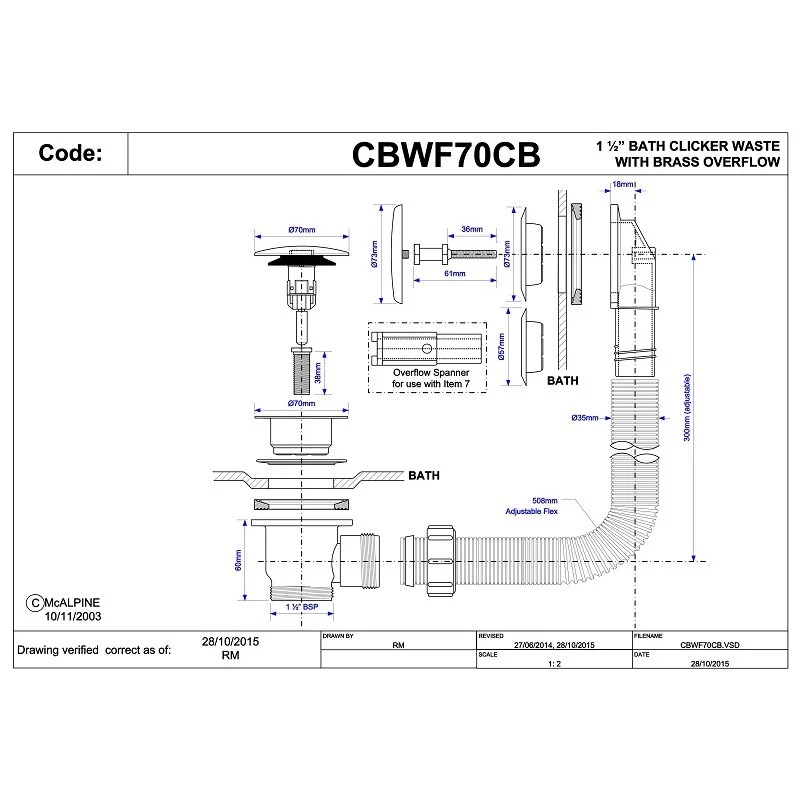
Before you start, it helps to know why the cover stays in place without screws. Most modern tubs use one of three common mechanisms:
- Snap‑Fit Latch: Small plastic clips on the back of the cover lock into grooves on the overflow opening.
- Spring‑Loaded Clip: A metal spring pushes the cover into a seated position; pressing a hidden release lets it pop out.
- Adhesive or Sealant: In older installations, a thin layer of silicone or caulk can act as a “glue,” holding the cover firmly.
Recognizing which system your bathtub uses will determine the exact pressure and tools needed. In most cases, the solution is simple: gently pry, twist, or release the hidden latch. The good news is you won’t need a screwdriver, which is precisely why many people search for how to remove bathtub overflow cover with no screws.
Step‑by‑Step: How to Remove Bathtub Overflow Cover with No Screws
- Gather Your Tools: You’ll need a flat‑head screwdriver (for leverage, not unscrewing), a putty knife or thin pry bar, a flashlight, and a pair of rubber gloves.
- Turn Off the Water: Shut off the bathroom’s main water supply to avoid accidental sprays if the valve is disturbed.
- Inspect the Cover: Shine a flashlight into the overflow opening. Look for any visible slots, notches, or small holes where a tool can be inserted.
- Insert a Thin Tool: Slide the tip of the putty knife or flat‑head screwdriver into the slot. Gently wiggle it to feel for a latch or spring.
- Release the Latch: Apply steady pressure inward and upward. The cover should pop out a few millimeters. If it resists, rotate the tool slightly to mimic a twisting motion.
- Remove the Cover: Once the latch releases, pull the cover straight out. If it’s held by adhesive, use the pry bar to lift it slowly while cutting any sealant with a utility knife.
- Clean the Area: Scrape away old caulk, clean the overflow opening, and inspect the plumbing for any signs of corrosion or blockage.
Following these steps will safely answer the question of how to remove bathtub overflow cover with no screws in most residential settings.
Tools and Materials You’ll Need
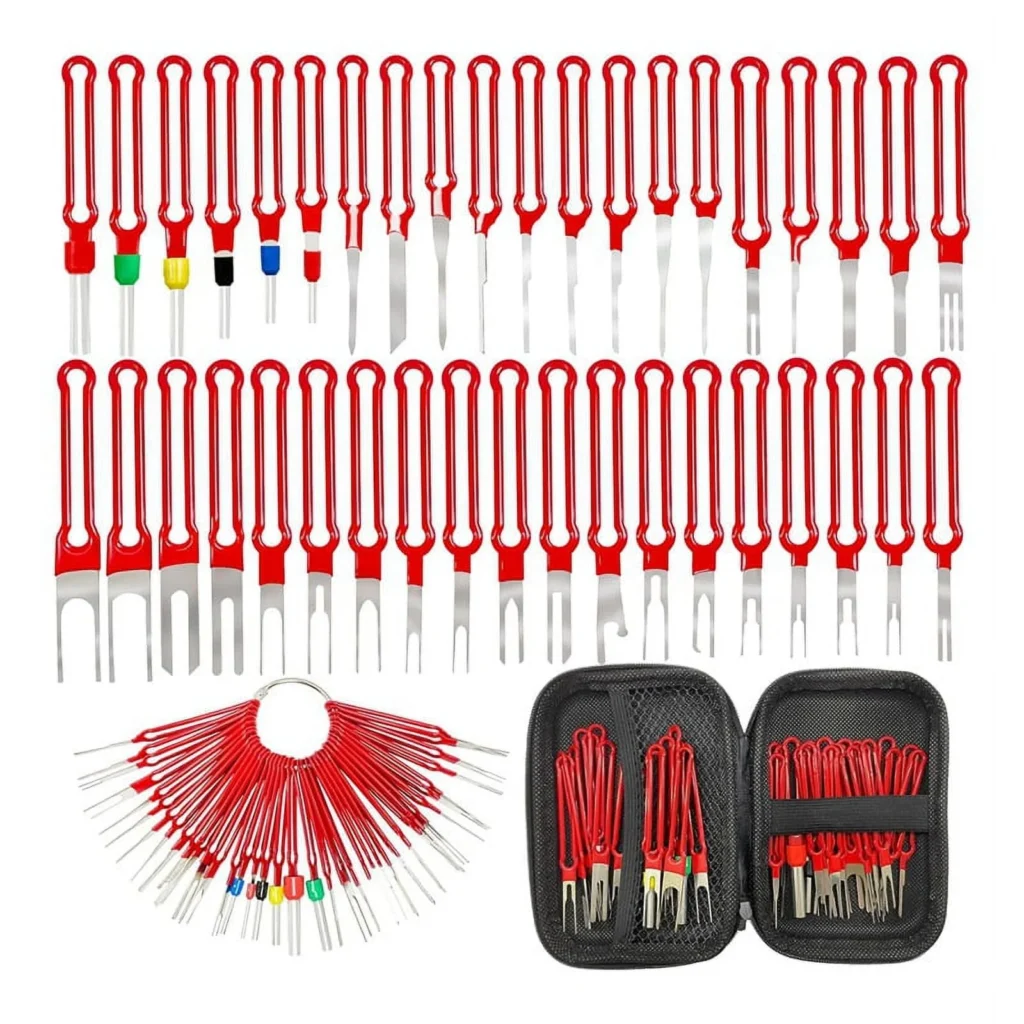
Even though the job doesn’t require a power drill or screwdrivers, having the right hand tools makes the process smoother. Here’s a concise checklist to keep on your bathroom toolkit:
- Flat‑head screwdriver or small pry bar – for leverage.
- Putty knife (thin, flexible) – to slip into tight slots.
- Utility knife – to cut through old sealant.
- Rubber gloves – protect your hands from sharp edges.
- Silicone sealant – for re‑sealing after the cover is reinstalled.
- Flashlight or headlamp – to see inside the overflow opening.
- Towel or rag – to catch any water drips.
Most of these items are already in a basic home repair kit. If you’re missing any, they’re inexpensive at your local hardware store.
Safety First: Avoiding Common Pitfalls
Removing bathroom components can be tricky if you ignore basic safety practices. Here are the top mistakes to watch out for when learning how to remove bathtub overflow cover with no screws:
- Applying Too Much Force: A sudden pop can crack the porcelain. Use gradual pressure and keep the tool flat against the cover.
- Using Metal Tools on Plastic Covers: Plastic clips can snap if you pry too aggressively. Opt for a non‑metallic tool like a plastic spudger if the cover is thin.
- Ignoring Existing Sealant: Cutting through silicone without a utility knife can damage the tub’s finish. Score the sealant first.
- Not Turning Off Water: Even a small leak can cause slipping or water damage while you work.
- Skipping a Clean‑Up: Residual caulk can prevent a proper reseal later, leading to leaks.
By staying mindful of these points, you’ll keep the job safe, clean, and damage‑free.
Design Opportunities After the Cover Is Removed
Once you’ve mastered how to remove bathtub overflow cover with no screws, you might wonder what to do with the newly exposed area. This is a perfect moment to introduce subtle design upgrades that enhance both function and aesthetics.
Upgrade to a Decorative Overflow Plate
Many manufacturers sell decorative overflow plates that match modern faucet finishes—brushed nickel, matte black, or polished chrome. Installing one can give the tub a cohesive look without major renovation.
Add a Waterproof Paint Accent
If you’re feeling bold, apply a waterproof, mildew‑resistant paint to the overflow area. Choose a muted hue that complements your neutral towel palette for a seamless transition.
Install a Small Shelf for Bath Essentials
Some overflow openings are deep enough to accommodate a slim, waterproof shelf. Use stainless‑steel brackets to hold a tiny tray for shampoo bottles, making the space both decorative and practical.
Quick Tips for a Smooth Removal
- Warm the area with a hairdryer for a few seconds; heat softens silicone.
- Use a rubber suction cup to grip the cover if it’s smooth and round.
- Work in a well‑lit space—shadows can hide the tiny release slot.
- Keep a small bucket nearby to catch any accidental water discharge.
Common Mistakes When Reinstalling the Cover
Removing the overflow cover is only half the battle. Reinstalling it correctly ensures long‑term performance. Common errors include:
- Re‑applying too much silicone, which can create a ridge that traps water.
- Forgetting to test the overflow function before sealing completely.
- Using the wrong type of sealant—always choose 100% silicone for bathroom use.
- Skipping the final wipe‑down; residue can affect the clip’s grip.
Take a moment to double‑check each step; a properly sealed cover prevents future leaks and maintains the tub’s appearance.
Frequently Asked Questions
Can I use a suction cup to pull off the overflow cover?
Yes, a strong suction cup works well on smooth, round covers. Apply steady upward pressure while gently wiggling the cup to disengage the latch.
What if the overflow cover is stuck with old silicone?
Score the silicone with a utility knife, then apply a hairdryer’s heat for 30 seconds. This softens the sealant, allowing you to pry the cover out with minimal force.
Do I need to replace the cover after removal?
Not necessarily. If the cover is in good condition, you can reinstall it. However, many homeowners use this opportunity to upgrade to a more stylish plate that matches newer fixtures.
Is it safe to use a metal pry bar on a porcelain tub?
Use caution. A metal pry bar can chip porcelain if applied too aggressively. Prefer a plastic spudger or a thin putty knife, and always protect the tub surface with a soft cloth.
Will removing the cover affect my tub’s warranty?
Generally, manufacturers allow removal for maintenance. Keep any receipts and document the process; if you reinstall the cover correctly, the warranty remains intact.
How often should I check the overflow cover for wear?
Inspect it annually. Look for cracks, warped clips, or deteriorated sealant. Regular checks prevent leaks and maintain proper drainage.
Now that you know exactly how to remove bathtub overflow cover with no screws, you’re equipped to handle the task confidently. Whether you’re fixing a leak, upgrading to a sleek plate, or simply curious about the inner workings of your bathroom, this knowledge adds a valuable skill to your DIY toolbox.
Take a moment to appreciate how a small, often‑overlooked component can influence both function and style. With the right tools, a careful approach, and a dash of creativity, you can transform that hidden opening into a design feature that complements your modern home décor.
Feel inspired? Explore more ideas on our blog, such as simple balcony seating décor ideas for small spaces or how to integrate ceramic desk décor into a contemporary workspace. Happy renovating!