Table of Contents
- Understanding Flush Mount LED Bumper Lights: Basics and Benefits
- Understanding Flush Mount LED Bumper Lights – Technical Overview
- Choosing the Right Flush Mount LED Bumper Lights for Your Space
- Step‑by‑Step Installation Guide
- Design Integration: Making Flush Mount LED Bumper Lights Part of Your Décor
- Layering Light for Depth
- Highlighting Architectural Features
- Color Coordination
- Maintenance and Longevity: Keeping Your Lights at Their Best
- Energy Efficiency and Smart Controls
- Quick Home Décor Tips
- Common Mistakes to Avoid
- Frequently Asked Questions
- Putting It All Together: A Practical Example
Understanding Flush Mount LED Bumper Lights: A Complete Guide
Lighting has moved far beyond simple illumination; it now plays a pivotal role in shaping the ambience of any space. Among the most versatile options available today are flush mount LED bumper lights, which combine sleek design with powerful performance. Whether you’re renovating a contemporary apartment, adding a touch of modernity to a garage, or simply looking for an efficient way to brighten a hallway, these fixtures can make a noticeable difference.
In this article we’ll walk you through the essential aspects of understanding flush mount led bumper lights. You’ll learn how they work, what to consider when selecting the right model, step‑by‑step installation tips, and maintenance strategies that keep them shining for years. By the end, you’ll feel confident integrating these lights into your home décor plan, creating a polished look that aligns with today’s interior design trends.
Ready to explore a lighting solution that blends form and function? Let’s dive into the details and see why understanding flush mount led bumper lights is the first step toward a brighter, more stylish environment.
Understanding Flush Mount LED Bumper Lights: Basics and Benefits

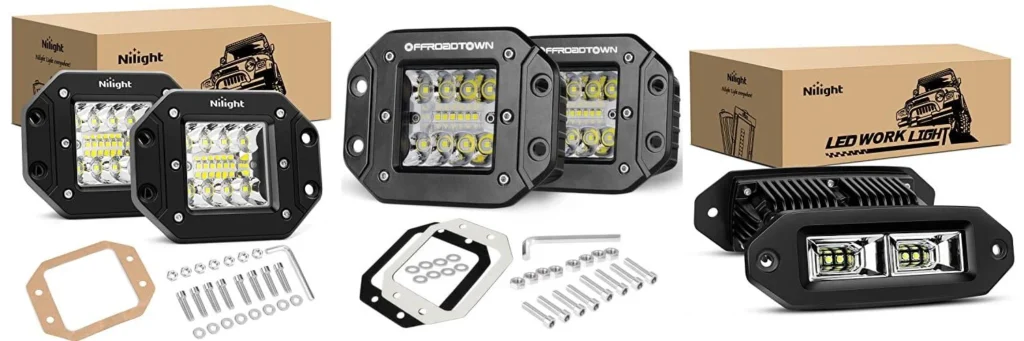
At its core, a flush mount LED bumper light is a low‑profile lighting fixture that sits directly against a surface—usually a ceiling or a wall—without protruding into the room. The “bumper” term refers to the slim edge that frames the light source, giving it a clean, uninterrupted line. Because LEDs emit light efficiently in a 360‑degree spread, these fixtures provide uniform illumination while consuming far less electricity than traditional incandescent or fluorescent options.
Understanding Flush Mount LED Bumper Lights – Technical Overview
The technology behind understanding flush mount led bumper lights involves several key components:
- LED Chips: Modern LEDs are built from semiconductor materials that convert electricity into light with minimal heat loss.
- Driver Circuit: This regulates voltage and current, ensuring consistent brightness and protecting the LEDs from power spikes.
- Diffuser Lens: Often made of frosted acrylic or polycarbonate, the lens softens the light, reducing glare and creating a pleasant glow.
- Mounting Bracket: A slim metal or plastic frame that secures the fixture flush to the mounting surface.
Beyond energy savings, the benefits of these lights include a long lifespan (typically 25,000–50,000 hours), instant full‑brightness output, and the ability to pair with smart controls for dimming or color‑changing effects. For homeowners who value both aesthetics and sustainability, understanding flush mount led bumper lights opens the door to a smarter lighting strategy.
Choosing the Right Flush Mount LED Bumper Lights for Your Space
Selecting the perfect fixture starts with assessing the room’s purpose, size, and existing décor. Here are the main factors to weigh when you’re understanding flush mount led bumper lights options:
- Brightness (Lumens): For a living room or open‑plan area, aim for 2,000–3,000 lumens per fixture. Hallways and bathrooms may require 800–1,200 lumens for safe navigation.
- Color Temperature: Warm white (2700‑3000K) creates a cozy atmosphere, while cool white (4000‑5000K) feels crisp and modern—ideal for kitchens or workspaces.
- Size and Shape: Round, square, and rectangular bumpers each produce a slightly different visual effect. Consider a round design for a soft, organic feel, or a square for a more architectural look.
- IP Rating: If the fixture will be installed in damp areas such as bathrooms or covered garages, choose an IP44 or higher rating for moisture resistance.
- Smart Compatibility: Many newer models integrate with Wi‑Fi or Zigbee hubs, allowing voice control via Alexa or Google Assistant.
When you combine these considerations with an eye for design, you’ll find that understanding flush mount led bumper lights becomes a rewarding exercise in curating a cohesive aesthetic. For inspiration on blending lighting with wall art, check out our guide on wall décor with minimalist poster prints.
Step‑by‑Step Installation Guide

Installing flush mount LED bumper lights is a relatively straightforward DIY project, but a careful approach ensures safety and a flawless finish. Below is a practical walkthrough for anyone understanding flush mount led bumper lights and ready to bring them to life.
- Gather Tools: You’ll need a screwdriver, wire stripper, voltage tester, drill (if new holes are required), and a ladder.
- Turn Off Power: Switch off the circuit at the breaker panel. Verify the wires are dead with a voltage tester.
- Prepare the Mounting Surface: Measure and mark the location, ensuring the fixture sits level. If you’re replacing an existing light, remove the old fixture and keep the wiring intact.
- Connect the Wiring: Match the black (hot) wire to the fixture’s hot lead, the white (neutral) to neutral, and the green or bare copper to ground. Secure with wire nuts and wrap with electrical tape.
- Secure the Bracket: Attach the mounting bracket to the ceiling or wall using the provided screws. Make sure it sits flush—any gap will be visible once the diffuser is installed.
- Attach the Bumper: Slide the LED module into the bracket, ensuring the diffuser lens aligns perfectly with the edge. Some models click into place; others use small screws.
- Test the Light: Turn the power back on and verify that the fixture illuminates evenly. Adjust if necessary.
- Finish the Trim: Install any decorative trim pieces that came with the fixture to conceal the mounting hardware.
Following these steps will give you a clean, professional look while reinforcing the fundamentals of understanding flush mount led bumper lights. If you’re dealing with a garage or outdoor area, remember to select a fixture with an appropriate IP rating and consider a weather‑sealed junction box.
Design Integration: Making Flush Mount LED Bumper Lights Part of Your Décor
Lighting isn’t just functional; it’s a design element that can define the mood of a room. When you’re understanding flush mount led bumper lights, think about how they interact with color, texture, and furniture placement.
Layering Light for Depth
Combine flush mount bumpers with other light sources—such as floor lamps, table lamps, or pendant lights—to create layers. This technique prevents a flat, one‑dimensional feel and adds visual interest. For example, a row of dimmable flush mount LED bumpers along a hallway can be paired with recessed spotlights highlighting artwork, producing a balanced glow.
Highlighting Architectural Features
Use the low‑profile nature of these fixtures to accentuate ceiling beams, crown molding, or exposed brick. A subtle strip of white light placed directly above a recessed ceiling detail can draw the eye upward, making the space feel taller.
For those looking to bring a touch of nature to their exterior, see how balcony décor with woven baskets can complement the clean lines of modern lighting.
Color Coordination
Match the diffuser’s finish to surrounding surfaces. A white or frosted diffuser blends seamlessly with light‑colored walls, while a black or brushed‑metal finish can become a statement piece against darker décor. Remember that the color temperature you select will influence how other colors appear—warm light enhances earthy tones, while cool light accentuates blues and greys.
Maintenance and Longevity: Keeping Your Lights at Their Best
One of the greatest advantages of LED technology is its durability, but regular care still extends the life of understanding flush mount led bumper lights. Here are some maintenance habits to adopt:
- Dust Regularly: Use a microfiber cloth or a soft brush to remove dust from the diffuser. Avoid abrasive cleaners that could scratch the surface.
- Check Connections: Annually inspect wiring connections for looseness, especially in humid environments where corrosion can occur.
- Replace Faulty Drivers: If you notice flickering or dimming, the driver may need replacement. Most manufacturers offer easy‑swap drivers that match the original specifications.
- Upgrade Smart Features: Firmware updates for Wi‑Fi enabled bumpers can improve compatibility with newer smart home platforms.
By staying proactive, you’ll enjoy consistent illumination for decades, reinforcing the value of understanding flush mount led bumper lights as a long‑term investment in your home’s aesthetic and energy efficiency.
Energy Efficiency and Smart Controls
LEDs already consume a fraction of the power used by traditional bulbs, but pairing flush mount bumpers with smart controls maximizes savings. Here’s how:
- Dimming: Lowering brightness by 30% can reduce energy use by up to 50% without sacrificing comfort.
- Scheduling: Program lights to turn off automatically during daylight hours, or set “away” modes when the home is unoccupied.
- Motion Sensors: Integrate sensors that activate the light only when movement is detected, ideal for garages and entryways.
- Color Temperature Adjustment: Some smart bumpers let you shift from warm to cool light throughout the day, supporting circadian rhythms.
When you combine these features with the inherent efficiency of LEDs, the overall electricity cost drops dramatically—a compelling reason for anyone understanding flush mount led bumper lights to consider a smart upgrade.
Quick Home Décor Tips
- Use dimmable flush mount bumpers in living areas to transition from bright daytime to cozy evening lighting.
- Install a linear row of bumpers above kitchen countertops for even task lighting without bulky fixtures.
- Choose a brushed‑nickel frame to echo hardware finishes in bathrooms, creating a cohesive look.
Common Mistakes to Avoid
Even seasoned DIYers can slip up when working with lighting. Below are typical errors and how to sidestep them while understanding flush mount led bumper lights:
- Ignoring IP Ratings: Installing a non‑rated fixture in a damp area leads to premature failure. Always check the rating before purchase.
- Over‑tightening Screws: Excessive force can crack the diffuser or strip the mounting bracket. Tighten just enough for a secure fit.
- Mismatched Color Temperature: Pairing cool LEDs with warm‑toned décor can create a jarring contrast. Choose a temperature that complements the room’s palette.
- Skipping the Voltage Test: Assuming the power is off without testing can be dangerous. A simple voltage tester prevents accidents.
Frequently Asked Questions
What is the average lifespan of a flush mount LED bumper light?
Typically, these LEDs last between 25,000 and 50,000 hours, which translates to 10‑15 years of normal residential use before any noticeable dimming occurs.
Can I dim my flush mount LED bumper lights with a standard dimmer?
Only if the fixture is labeled “dimmable.” Using a non‑compatible dimmer can cause flickering or damage the driver. For smart models, a dedicated app or voice‑assistant command is recommended.
Are flush mount LED bumper lights suitable for outdoor use?
Yes, provided they have an appropriate IP rating (e.g., IP44 or higher) and are installed with weather‑sealed junction boxes. Outdoor-rated models also feature UV‑resistant diffusers.
How do I choose the right lumens for a hallway?
Aim for 10‑15 lumens per square foot. For a 5‑meter hallway, this usually means a fixture delivering around 800‑1,200 lumens, ensuring safe passage without glare.
Do these lights affect my home’s resale value?
Modern, energy‑efficient lighting is a strong selling point. Prospective buyers often appreciate the low operating cost and sleek aesthetic of flush mount LED bumper lights, potentially boosting perceived value.
Putting It All Together: A Practical Example
Imagine renovating a small urban apartment with a minimalist vibe. You start by selecting warm‑white, dimmable flush mount LED bumper lights for the living room, pairing them with a sleek white diffuser that mirrors the surrounding walls. In the adjacent kitchen, you install cool‑white, higher‑lumens bumpers above the countertops to provide bright task lighting. A linear strip of smart‑controlled bumpers runs along the hallway, programmed to brighten gradually at sunrise and dim at sunset.
To tie the lighting scheme into the overall décor, you add a few pieces from our elegant home styling ideas guide—such as a neutral rug and a set of brushed‑steel side tables. The result is a harmonious environment where each fixture serves a purpose, yet all work together to enhance the apartment’s modern aesthetic.
By mastering the fundamentals of understanding flush mount led bumper lights, you’ve transformed a simple lighting upgrade into a cohesive design statement that balances beauty, efficiency, and technology.
Now that you’ve explored the technical details, design strategies, and practical steps, it’s time to apply these insights to your own space. Experiment with different finishes, play with smart controls, and remember that good lighting is as much about subtlety as it is about illumination. For more inspiration, browse our collection of home décor ideas and start planning your next lighting project today.