Table of Contents
- crown molding vs no crown molding choosing the right fit for your home
- crown molding vs no crown molding choosing the right fit for your home: style compatibility
- Budget considerations: cost vs value
- Installation basics: DIY or professional?
- Design tips: pairing molding with paint, lighting, and furniture
- Room‑by‑room guide: where crown molding shines
- Quick Tips for Crown Molding Success
- Common Mistakes and How to Avoid Them
- Frequently Asked Questions
Crown Molding vs No Crown Molding – Choosing the Right Fit for Your Home
When it comes to finishing a room, crown molding can feel like the difference between a polished masterpiece and a plain canvas. Yet many homeowners wonder whether the added cost, effort, and visual impact are truly worth it. This question—crown molding vs no crown molding choosing the right fit for your home—is especially common in today’s design‑savvy market, where every detail can either elevate or clutter a space.
In this guide we’ll walk through the practical, aesthetic, and budgetary considerations that help you decide if crown molding belongs in your living room, bedroom, or even your kitchen. You’ll learn how to match molding to architectural style, how to budget without sacrificing quality, and which rooms benefit most from that elegant transition between wall and ceiling.
Whether you’re a first‑time buyer, a seasoned DIYer, or simply curious about the impact of trim, the insights below will give you confidence to make a decision that aligns with your personal taste and the functional needs of your home.
crown molding vs no crown molding choosing the right fit for your home
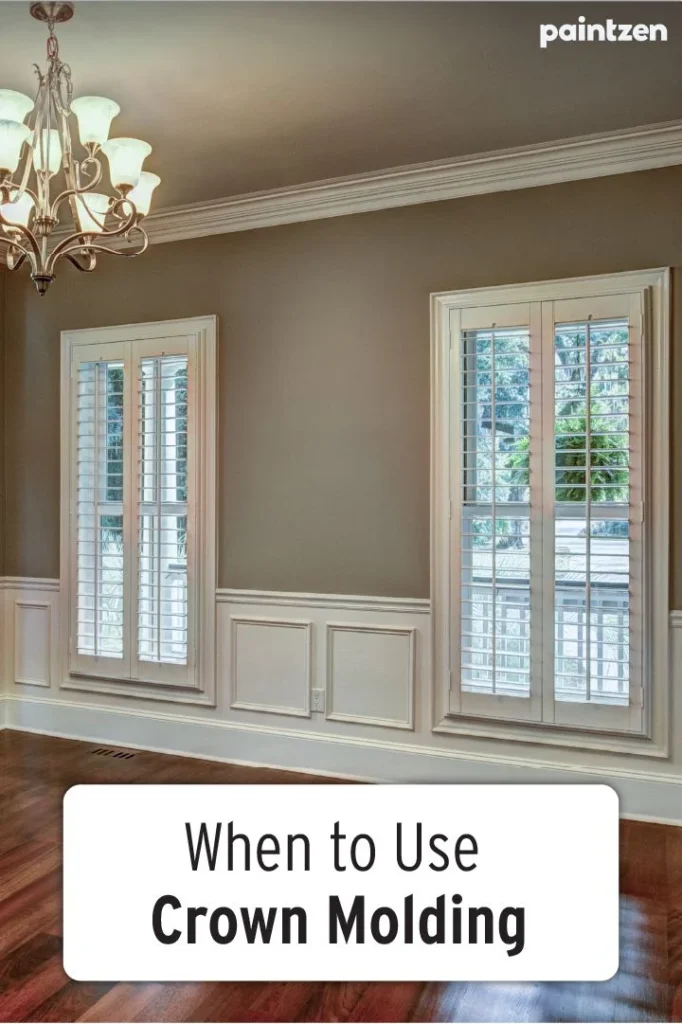
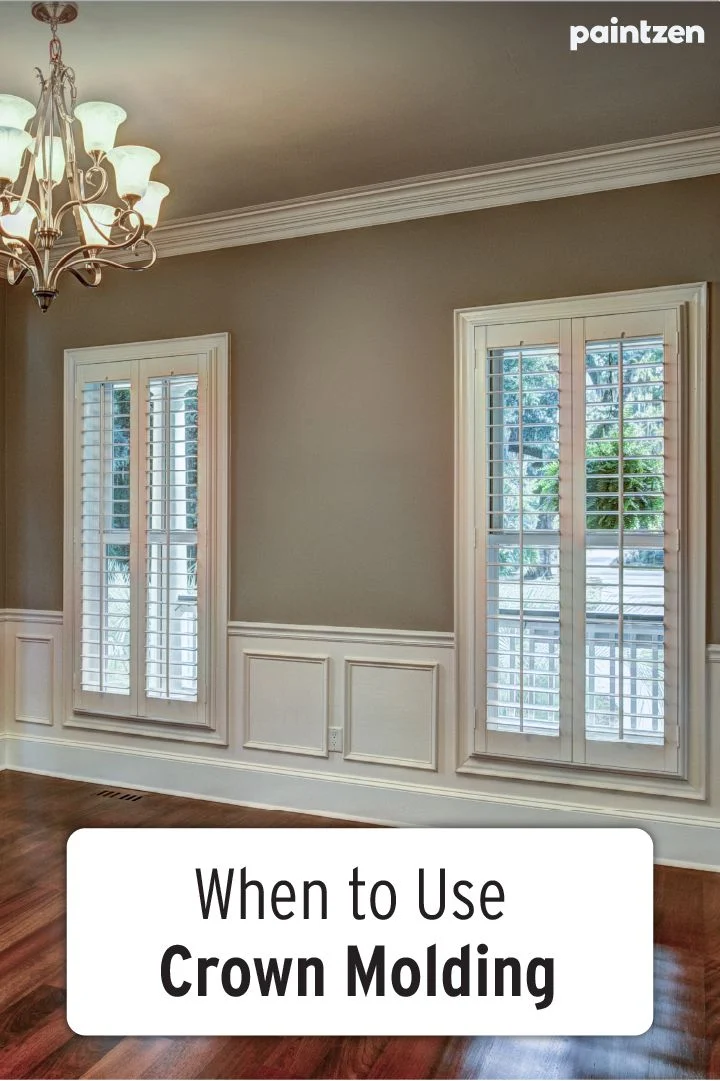
Crown molding is more than a decorative strip; it’s a visual bridge that softens the hard line where walls meet ceilings. When you compare crown molding vs no crown molding, the main differences boil down to three factors: visual impact, perceived value, and maintenance.
Rooms with high ceilings, formal dining areas, or traditional décor often benefit from the added elegance that molding provides. Conversely, modern minimalist spaces, small apartments, or budget‑conscious remodels may achieve a cleaner look without it. Understanding the style language of each room will guide you toward the right choice.
crown molding vs no crown molding choosing the right fit for your home: style compatibility
Before you purchase any trim, ask yourself whether your home’s architectural era already includes decorative elements. A Victorian or Colonial home typically expects crown molding, while a mid‑century modern loft may look out of place with heavy profiles. Use the following checklist to gauge compatibility:
- Ceiling height: Lower ceilings (< 8 ft) can feel cramped with bulky molding; opt for a slim, linear profile if you want a subtle touch.
- Overall aesthetic: Traditional, farmhouse, or classic styles thrive on ornate moldings; contemporary, industrial, or Scandinavian interiors often prefer clean lines.
- Room function: Formal spaces (dining rooms, master bedrooms) gain a sense of ceremony from molding; high‑traffic family rooms may benefit from a simpler finish.
By aligning the molding style with the room’s purpose and existing architecture, you’ll create a cohesive look that feels intentional rather than forced.
Budget considerations: cost vs value

One of the biggest hurdles in the crown molding vs no crown molding debate is cost. Material prices vary widely—from inexpensive MDF (medium‑density fiberboard) to premium hardwoods and plaster. Installation costs can also add up, especially if you need to cut complex angles or hire a professional.
To keep the project within budget, consider these strategies:
- Choose MDF for a cost‑effective look; it’s easy to paint and works well in most indoor environments.
- Buy pre‑finished molding to eliminate painting time, but be mindful that pre‑finished options can be pricier per linear foot.
- Install yourself if you have basic carpentry skills; many online tutorials can guide you through measuring, cutting, and nailing.
- Combine molding in focal rooms (living room, master bedroom) with plain ceilings elsewhere to balance cost and visual impact.
Remember that crown molding can increase resale value by adding perceived luxury, but the return varies by market. If you plan to sell soon, a modest, well‑installed trim may be more beneficial than an elaborate, costly design.
Installation basics: DIY or professional?

Installing crown molding is a rewarding DIY project for many homeowners, yet the decision often hinges on skill level and the complexity of the room. Simple rooms with 90‑degree angles are beginner‑friendly; irregular rooms, curved walls, or vaulted ceilings usually require a professional’s expertise.
Here’s a quick step‑by‑step overview for those who want to try it themselves:
- Measure each wall length and add a 10% waste factor.
- Cut the molding at a 45‑degree angle using a miter saw for inside and outside corners.
- Test fit each piece before nailing to ensure tight joints.
- Secure the molding with finishing nails, then fill gaps with caulk or wood filler.
- Paint or stain the molding to match or contrast with your wall color.
If you’re unsure about cutting angles or working at height, hiring a carpenter can save time and prevent costly mistakes. Many professionals offer a “trim‑only” package that focuses solely on crown molding installation, keeping the project streamlined.
Design tips: pairing molding with paint, lighting, and furniture
Even the most perfectly installed crown molding can fall flat without thoughtful design integration. Here are some proven methods to make molding a focal point rather than a backdrop:
- Paint contrast: Choose a color slightly lighter or darker than your ceiling to create depth. A subtle shade difference can make the molding pop without overwhelming the room.
- Lighting accents: Install wall sconces or LED strip lights just below the molding to highlight its profile at night.
- Furniture alignment: Keep the top of bookshelves or cabinetry level with the molding line for a harmonious visual flow.
- Texture play: In rooms with smooth walls, a textured or patterned molding adds tactile interest.
For renters or homeowners who prefer non‑permanent options, consider decorative wall panels that mimic the look of molding without the need for nails. Wall décor ideas without drilling offer a stylish, damage‑free alternative.
Room‑by‑room guide: where crown molding shines
Not every space benefits equally from crown molding. Below is a quick guide to help you decide where to install and where to skip:
- Living room: Ideal for molding if you have a statement fireplace or high ceiling. It frames the space and adds a touch of elegance.
- Bedroom: A modest crown can make a master suite feel more luxurious; however, in small bedrooms keep the profile low to avoid visual crowding.
- Kitchen: Use thin, simple profiles to avoid interfering with cabinet doors. Molding can tie together backsplash tiles and ceiling paint.
- Hallways & entryways: A subtle strip can guide the eye down a corridor, especially when paired with an entryway rug for added warmth.
- Bathrooms: Moisture‑resistant materials like PVC crown molding work well, adding a spa‑like feel without risking water damage.
By focusing molding on high‑impact areas and leaving other rooms plain, you achieve a balanced aesthetic while staying budget‑smart.
Quick Tips for Crown Molding Success
- Measure twice, cut once – even a small error can ruin a corner joint.
- Use painter’s tape on the ceiling before cutting to protect paint.
- Apply caulk in the joint between molding and ceiling for a seamless finish.
- Consider a low‑profile “cove” trim as a lightweight alternative to full crown molding.
Common Mistakes and How to Avoid Them
Even seasoned DIYers can slip up. Here are the most frequent pitfalls:
- Ignoring ceiling imperfections: Uneven ceilings lead to gaps. Use a flexible caulk or a shim to even out the surface before installation.
- Choosing the wrong material: MDF is cheap but not moisture‑resistant. Opt for PVC or hardwood in humid areas.
- Over‑painting: Thick coats can obscure the molding’s detail. Apply two thin coats for a crisp look.
- Neglecting lighting: Poor lighting hides the molding’s profile. Add accent lighting to showcase the trim.
Frequently Asked Questions
Is crown molding worth the cost for a small apartment?
In compact spaces, a slim, simple profile can add elegance without overwhelming the room. If budget is tight, focus on one focal area like the living room and skip the rest.
Can I install crown molding over existing trim?
Yes, but you’ll need to ensure the existing trim is securely attached and level. Adding a new layer may require longer nails and additional caulking to hide seams.
What’s the difference between crown molding and cove molding?
Crown molding typically has a more pronounced angle and decorative profile, while cove molding is a gentle concave curve, often used for a subtler transition.
How do I paint crown molding without drips?
Use a high‑quality angled brush, apply thin coats, and protect the floor with drop cloths. Allow each coat to dry fully before applying the next.
Do I need to remove crown molding before repainting walls?
It’s not required, but removing it can give you a cleaner edge and prevent paint splatter. If you leave it in place, tape the molding carefully.
For more inspiration on coordinating trims with other design elements, check out our guide on kitchen shelf décor with jars and see how simple details can transform a room.
Choosing between crown molding and no crown molding ultimately comes down to personal style, budget, and the functional needs of each room. By weighing the aesthetic benefits against costs, assessing installation feasibility, and following best‑practice design tips, you can make an informed decision that enhances your home’s character.
Take the time to plan, measure, and visualize before you cut that first piece. Whether you decide on an elegant crown or a clean, trim‑free ceiling, the result will be a space that feels thoughtfully designed and uniquely yours.