
Table of Contents
- Why Choose DIY neutral candle décor?
- DIY neutral candle décor: Materials and Tools
- Essential Materials
- Tools of the Trade
- Step‑by‑Step Guide to Crafting Your First Neutral Candle
- 1. Prepare Your Workspace
- 2. Melt and Color the Wax
- 3. Add Fragrance
- 4. Position the Wick
- 5. Pour the Wax
- 6. Finish and Trim
- DIY neutral candle décor: Finishing Touches
- Integrating DIY neutral candle décor into Different Rooms
- Living Room
- Bedroom
- Bathroom
- Kitchen
- Outdoor Patio
- DIY neutral candle décor with Clay Candle Holders – Creative Home Styling
- Quick Home Décor Tips for Candle Lovers
- Common Mistakes to Avoid When Creating DIY neutral candle décor
- Frequently Asked Questions
- Can I use essential oils instead of fragrance oils?
- How long will a neutral candle burn safely?
- Is it okay to reuse candle containers?
- What’s the best way to store unfinished candles?
- Do neutral candles clash with bold color schemes?
- Can I make scented candles without any fragrance?
DIY neutral candle décor: Simple Steps for Modern Home Styling
Creating a warm, inviting atmosphere doesn’t always require expensive accessories or elaborate installations. One of the most versatile ways to add a touch of understated elegance is through DIY neutral candle décor. Whether you live in a compact city apartment or a spacious suburban home, neutral‑toned candles can blend seamlessly with a variety of design schemes, from minimalist Scandinavian to cozy contemporary.
In this guide, we’ll explore why a neutral palette works so well, break down the essential materials, and walk you through several easy‑to‑follow projects. You’ll also discover how to integrate your handmade candles into living rooms, bedrooms, bathrooms, and even outdoor spaces without looking over‑styled.
By the end of the article, you’ll have a toolbox of ideas, a clear sense of the process, and confidence to customize each piece to suit your unique aesthetic. Let’s light the way to a more harmonious home.
Why Choose DIY neutral candle décor?
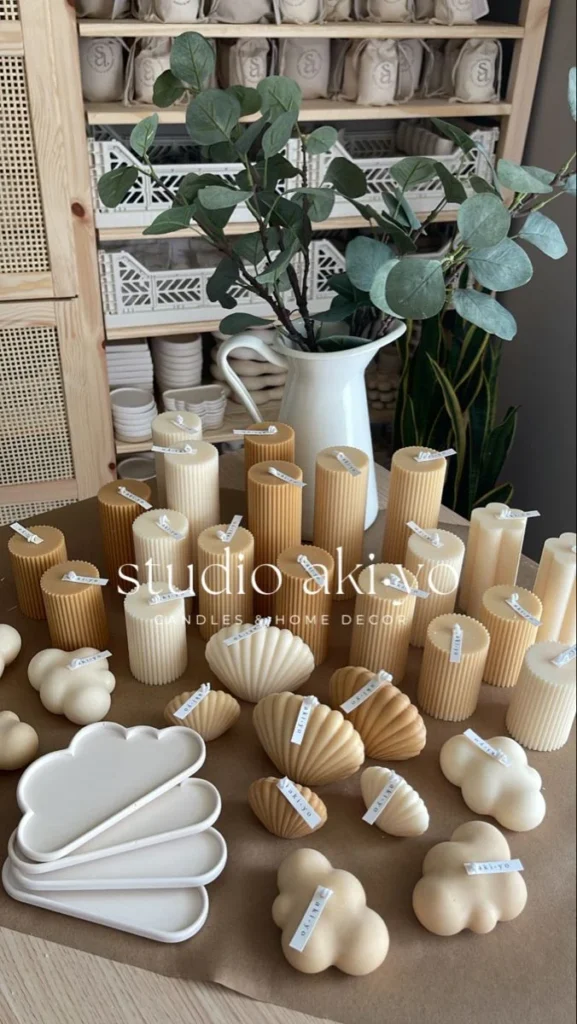
Neutral tones—think ivory, soft greys, muted beiges, and gentle taupes—offer a timeless backdrop that allows other design elements to shine. When you craft your own candles, you control the hue, texture, and scent, ensuring they complement rather than compete with existing décor. Moreover, the act of making candles can be therapeutic, turning a simple craft into a moment of mindfulness.
Here are three compelling reasons to opt for DIY neutral candle décor:
- Versatility: Neutral candles fit into any room style, from rustic farmhouse to sleek modern.
- Cost‑effectiveness: Bulk wax, simple molds, and basic tools keep expenses low.
- Personalization: Adjust size, fragrance, and finish to match your exact vision.
DIY neutral candle décor: Materials and Tools
Before you light the first wick, gather the right supplies. Investing in quality basics will make the process smoother and the final product more professional.
Essential Materials
- Wax: Soy wax, beeswax, or a soy‑paraffin blend. Soy provides a clean burn and holds fragrance well.
- Neutral dye: Use a small amount of ivory or soft gray dye chip; remember, a little goes a long way.
- Fragrance oils: Choose subtle scents like linen, sandalwood, or vanilla to maintain the understated vibe.
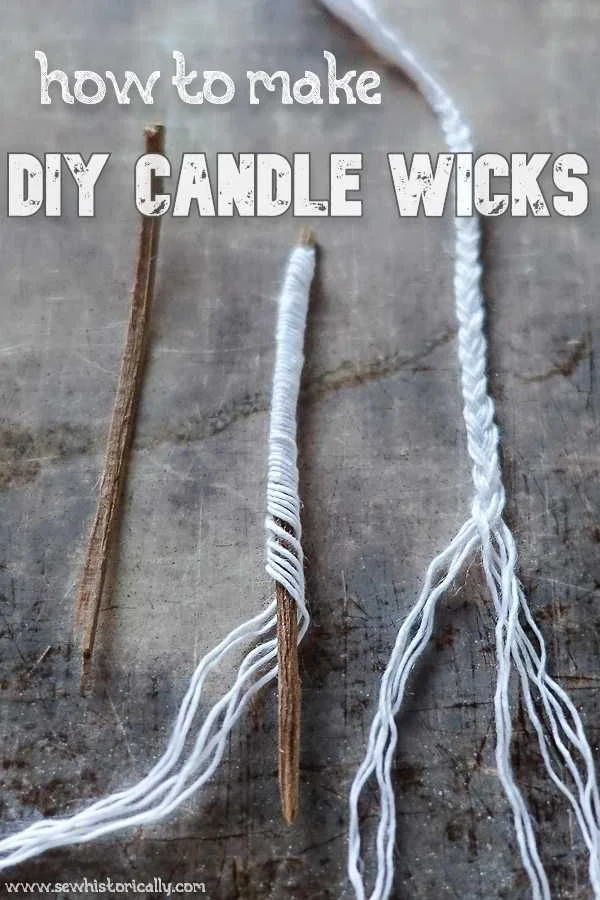
- Wicks: Cotton or wood wicks sized for your container’s diameter.
- Containers: Matte ceramic jars, frosted glass vases, or concrete molds work beautifully.
Tools of the Trade
- Double‑boiler or a microwave‑safe pouring pitcher.
- Thermometer (ideally 165‑185°F for pouring).
- Stirring spoon (silicone is heat‑resistant).
- Wick holders or pencils to keep wicks centered.
- Scissors for trimming wicks.
When you have everything ready, you’ll notice how quickly the project moves from concept to reality.
Step‑by‑Step Guide to Crafting Your First Neutral Candle
This section walks you through each phase, from melting wax to the final decorative touches. Feel free to pause and repeat any step until you feel comfortable.
1. Prepare Your Workspace
Lay down newspaper or a silicone mat to protect surfaces. Measure your wax according to the size of your chosen container—generally, 1 pound of wax fills about 16 oz.
2. Melt and Color the Wax
Using a double‑boiler, melt the wax slowly. Once it reaches 185°F, add a tiny piece of neutral dye and stir gently. The goal is a soft, even hue; avoid over‑coloring which can lead to a muddy appearance.
3. Add Fragrance
When the wax cools to around 165°F, stir in your fragrance oil—approximately 1 oz per pound of wax for a balanced scent. Mix for at least 30 seconds to ensure the fragrance binds properly.
4. Position the Wick
Secure the wick to the bottom of the container with a dab of hot wax or a wick sticker. Use a pencil laid across the top to keep the wick centered as the wax solidifies.
5. Pour the Wax
Slowly pour the wax into the container, leaving a small gap at the top. Allow the candle to cool undisturbed for 4‑6 hours or until completely solid.
6. Finish and Trim
Once solid, trim the wick to about ¼ inch. If you notice any surface imperfections, lightly warm the top with a hairdryer and smooth it with a spatula.
DIY neutral candle décor: Finishing Touches
The final look can elevate a simple candle to a design statement. Consider these ideas:
- Texture: Add a light dusting of fine sand or crushed marble to the wax before it fully sets for a subtle, tactile surface.
- Labeling: Use minimalist kraft paper tags with hand‑lettered names or scents.
- Layering: Place a smaller, contrasting candle (e.g., a white soy pillar) inside a larger neutral glass for depth.
These touches keep the décor cohesive while adding a personal flair.
Integrating DIY neutral candle décor into Different Rooms
Neutral candles are incredibly adaptable. Below are specific placement ideas for various spaces, each paired with practical styling tips.
Living Room
Group three to five candles of varying heights on a low coffee table or a reclaimed wood tray. Pair them with a plush throw and a few green plants to create a balanced tableau. For a modern touch, use matte black or brushed brass candle holders to contrast the soft tones.
Bedroom
Place a single, tall neutral candle on a bedside table beside a simple glass lamp. Choose a soothing fragrance like lavender or chamomile to enhance relaxation. If you have a reading nook, add a cluster of petite candles on a small wooden stool.
Bathroom
Neutral candles work beautifully on a vanity shelf or a stone countertop. Pair them with a scented soap and a small potted fern for a spa‑like vibe. For inspiration on how to keep bathroom décor calm, check out our guide on calming décor pieces for bathrooms.
Kitchen
While open flames aren’t advisable near cooking surfaces, you can set a neutral candle on a dining table as a centerpiece during meals. Choose unscented wax if you prefer to keep food aromas pure.
Outdoor Patio
Concrete or metal lanterns filled with neutral candles add soft illumination for evening gatherings. Protect the wax from wind by using glass hurricane containers.
DIY neutral candle décor with Clay Candle Holders – Creative Home Styling
If you want to add texture, consider pairing your candles with handmade clay holders. These can be sourced from local artisans or crafted in a weekend workshop. The earthy feel of clay complements the subtle hue of neutral candles, creating a harmonious visual contrast.
Read more about the process in our DIY décor with clay candle holders guide for detailed instructions on shaping and glazing the pots.
Quick Home Décor Tips for Candle Lovers
- Mix candle heights: 2‑inch, 4‑inch, and 6‑inch variations add visual interest.
- Use a mirror beneath a candle to double the glow without extra heat.
- Rotate scents seasonally—citrus for summer, spice for winter.
Common Mistakes to Avoid When Creating DIY neutral candle décor
- Over‑coloring: Too much dye can mask the natural wax texture.
- Wrong wick size: An undersized wick leads to tunneling; too large creates soot.
- Skipping the cure time: Fragrance needs 48‑72 hours to fully bind for optimal scent throw.
By watching these pitfalls, your candles will burn cleanly and look polished.
Frequently Asked Questions
Can I use essential oils instead of fragrance oils?
Yes, essential oils work well, especially with soy wax. However, they are less potent than fragrance oils, so you may need to increase the dosage slightly—typically 1.5 oz per pound of wax.
How long will a neutral candle burn safely?
Most soy candles burn 8‑10 hours per pound. Always keep the wax level at least ½ inch from the container’s edge and never leave a candle unattended.
Is it okay to reuse candle containers?
Absolutely. Clean the container with warm, soapy water and a gentle scrub. Rinse thoroughly and let it dry before refilling.
What’s the best way to store unfinished candles?
Cover the top with a piece of parchment paper or a silicone lid to prevent dust and preserve the fragrance. Store in a cool, dark place to avoid discoloration.
Do neutral candles clash with bold color schemes?
Not at all. Neutral candles act as a visual anchor, allowing vibrant décor to pop without overwhelming the space. Pair them with a single accent color for balance.
Can I make scented candles without any fragrance?
Yes, you can create “unscented” candles that still provide ambiance. They’re ideal for dining areas where food aromas should dominate.
With these insights, you’re ready to embark on your own DIY neutral candle décor journey. Experiment with shapes, textures, and subtle scents to craft pieces that truly reflect your personal style. Remember, the goal is to enhance the serenity of your home, not to dominate it.
As you explore further, you might also enjoy reading about other décor projects, such as whether Stickley furniture fits your budget or how to incorporate ceramic accents for a modern look. Each of these topics offers fresh ideas that can complement your candle creations.
Happy crafting, and may your home glow with understated elegance.